DIRECTION 5750007-1EN, REV. 1 LOGIQ E10 BASIC SERVICE MANUAL
Chapter 8 Replacement Procedures 8 - 363
Card Cage replacement
NOTE: When removing the HDD, it is not necessary to remove the HDD from HDD Mounting Bracket
or the Rear I/O from the Option Box.
CAUTION
During this procedure, wear cut resistant gloves to avoid scraping your hands when
reaching into the Main Console or blind spaces.
Table 8-373 Card Cage replacement
Steps Corresponding Graphic
1.
Remove all of the Cards from the Card Cage, remove the Back Plane.
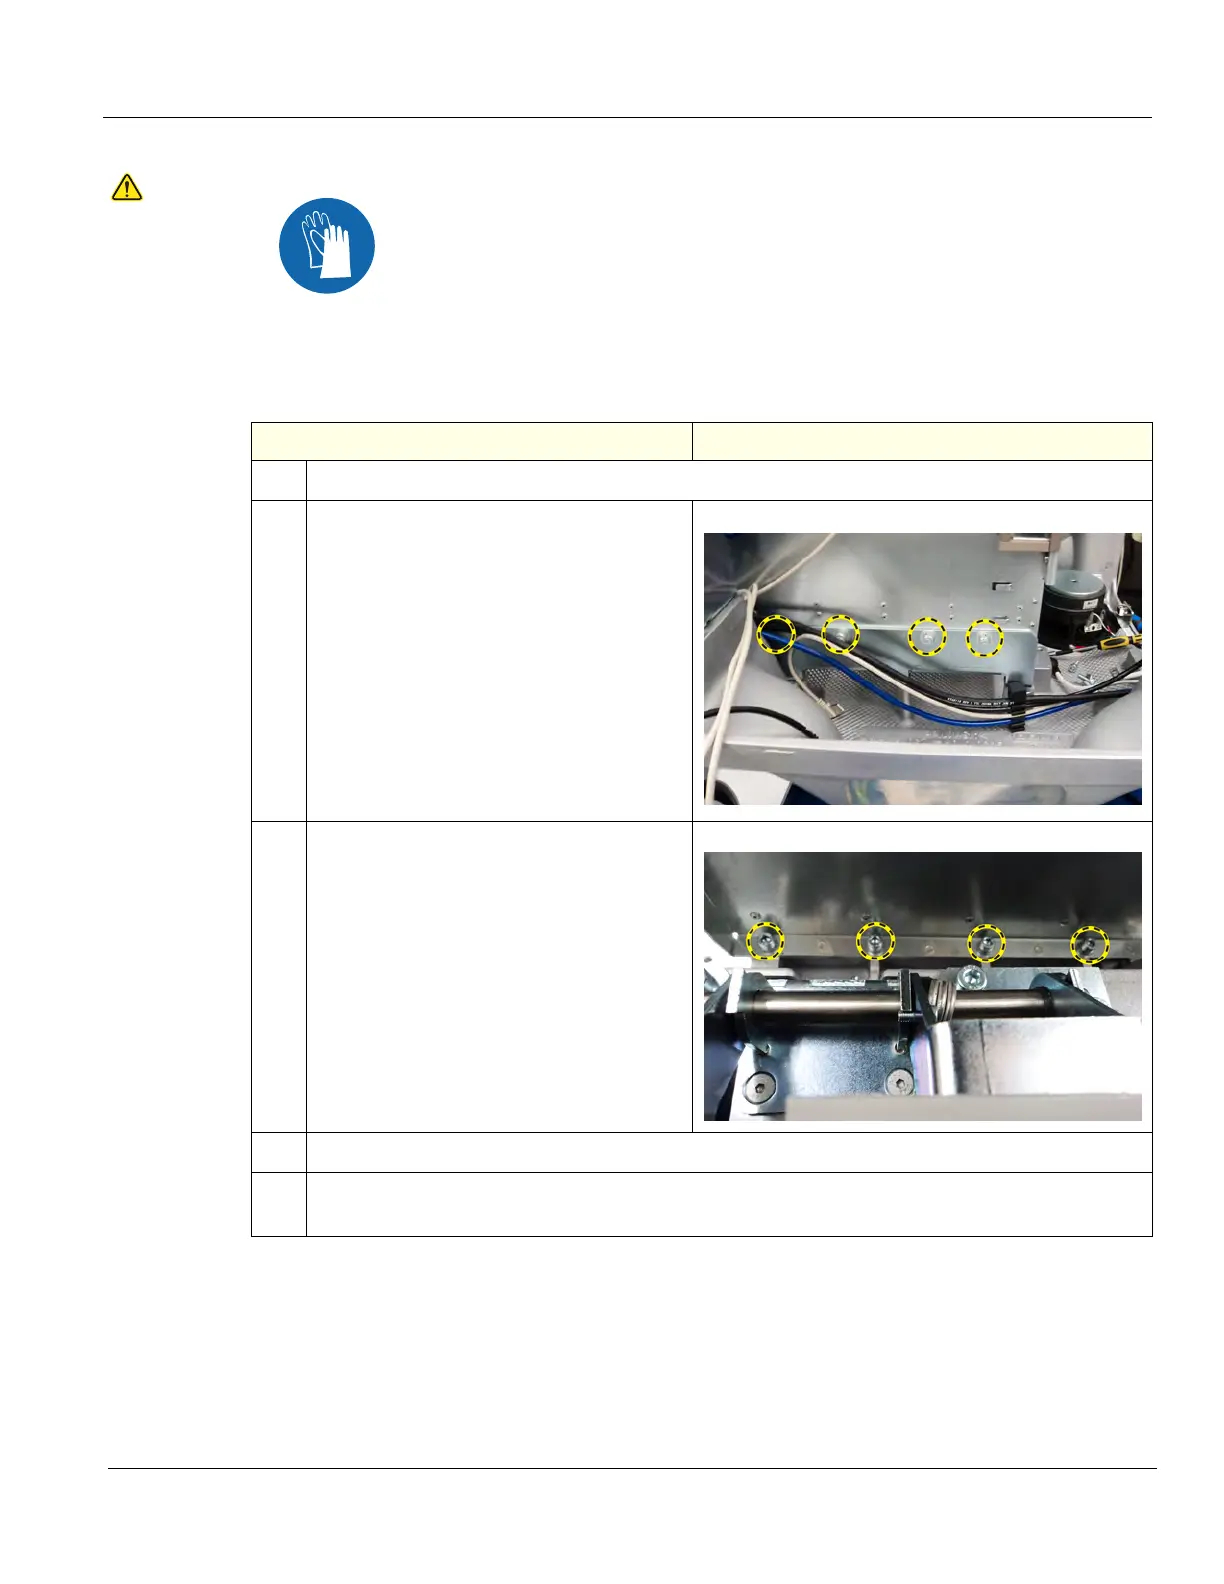
2.
Remove the four screws securing the Card
Cage to the Card Rack Mount, using a
7 mm hex wrench.
3.
Remove the four screws securing the Card
Cage to the Base Casting, using a 7 mm
hex wrench.
4.
Slide the Card Cage out of the console from the right side.
5.
Slide the replacement Card Cage into the console from the right side. Secure the Card Cage to
the Base Casting and Card Rack Mount. Torque to 10 +/- 10% Nm (7.4 +/- 0.74 lbf-ft).