DIRECTION 5750007-1EN, REV. 1 LOGIQ E10 BASIC SERVICE MANUAL
Chapter 8 Replacement Procedures 8 - 421
Calibration and adjustments
No calibrations or adjustments are needed after this option installation.
Verification
Perform the following steps to verify that the product is functioning as intended after this installation:
1.) Verify that all screws removed earlier have been installed.
2.) Connect cables and probes removed earlier.
3.) Power up the system to verify that it operates as intended.
4.) Perform and record a scan, and play back to confirm proper ECG operation.
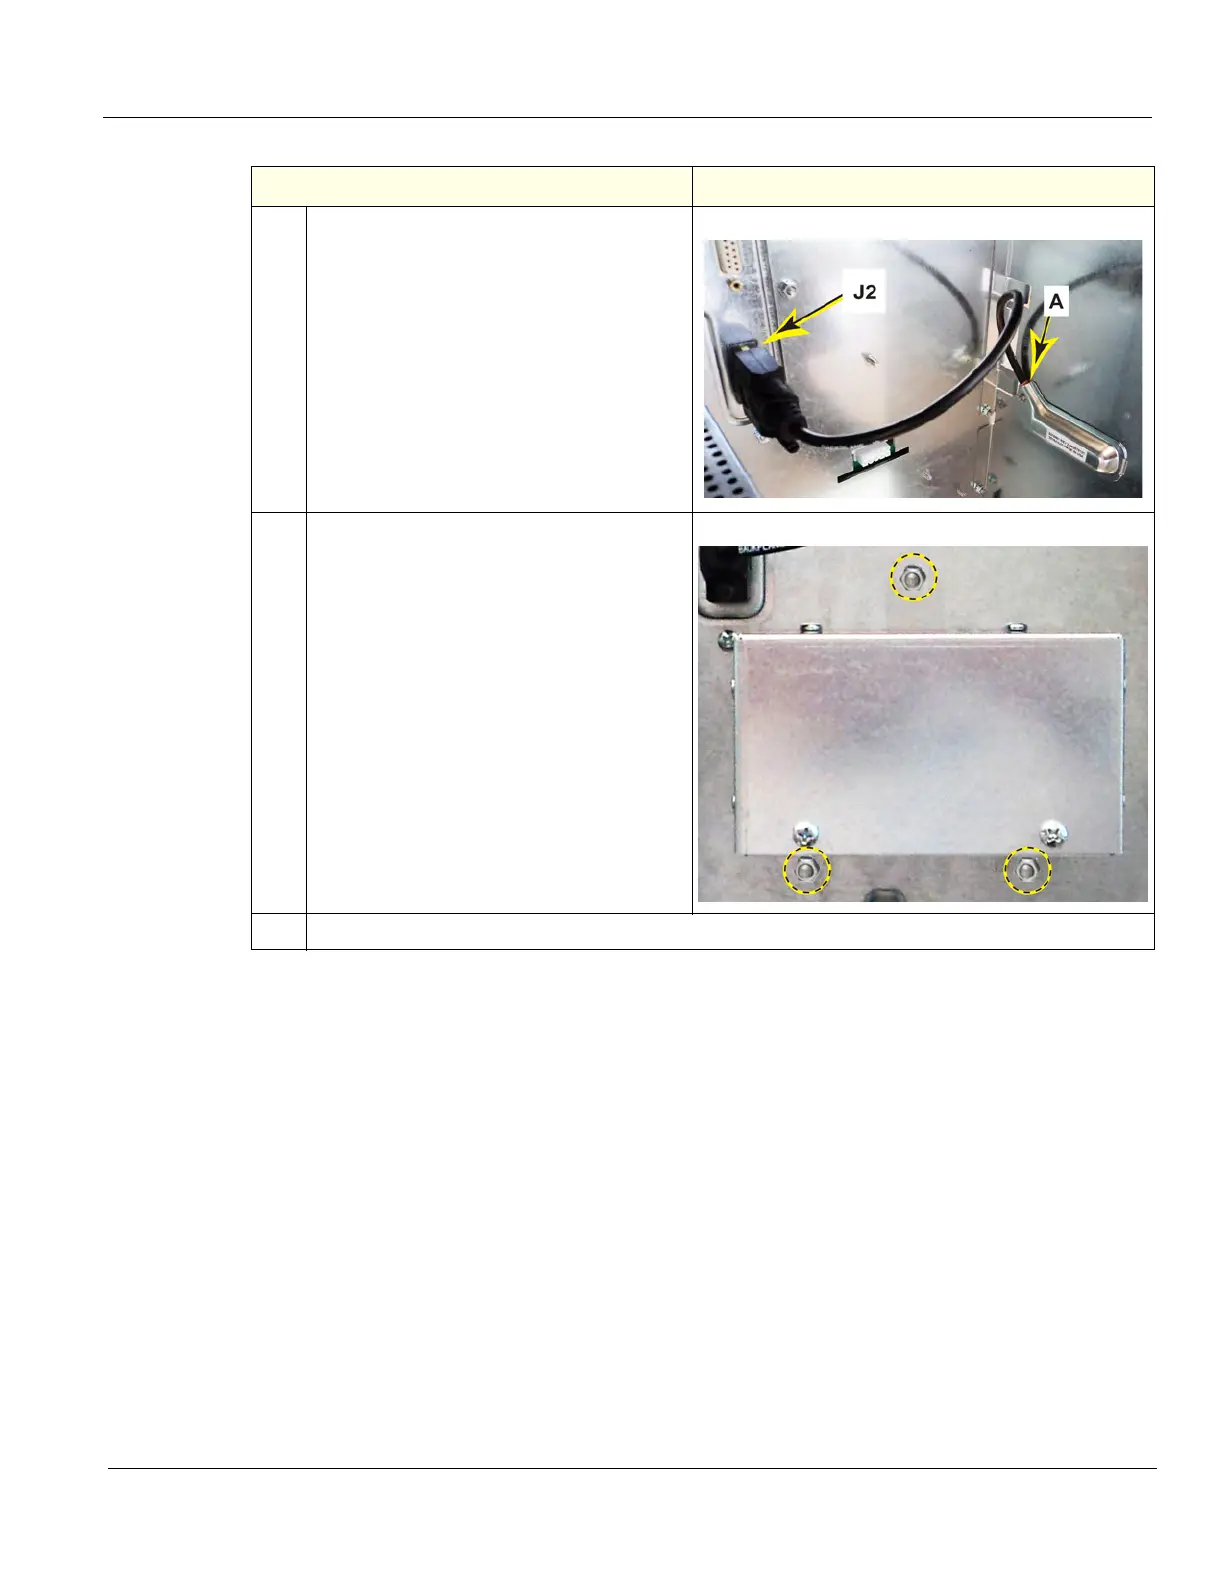
4.
Re-connect the Power and USB cable to J2
of the Backplane and install the EMI Cover,
using the flange nut removed. Make sure
the shielding is exposed to the EMI Cover
as shown (A), before tightening the flange
nut. Using a 5.5 mm driver.
Torque: 0.6 Nm (0.4 lbf-ft).
If the Shear Wave Option WAS present,
proceed to the next Step. If the Shear Wave
Option WAS NOT present, proceed to
Step 6.
5.
Align the mounting holes for the Capacitor
Pack.
With two hands, gently slide the Capacitor
Pack to the Backplane. The Pack will
support itself on the options bracket.
Re-install the three flange nuts removed to
secure the Pack to the options bracket.
Torque: 1.5 Nm (1.1 lbf-ft).
6. Re-connect the Batteries and all Covers removed.
Table 8-415 Patient I/O ECG Option Installation
Steps Corresponding Graphic