Part 1: For All FlexColor Users
Modifying Images in the Thumbnail Window
Setting the Scope of Affected Images
Before you open the Modify window, you can start setting the scope of images that
you will affect by working in the Thumbnails window (e.g., by using select, search
and/or filter), though this is usually not necessary. At most, you will affect the set of
images that were shown in the Thumbnails window when you opened the Modify
window.
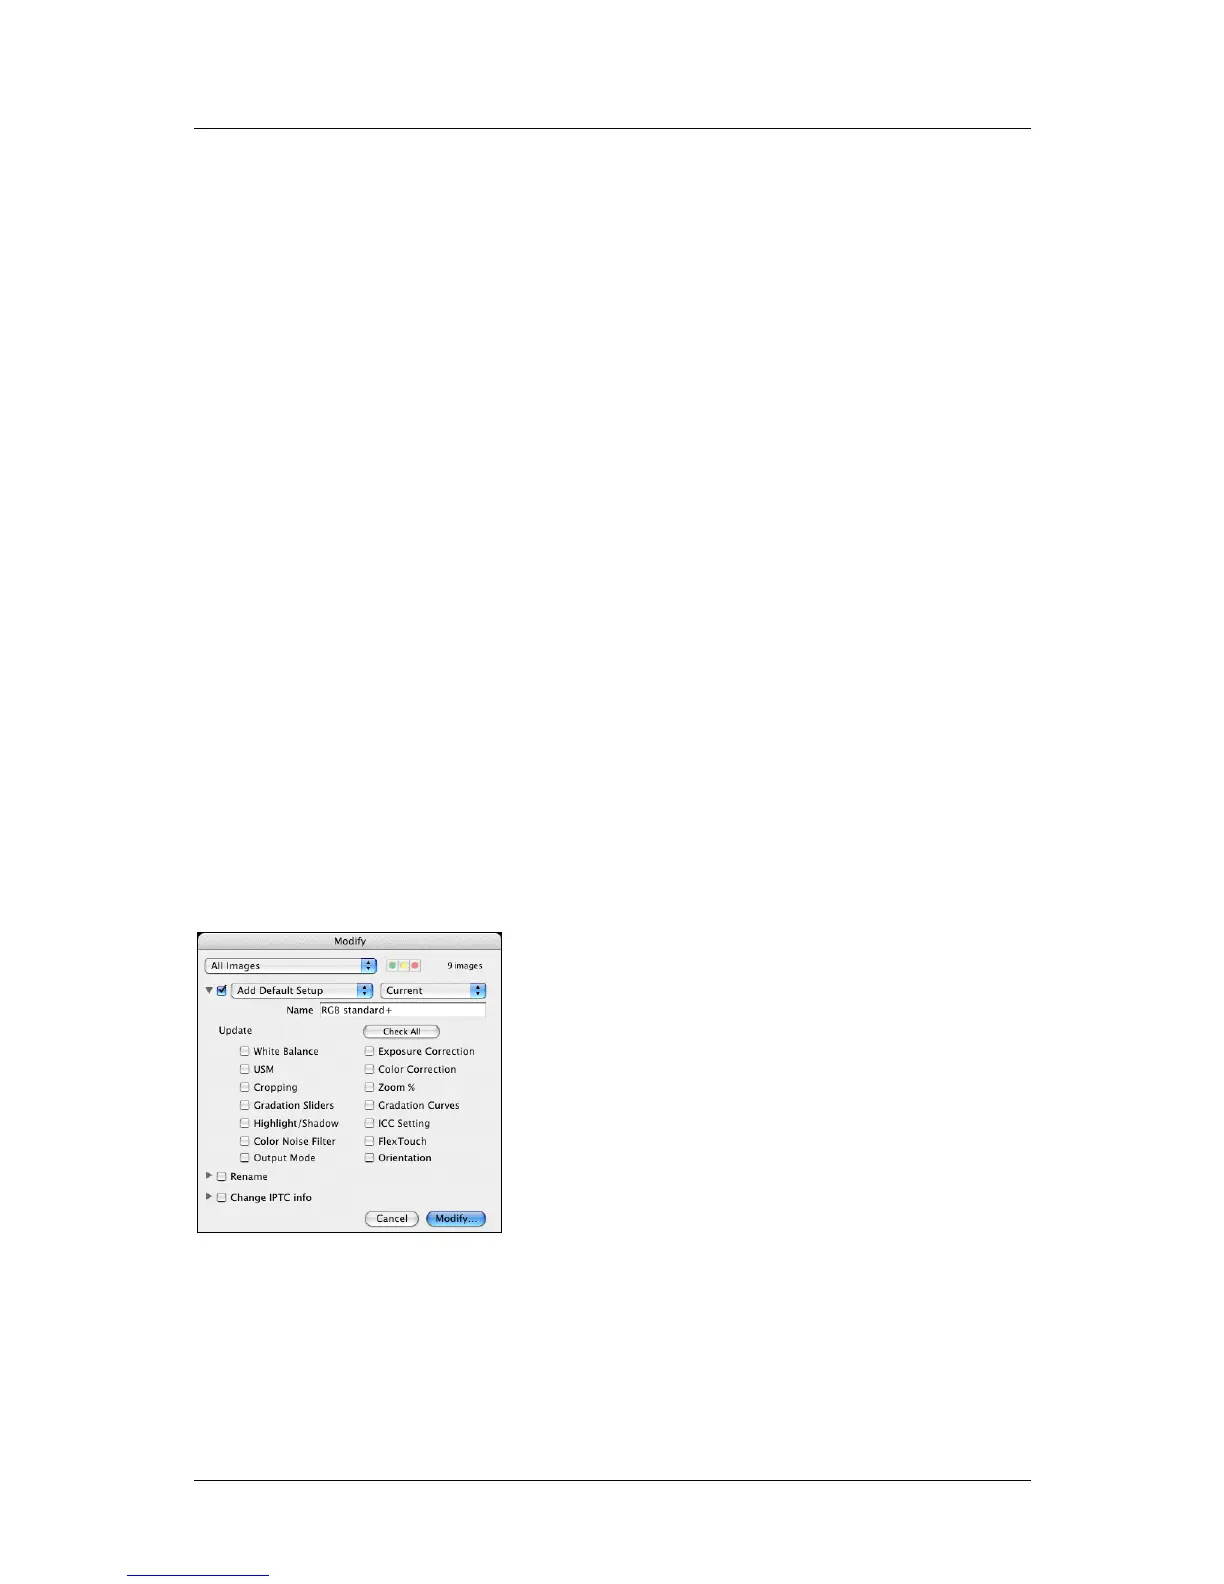
Open the Modify window by clicking on the Modify button. Here, use the pop-up
menu at the top to further define the scope as follows:
Set to “Selection only” to apply your modifications only to the images you had
highlighted before opening the Modify window.
Set to “Images with Approval Level” to apply your modifications only to
images of a given approval level. Then set the approval level using the three
colored buttons next to the pop-up menu.
Set to “All Images” to apply your modifications to all of the images that were
shown in the Thumbnails window when you opened the Modify window.
Note that the number of images that will be affected as a result of your scope settings
in both the Thumbnails and Modify window is shown to the right of the scope pop-up
menu. Check this to make sure that you will get the scope you are expecting.
Setting the Scope of Changes Applied
When you use the Modify window to change the setups of your image(s), you are now
able to modify the entire setups or just parts of them. For example, you might update
just orientation to rotate several images 90°, but leave all other settings as they are.
To select which types of settings to update, expand the Setup section of the Modify
window (if necessary) by clicking on the triangle next to its pop-up menu. Here, you
can see a collection of check boxes, each of which is named for a type of setting.
Mark the check box for each type of setting you want to apply to your selected
images. For convenience, a Check All/Uncheck All button is provided.
FlexColor 4.5 Documentation Addendum 15