43
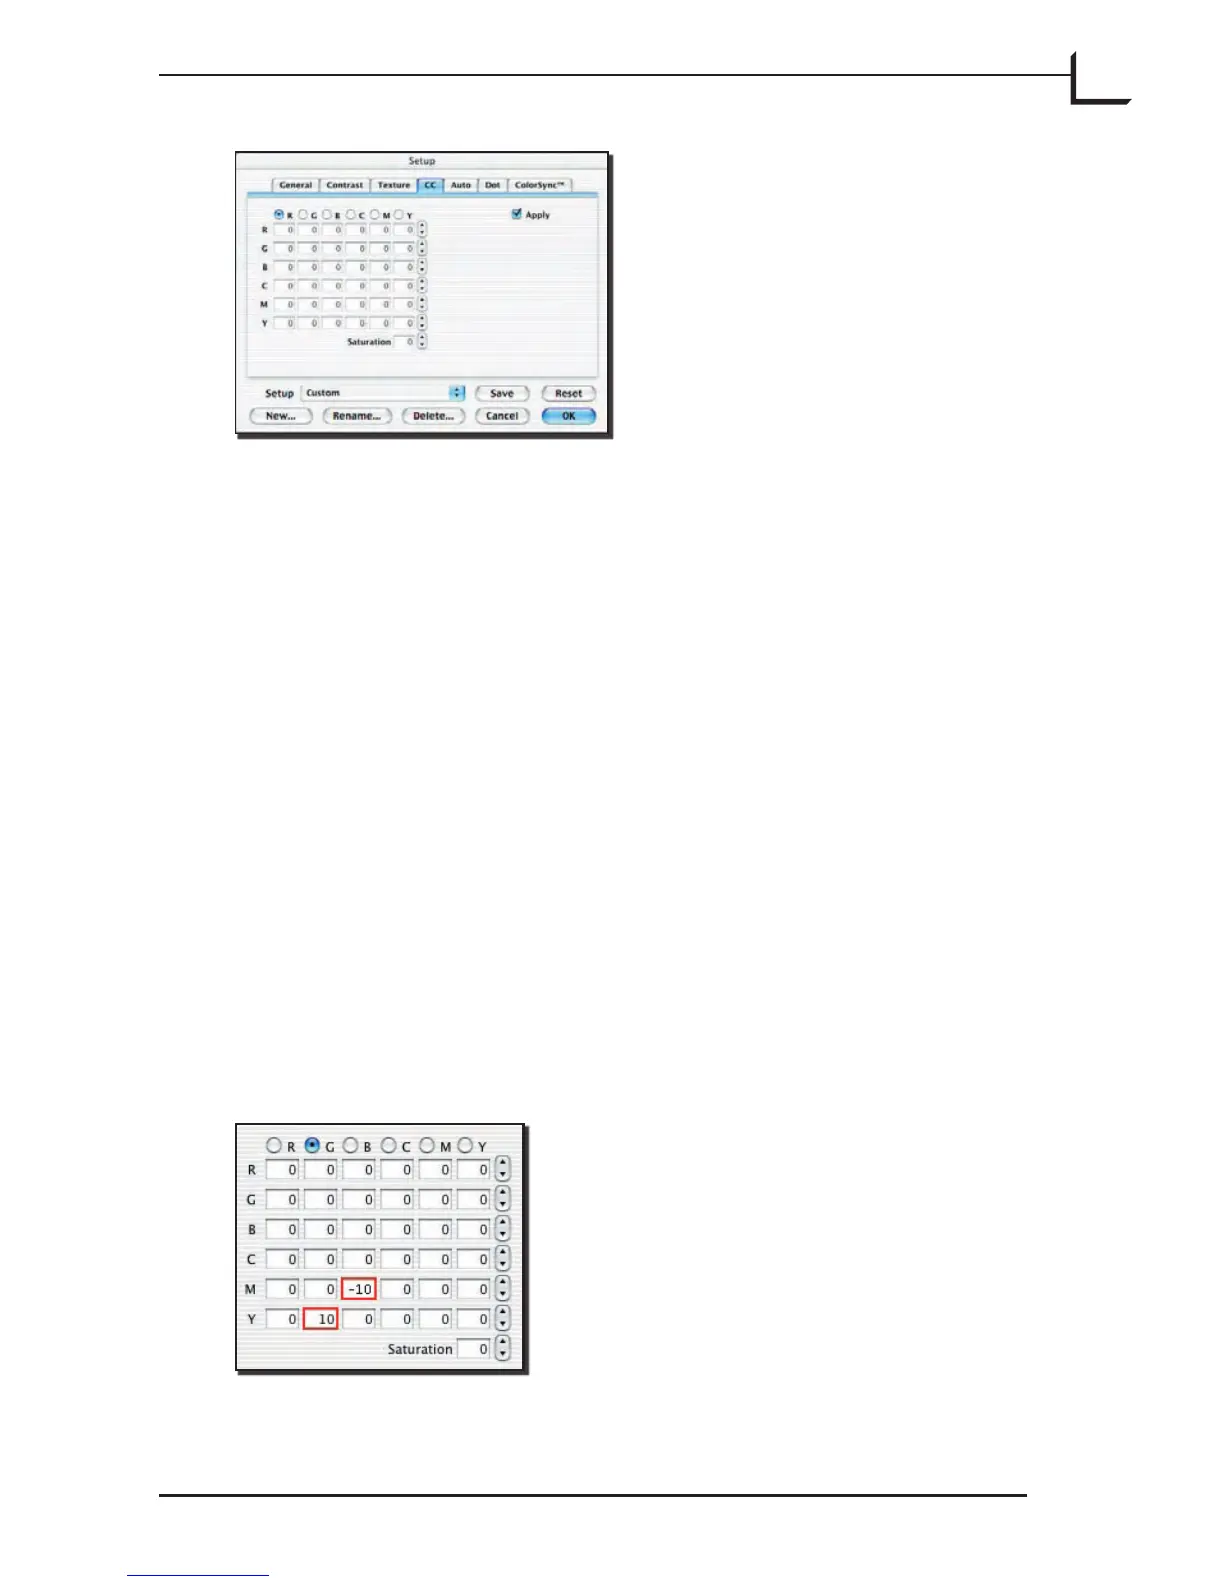
e matrix contains the same settings as the Color Correction window
(available from the Window menu), and displays all of the settings
you have made using that window. In many cases, it will be easier for
you to make adjustments using the Color Correction window instead.
See “Selective Color Correction” on page 99 for more information.
However, the matrix shown here gives a better overview of all of the color
correction settings for the current setup.
To activate the color correction, mark the Apply check box. To disable
the color correction settings, remove the mark from this box. Click on
the box to toggle the mark.
To modify the amount of any one color component in the image, click on
the button next to the target color along the top of the matrix. en use
the up and down buttons for each component color along the le side of
the matrix to add or remove that component from the target color.
Alternatively, you can click on any of the fields in the matrix and edit the
value with your keyboard. To modify the saturation in the entire image,
use the Saturation up and down buttons or input field.
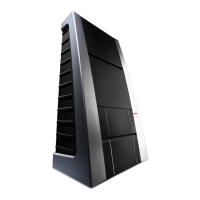
To reduce the amount of magenta in blue and add yellow in green, do as
follows: