40
• Installing a PEM
• Installing an AC power supply
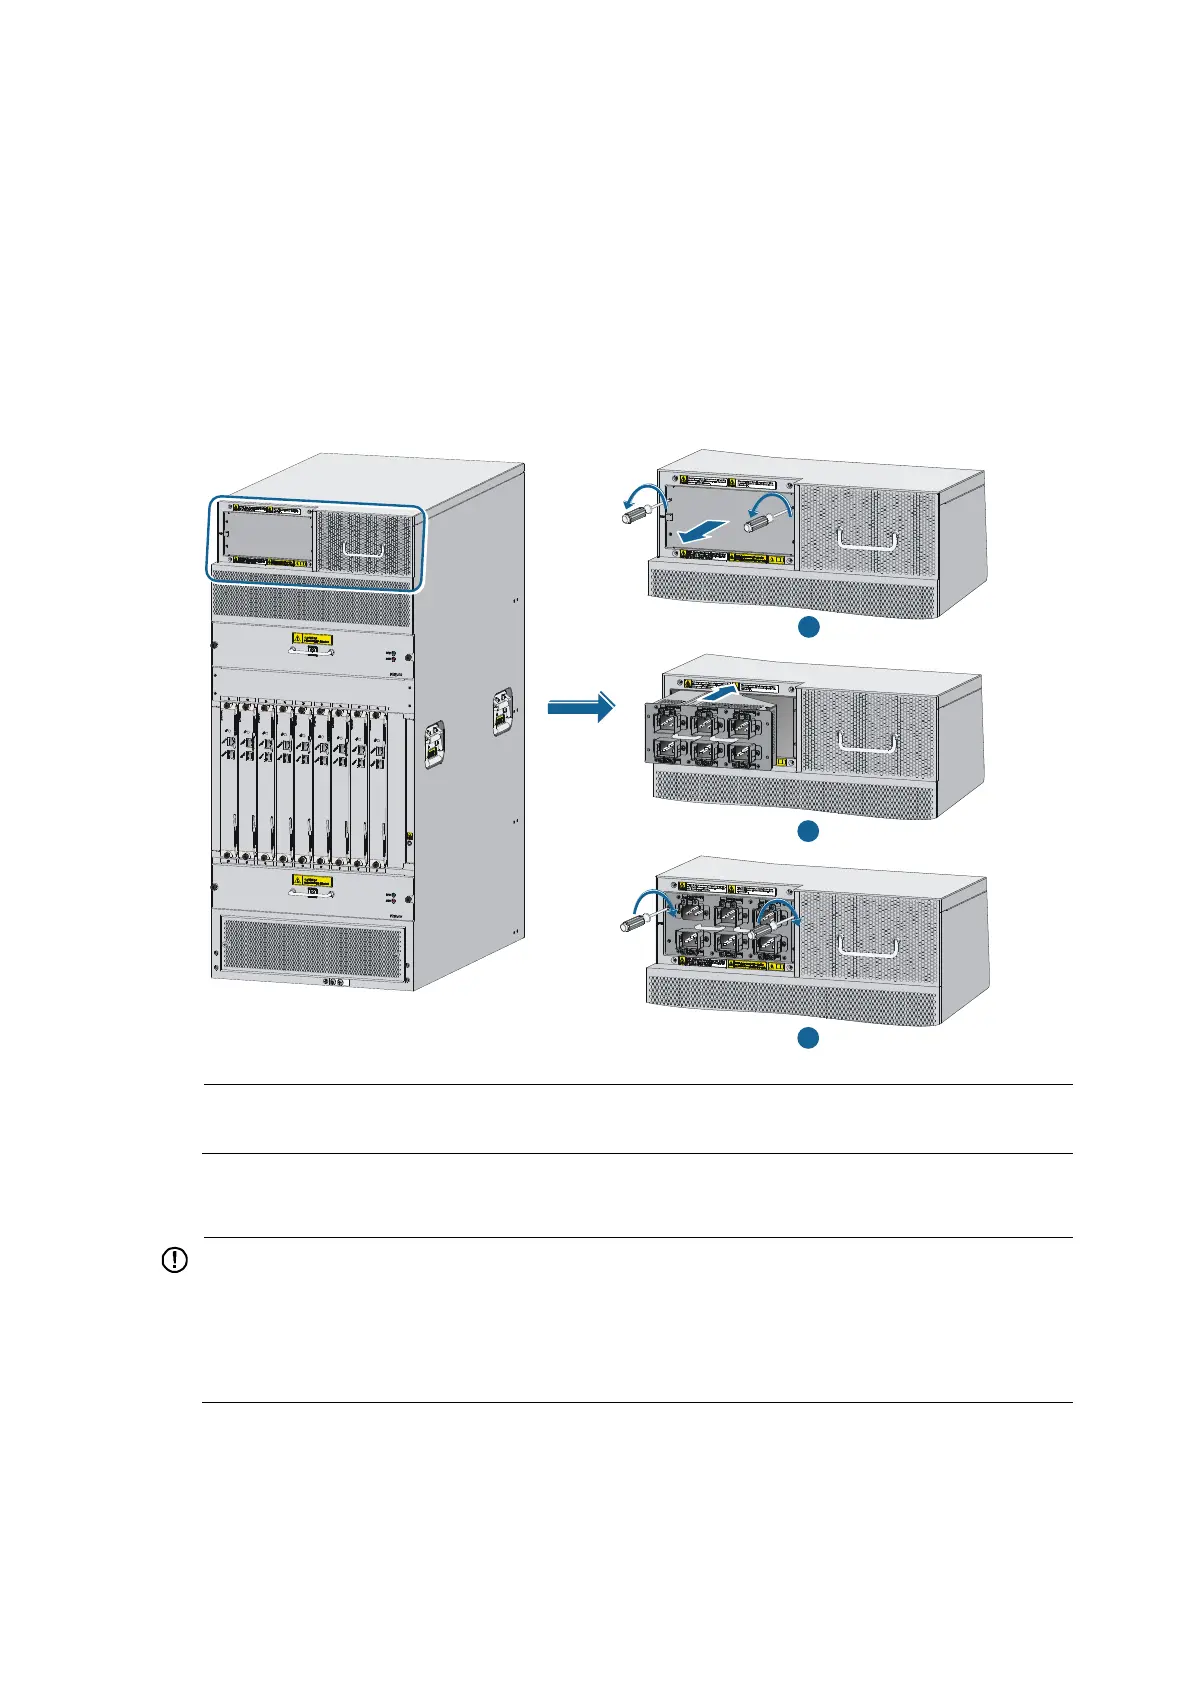
Installing a PEM
1. Loosen the screws on the filler panel of the PEM slot with a Phillips screwdriver to remove the filler
panel.
2. Insert a PEM slowly along the slide rails until it touches the backplane connector.
3. Use the M3 screws supplied with the PEM to attach the PEM to the switch chassis, and fasten the
screws with a Phillips screwdriver.
Figure 38 Installing a PEM
NOTE:
Gently insert the PEM into the chassis to avoid damaging the connector at the end of the PEM.
Installing an AC power supply
IMPORTANT:
• Make sure the number of power supplies is sufficient for the switch to operate properly.
• Each receptacle on the PEM corresponds to a power supply slot. To enable an AC power supply to work,
provide power supply to the relevant receptacle.
• Distribute power supplies in the upper and lower frames evenly on the 12518.
The procedures for installing an AC power supply are similar to installing a DC power supply. For more
information, see "Installing a DC power supply."
1
2
3
 Loading...