Example steps to initiate Printer Automatic Configuration via command line
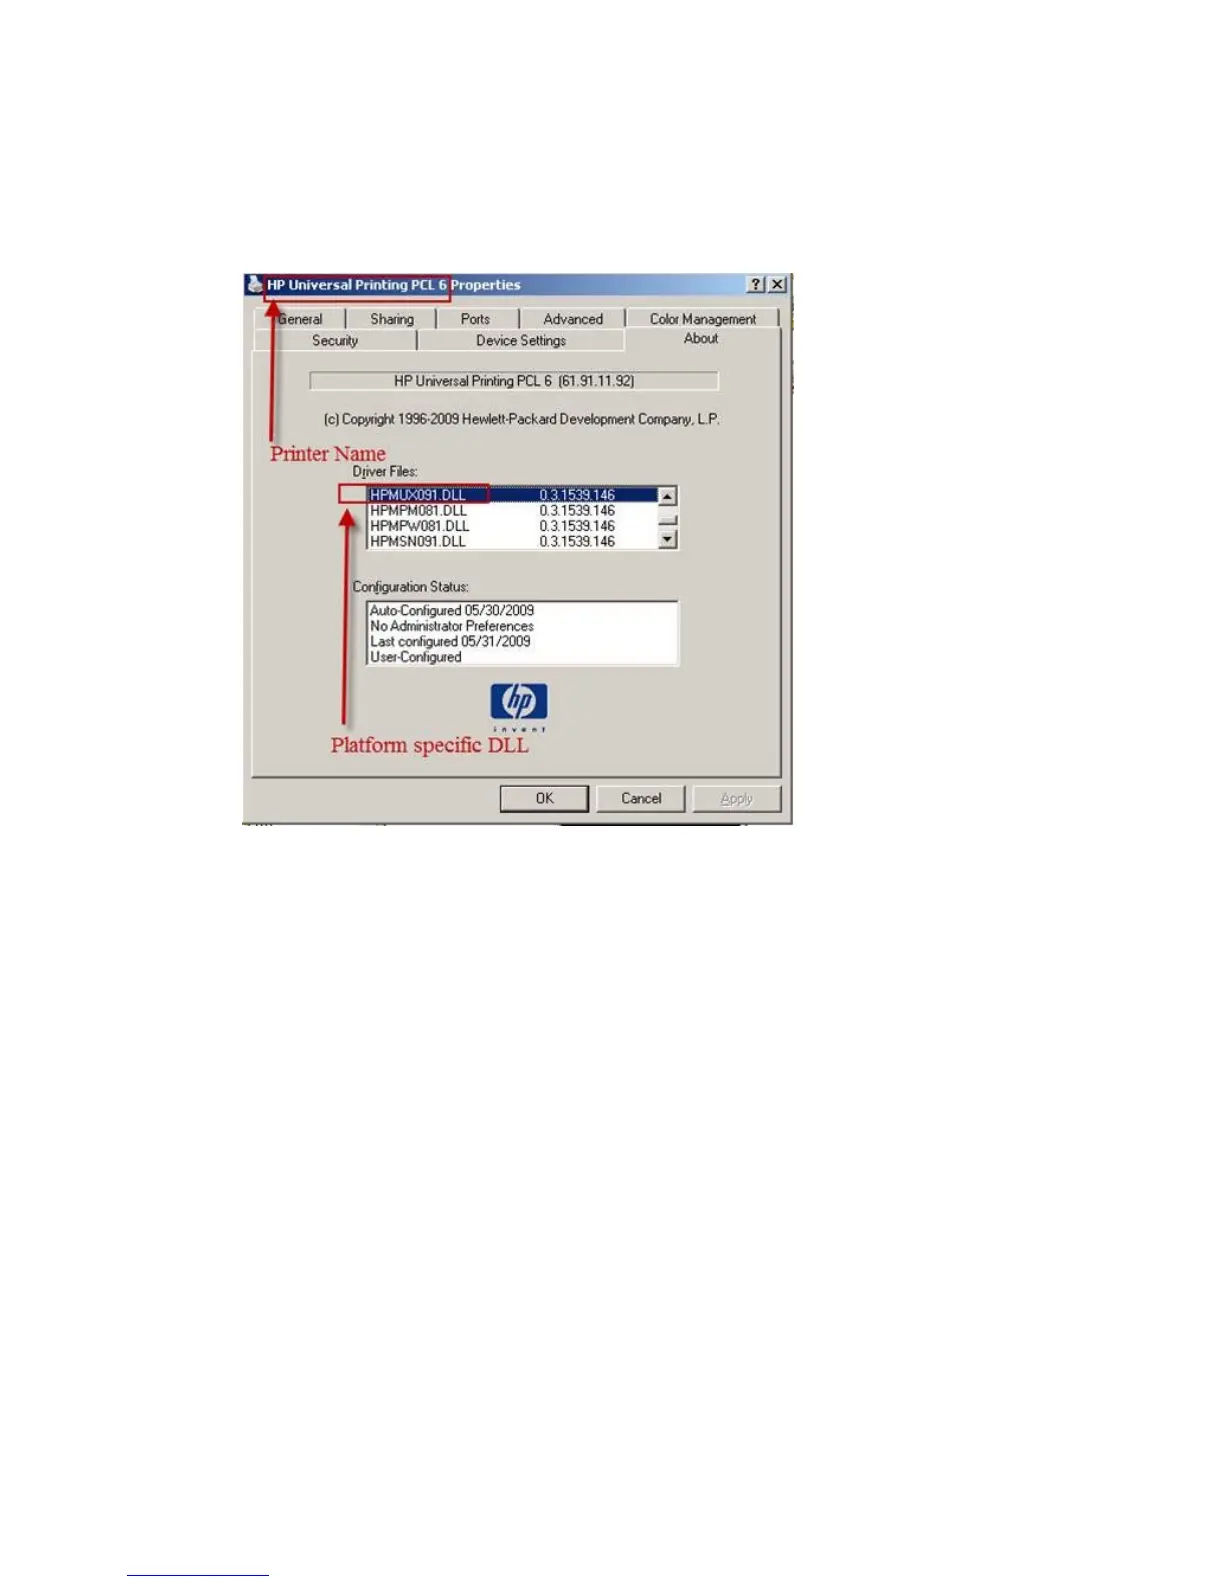
1. Note the Printer Name and Platform Specific DLL of the installed HP UPD. From the system's
Printers and Fax folder, right mouse on the printer name and select Properties, About to
locate the HPMUX*.DLL and the installed driver name instance.
Figure 6-3 Locate the platform specific DLL
2. Open a command prompt: START-RUN-CMD.EXE [enter]
C:\> rundll32 %systemroot%\system32\spool\drivers
\w32x86\3\hpmux091.dll,UpdateStaticModePrinter "HP Universal Printing
PCL 5 (v5.0)" /q
User dialogue box opens stating, “Getting printer information… Establishing Communication with
printer… Finishing printer validation”
3. Open the HP UPD Printer Properties-About tab and check the Configuration Status box. The
status should display the current system date for Last configured xx/yy/zzzz and default
options for the printer or HP UPD preconfigurations of the driver display in the HP UPD user
interface.
Disabling Printer Automatic Configuration
UPD installed services provide bi-directional I/O capability outside the context of the user, application,
or print job. Most printing functions will work without the driver to device communication, and print
quality and speed are not affected by the services enablement. UPD 4.7 added support for manual
configuration of the driver to both enable and configure device capabilities without requiring Automatic
Update to be enabled. The Installable Options section of the UPD’s Device Settings tab can be
manually defined using Driver Configuration Utility or the HP Driver Deployment Utility.
70 Chapter 6 HP UPD Administrative features ENWW
 Loading...