Hardware options installation 105
8.
Install the processor. Verify that the processor is fully seated in the processor retaining bracket by
visually inspecting the processor installation guides on either side of the processor. THE PINS ON
THE SYSTEM BOARD ARE VERY FRAGILE AND EASILY DAMAGED.
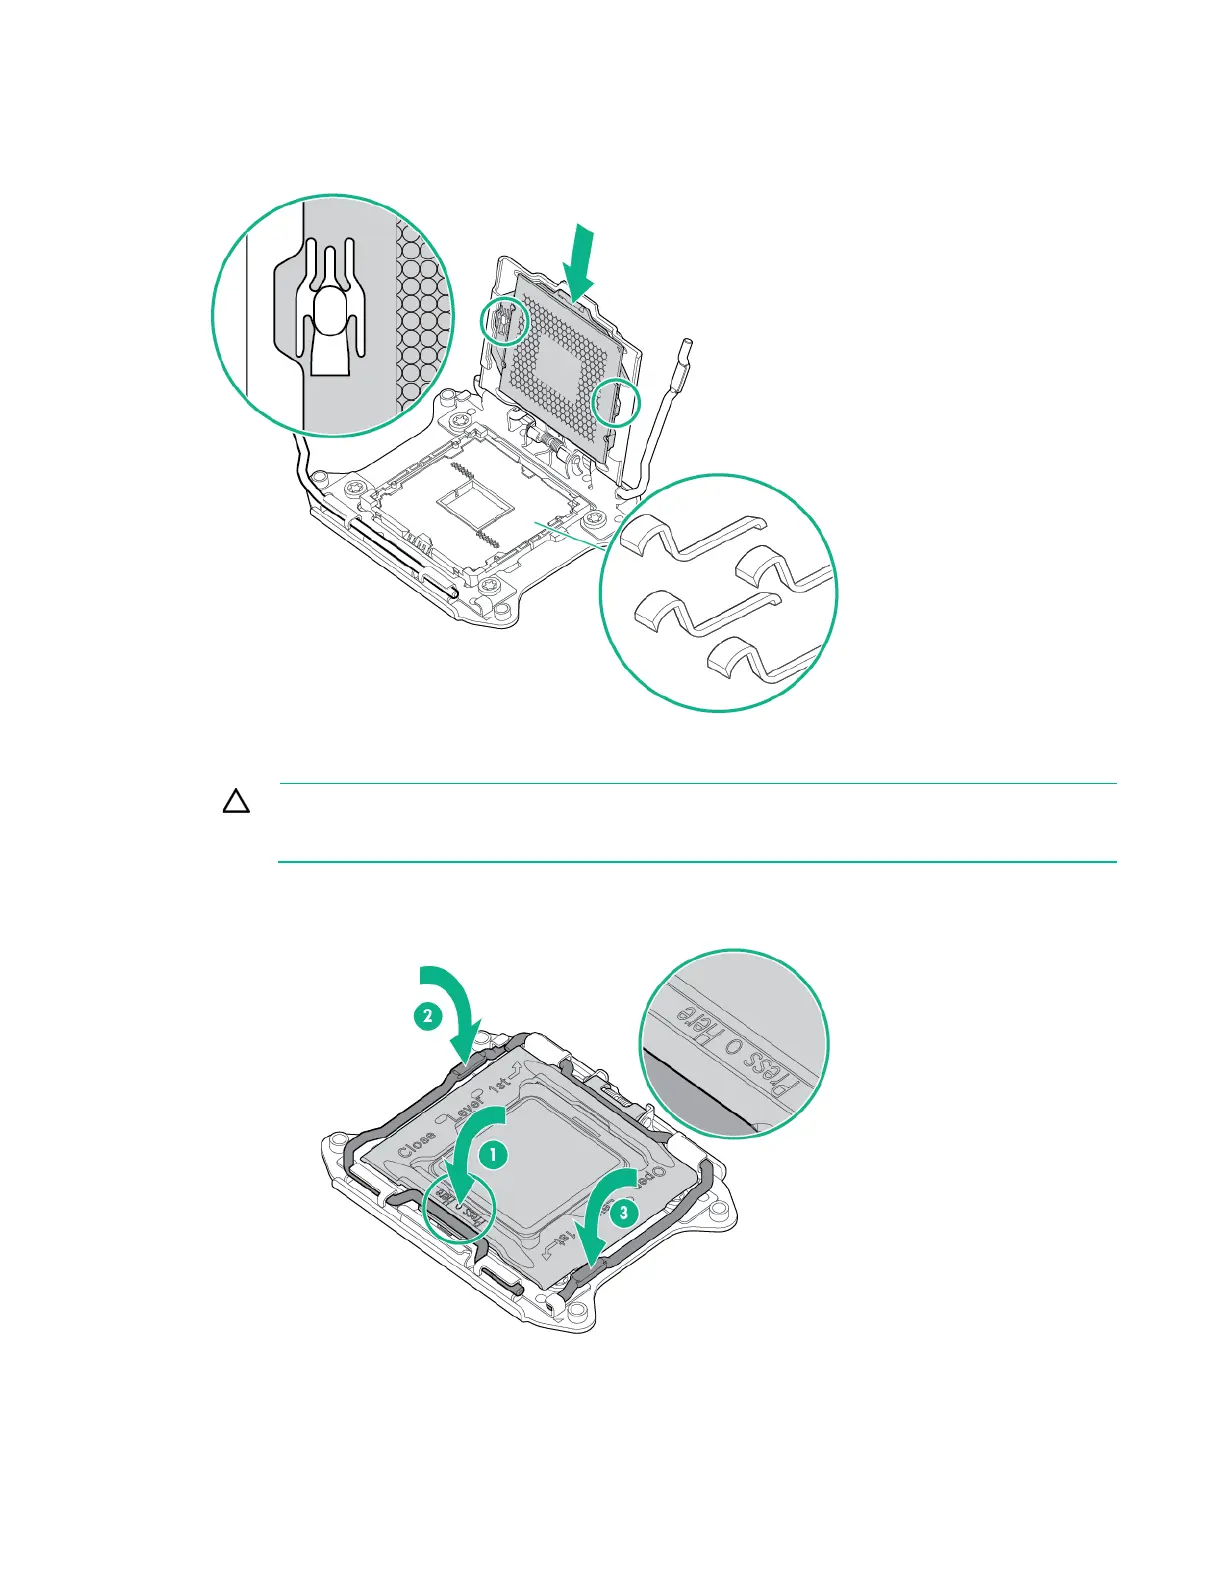
9. Close the processor retaining bracket. When the processor is installed properly inside the processor
retaining bracket, the processor retaining bracket clears the flange on the front of the socket.
CAUTION:
Do not press down on the processor. Pressing down on the processor may cause
damage to the processor socket and the system board. Press only in the area indicated on the
processor retaining bracket.
10. Press and hold the processor retaining bracket in place, and then close each processor locking
lever. Press only in the area indicated on the processor retaining bracket.

 Loading...


