Hardware options installation 77
o
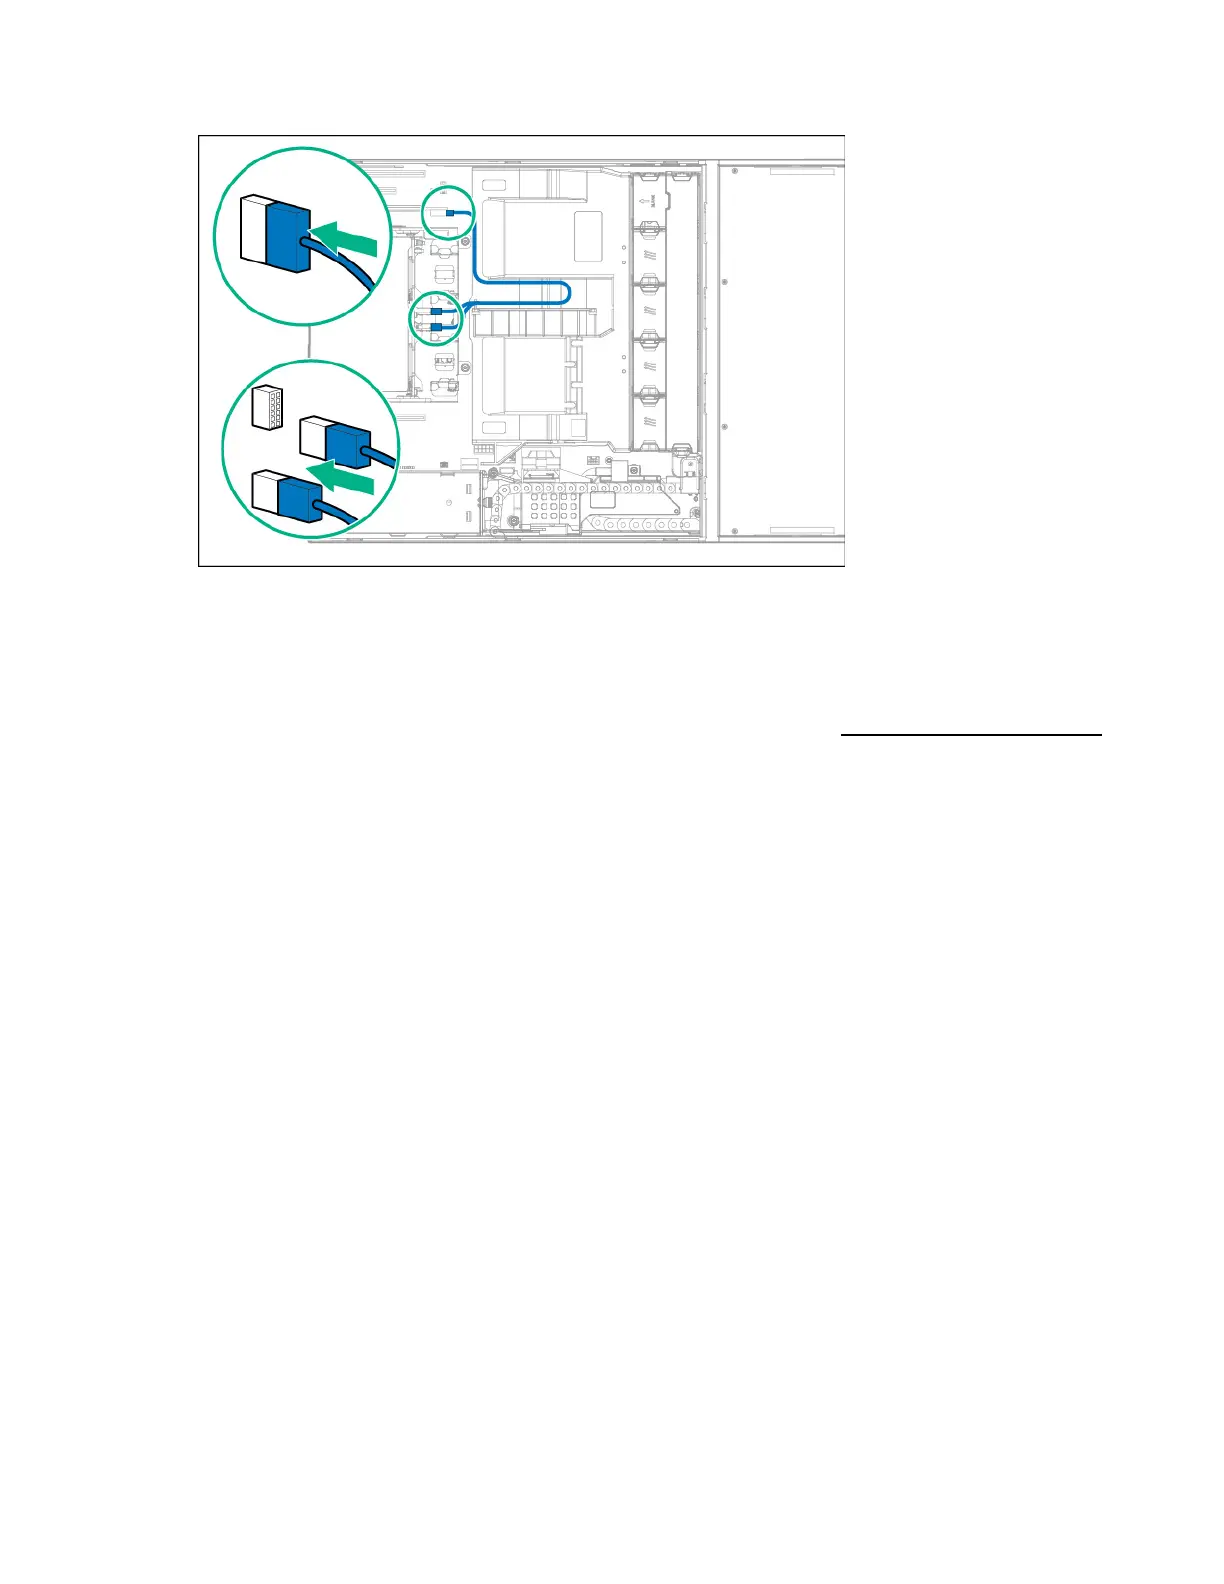
P440 controller Mini-SAS Y-cable connections from the PCIe expansion slot 5, 6 or 7
Drive cable options
Use these drive cable options to install a Host Bus Adapter or a Smart Array Controller board option.
For more information about product features, specifications, options, configurations, and compatibility,
see the product QuickSpecs on the Hewlett Packard Enterprise website (http://www.hpe.com/info/qs).
H240 Smart HBA Mini-SAS cable option for rear drive cage
This section describes how to connect an existing four-bay LFF or two-bay SFF hot-plug rear drive cage
to an H240 Smart HBA using this Mini-SAS x4 cable option.
Install the H240 Smart HBA Mini-SAS cable for a rear drive cage option
1. Power down the server (on page 19).
2. Remove all power:
a. Disconnect each power cord from the power source.
b. Disconnect each power cord from the server.
3. Remove the server from the rack (on page 28).
4. Remove the access panel (on page 29).
5. Remove the air baffle (on page 30).
6. If you are installing the H240 HBA for the four-bay LFF hot-plug rear drive cage, do one of the
following: