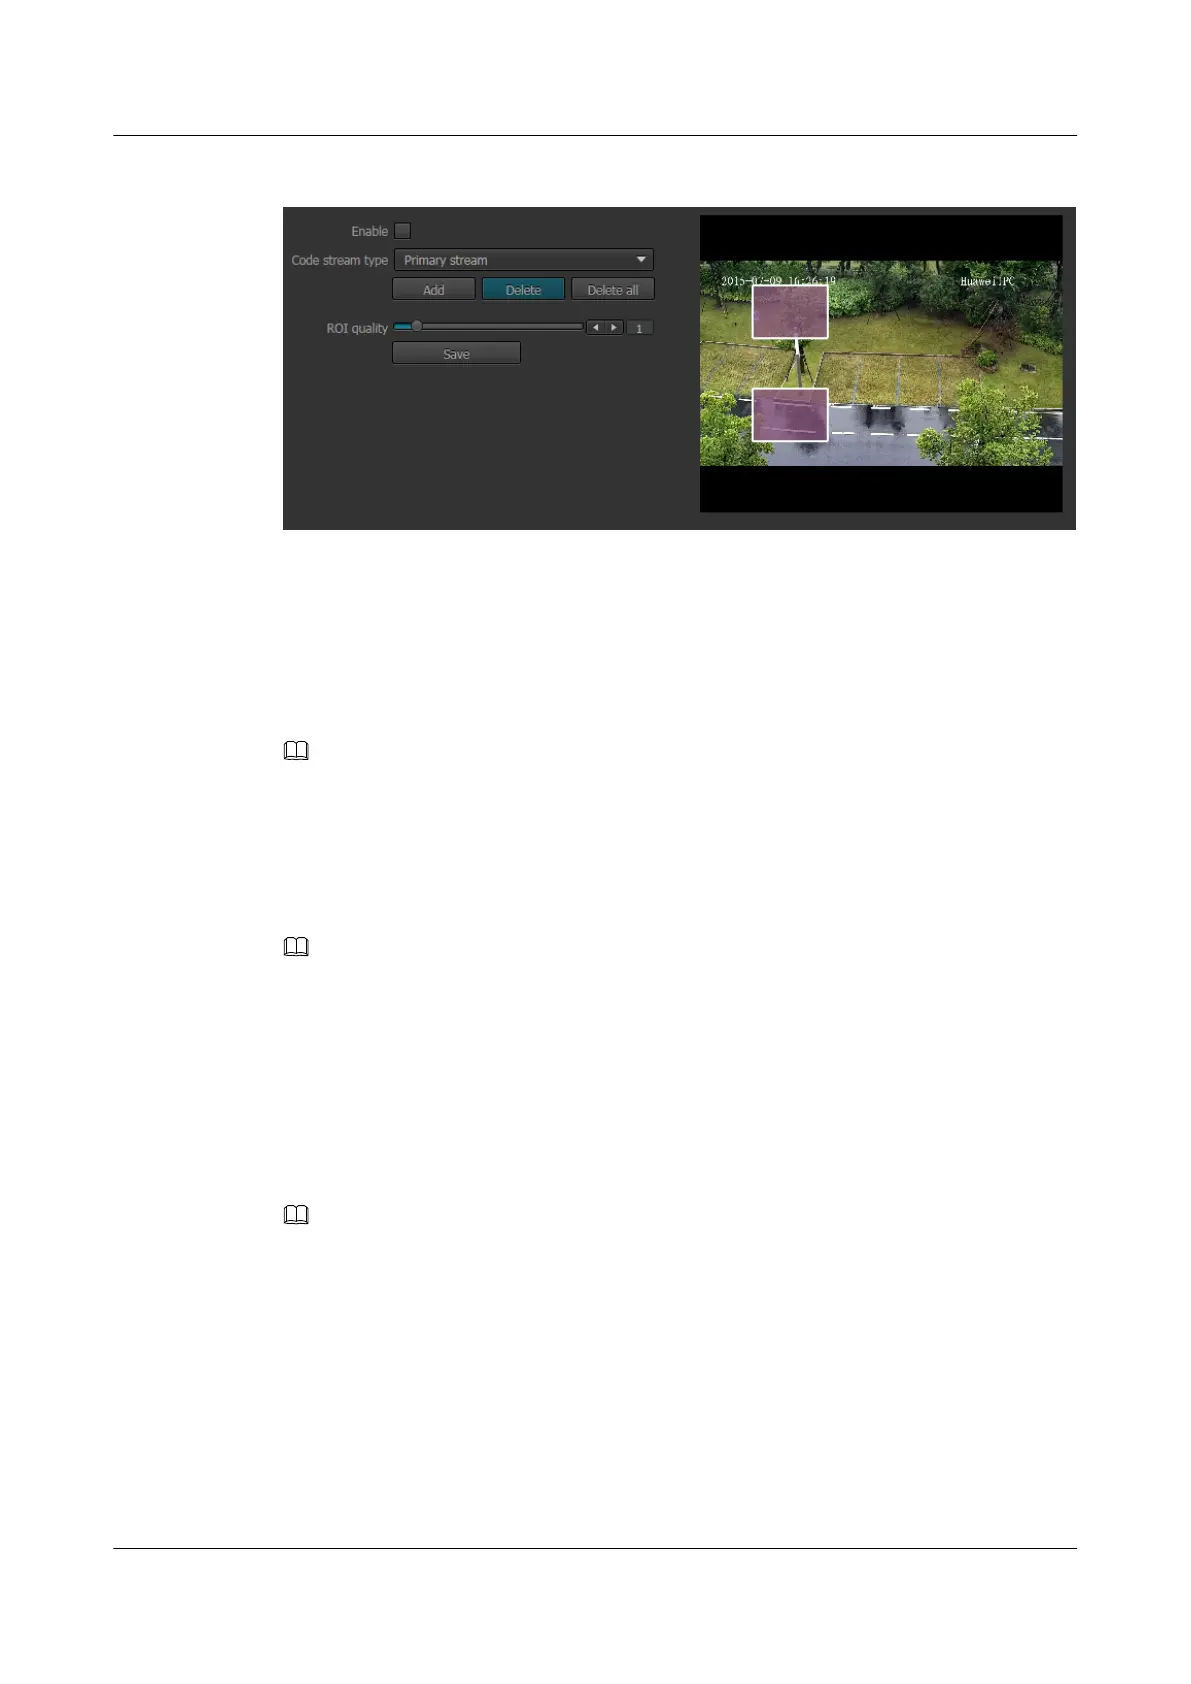
Figure 6-8 ROI Parameters page
Step 2 To enable ROI, select Enable.
Step 3 Select a value from the Code stream type drop-down list box.
Step 4 Click Add.
An ROI is displayed on the live video image.
NOTE
l You can add only one ROI at a time. If you need to add more ROIs, click Add again.
l A maximum of four ROIs can be added.
Step 5 Use the mouse to adjust the ROI location and size.
Step 6 Select the ROI and set its quality.
NOTE
l When the ROI function is enabled, the ROI quality is the difference between the current ROI area and
non-ROI area.
l With the increase of the ROI quality value, the image quality inside the ROI area increases, while the
quality outside the ROI area decreases. The larger the ROI quality value is, the clearer images captured
within the ROI area become.
l After you set ROI Quality, the definition of the image (including the OSD text) in some parts outside the
ROI area decreases.
Step 7 Click Save.
NOTE
l To delete an ROI, select the ROI on the live video image and click Delete.
l To delete all ROIs, click Delete all.
----End
6.6 Setting Privacy Mask Parameters
You can set a privacy mask area on the live video for privacy protection.
IPC6221-VRZ-SP
Configuration Guide
6 Setting Video Parameters
Issue 02 (2016-04-06) Huawei Proprietary and Confidential
Copyright © Huawei Technologies Co., Ltd.
48


 To Next Page