Torch Connect Console
XPR170 Field Service Bulletin 810410 105
Replace the ohmic relay and bracket
Refer to Torch connect console Easy Connect side on page 152 for
location and part number.
Remove the ohmic relay and bracket
1. Complete the following procedures:
a. Remove the power from the cutting system.
b. Drain the coolant. Refer to Remove old coolant from the coolant system in the Maintenance
section in the XPR170 Instruction Manual (810060).
c. Remove the top panel.
d. Remove the torch-side panel.
Refer to Torch connect console top panel and side panels on page 126.
Keep all nuts and screws that you remove.
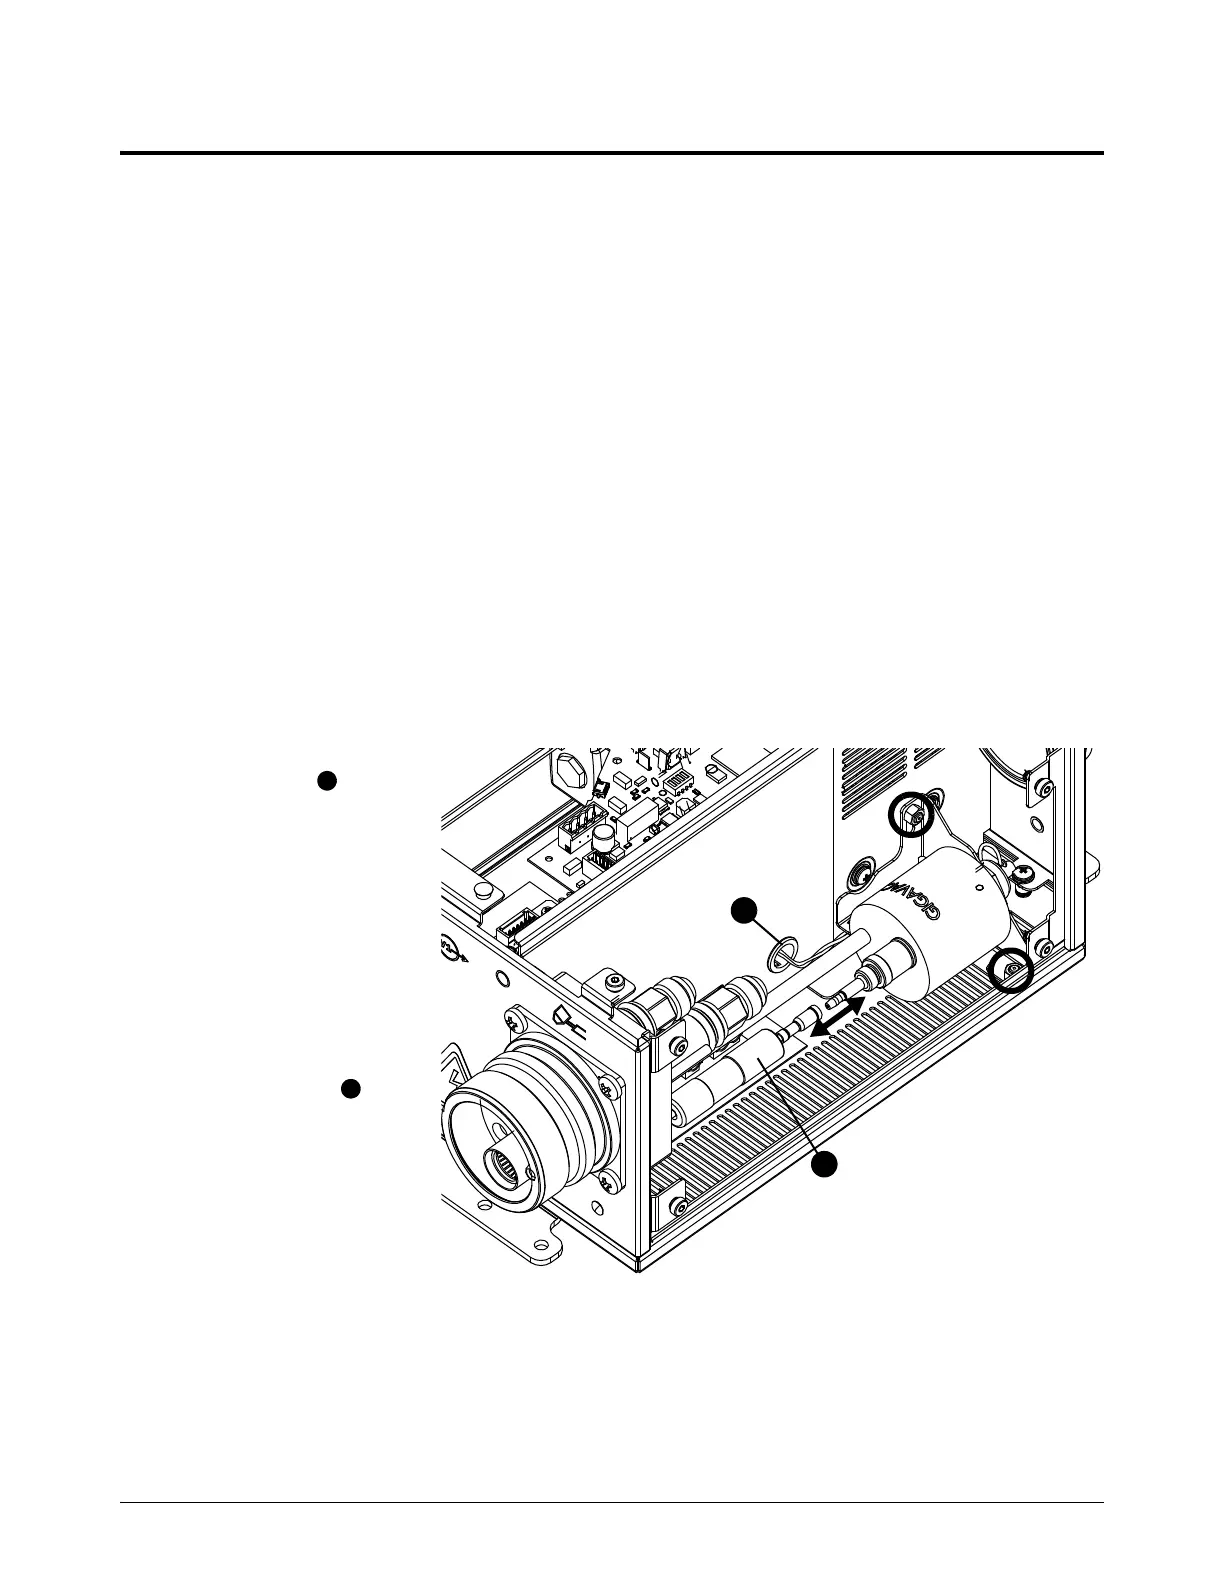
2. Remove the pilot arc lead, coolant hoses, and water hose from the torch connector.
3. Unscrew the
connector and pull
the electrical wire to
disconnect it.
4. Disconnect the wires
from J3 and J4 on the
ohmic PCB.
5. Remove the wires
from J2 on the ohmic
PCB and pull the
connector through
the grommet .
6. Use an 8 mm,
hexagonal-socket
wrench to remove the
2 nuts.
7. Remove the ohmic
relay and bracket.