EasyManuals Logo
Home>Hypertherm>Welding System>XPR170

Hypertherm XPR170 Replacement Part Procedures

Hypertherm XPR170
176 pages
To Next Page IconTo Next Page
To Previous Page IconTo Previous Page
Page #39 background imageLoading...
Page #39 background image
Plasma Power Supply
1
XPR170 Field Service Bulletin 810410 39
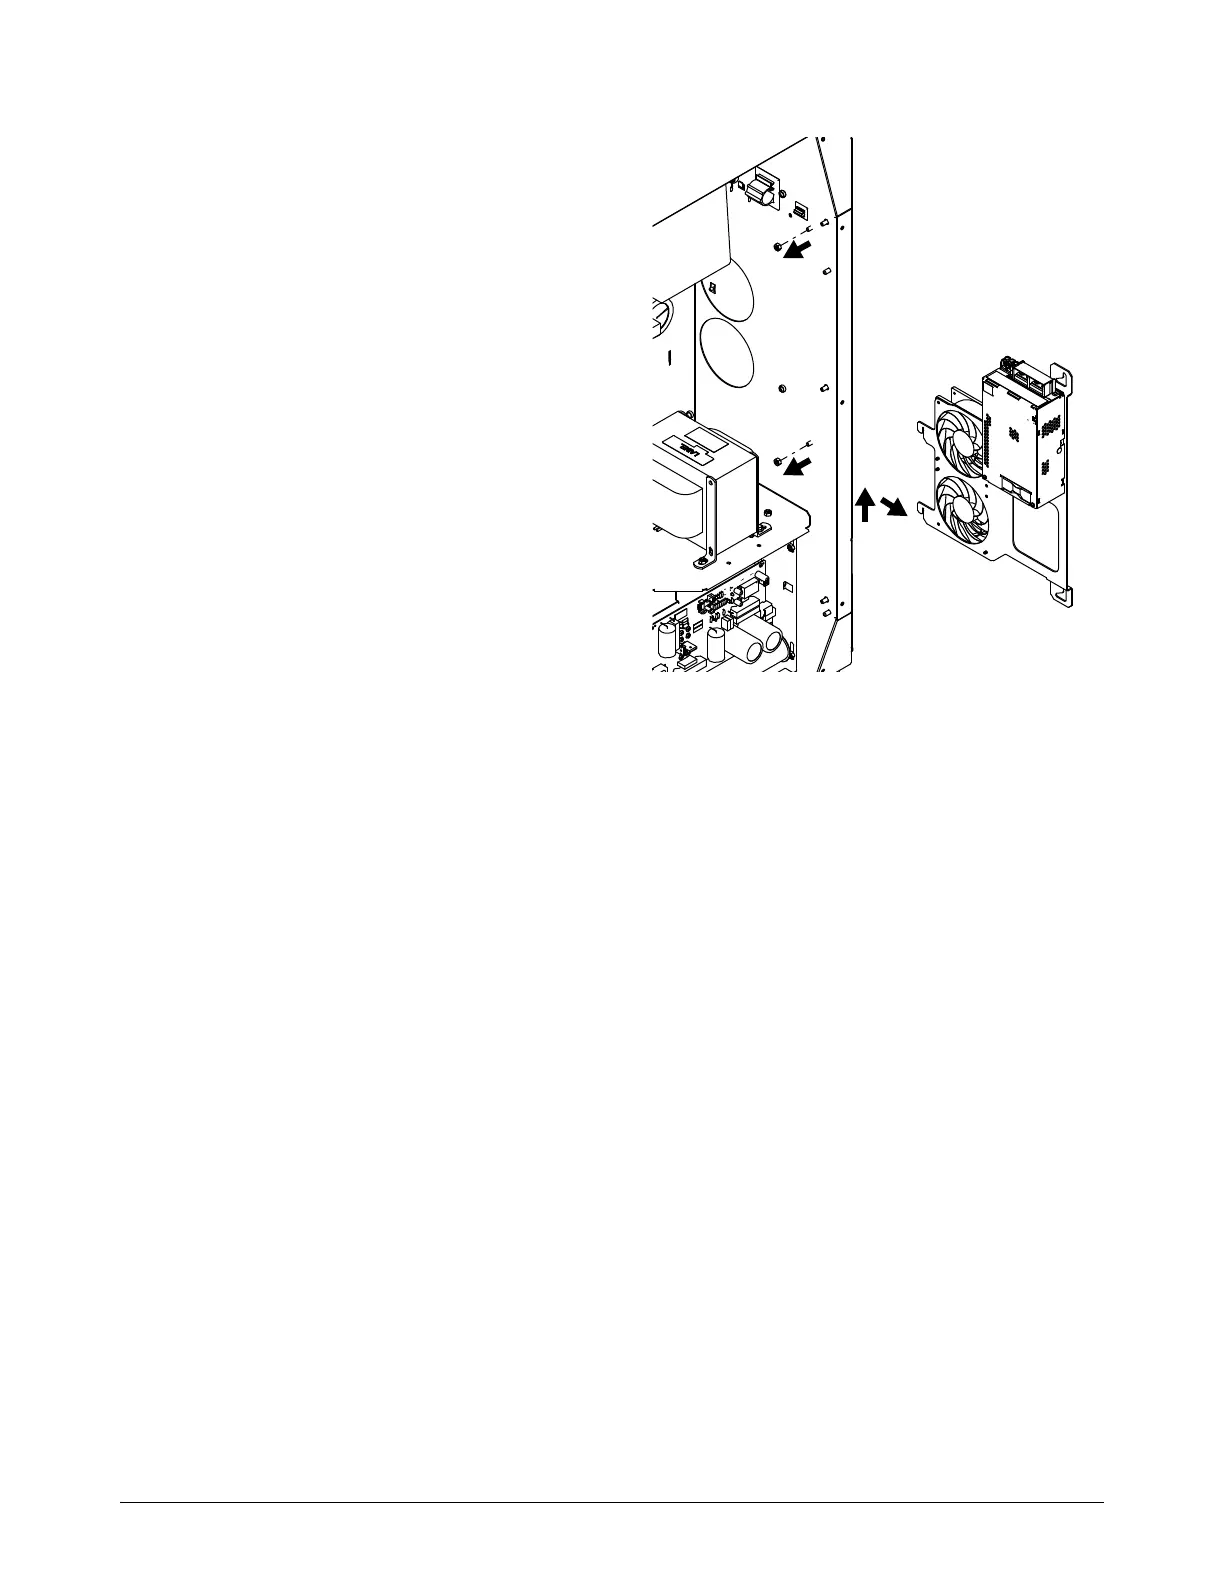
5. Use a 10 mm, hexagonal-socket wrench to
remove the 2 nuts from the bracket
assembly.
6. Remove the bracket assembly from the
plasma power supply.
7. Remove the 4 screws from the back of the
bracket to remove power source.
Install the 48 V power source
1. Use the 4 screws to install the power source onto the bracket.
The wire connections must point to the top of the plasma power supply.
2. Align the bracket assembly with the studs in the front sheet metal panel and the slots in the
center panel.

Table of Contents

Other manuals for Hypertherm XPR170

Questions and Answers:

Question and Answer IconNeed help?

Do you have a question about the Hypertherm XPR170 and is the answer not in the manual?

Hypertherm XPR170 Specifications

General IconGeneral
BrandHypertherm
ModelXPR170
CategoryWelding System
LanguageEnglish

Related product manuals