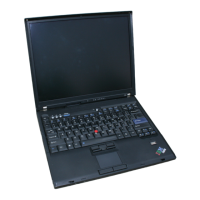
FRU Removals and Replacements
Follow the numerical sequence in the FRU removal
sequence list and in the exploded view to remove or
disconnect parts in the correct order. The letters in
parentheses in the list indicate screw types. See the
“Screw Size Chart” on page 19 to match the letters to the
correct screw type and size before replacing each screw.
Safety Notice 8: Translation on page 13
Before removing any FRU, power-off the computer,
unplug all power cords from electrical outlets, remove
the battery pack, then disconnect any interconnecting
cables.
Safety Notice 1: Translation on page 7
Before the computer is powered-on after FRU
replacement, make sure all screws, springs, or other
small parts are in place and are not left loose inside
the computer. Verify this by shaking the computer
and listening for rattling sounds. Metallic parts or
metal flakes can cause electrical shorts.
.1/ Battery Pack
(To replace the backup battery, use a coin to open
the backup battery door on the bottom cover.
Reset configuration after replacing the backup
battery.)
.2/ Four Bottom Cover Screws (2-B, 2-W)
(At each corner)
.3/ Top Cover Assembly
.4/ One Bottom Cover Screw (X)
(At center)
.5/ LCD and Digitizer Cables
.6/ LCD Assembly and Shield Cover Assembly
.7/ Switch and LED Card
.8/ Four Shield Cover Screws (Z)
(At corners of shield cover)
Separate LCD assembly and shield cover
(Perform digitizer calibration if the LCD assembly is
replaced.)
.9/ Standby Battery
.1ð/ System Power Cable
.11/ Seven System Board Screws (Y)
.12/ System Board
(Remove the backup battery, sub battery, DC/DC
card and inverter card, and the hard disk drive from
304 IBM Mobile Systems HMM - Volume 1
 Loading...