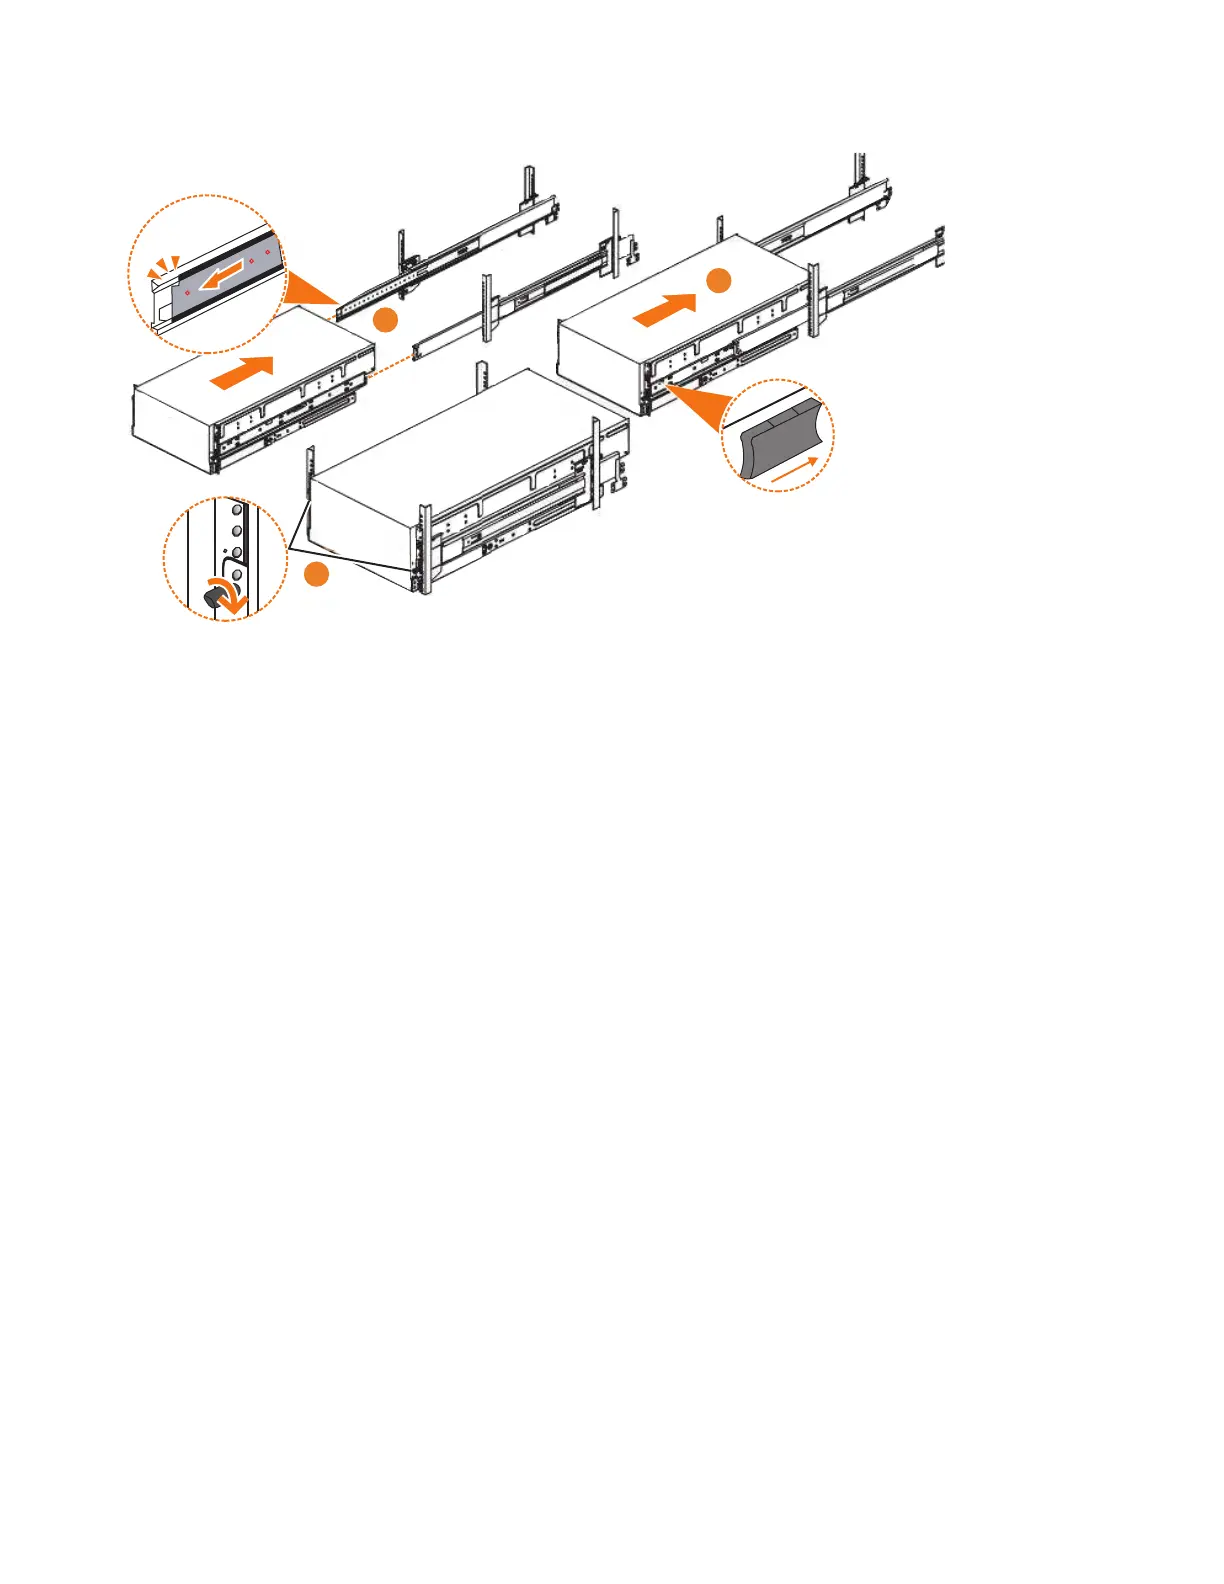
2. Ensure that the ball bearing retainer clicks into place inside the front of the left
and right drawer sections (▌2▐ in Figure 41).
Reinstalling parts into the enclosure
3. If you took the enclosure out of the rack, reinstall the following parts inside of
the enclosure, as described in the following topics. You can reinstall the parts in
any order.
v “Installing or replacing a drive: 2076-92F” on page 69
v “Installing or replacing a secondary expander module: 2076-92F” on page 74
Remember: The weight of the enclosure increases as more drives are installed.
4. Replace the top cover, as described in “Installing or replacing the top cover:
2076-92F” on page 68.
5. Reinstall the remaining enclosure parts, as described in the following topics.
You can reinstall the parts in any order.
v “Installing or replacing a power supply: 2076-92F” on page 79 and “Installing
or replacing the fascia: 2076-92F” on page 77
v “Installing or replacing an expansion canister: 2076-92F” on page 57 and
“Removing and installing a SAS cable: 2076-92F” on page 85
v “Installing or replacing a fan module: 2076-92F” on page 88
Sliding the enclosure into the rack
6. Locate the left and right blue release tabs near the front of the enclosure. Press
both release tabs forward to unlock the drawer mechanism (▌3▐ in Figure 41).
7. Push the enclosure firmly into the rack (▌4▐ in Figure 41).
8. Tighten the locking thumb screws (▌5▐ in Figure 41) to secure the enclosure in
the rack.
9. Reconnect power to the expansion enclosure.
Figure 41. Replacing the 2076-92F enclosure in the rack
56 Storwize V7000 Gen2 and Gen2+: Quick Installation Guide

 Loading...