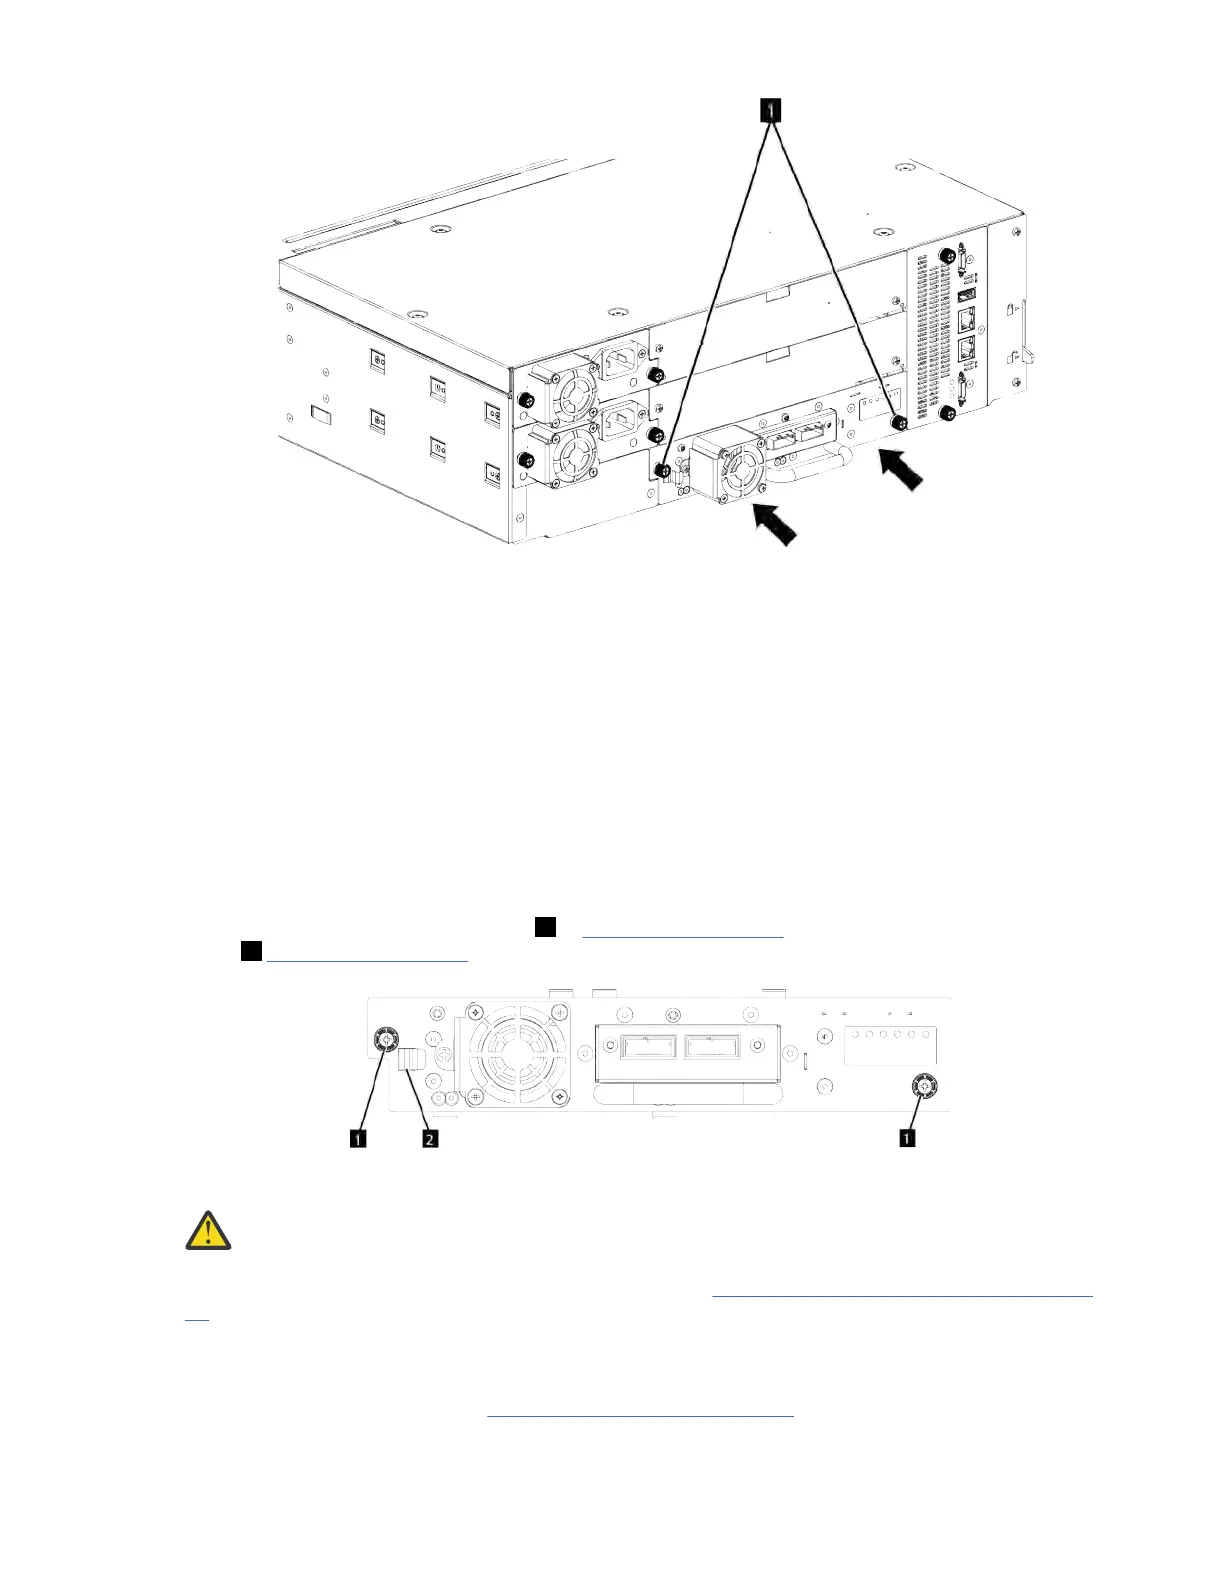
Figure 69. Installing a tape drive
4. Verify the drive operation. Check Library communication LED (10101) on sled is blinking green. At this
point drive should be ready on GUI.
5. Use one of the logical library wizards to add the drive to a logical library as needed.
Removing a tape drive
• Ensure that all host activity, including library operations are stopped to the drive that is being removed.
Exercise extra caution in case of a control path drive. Removing a control path drive will have severe
impact on the operation of logical library the drive was installed in.
• Ensure that the tape cartridge is removed from the tape drive. Use the Management GUI to move the
cartridge to a storage slot or I/O station.
• Remove the FC or SAS cables from the tape drive.
• Loosen the blue captive thumbscrews (1 in Figure 70 on page 153) on the tape drive. Press the lock
lever (2 Figure 70 on page 153) to the right and pull straight back on the tape drive handle while the
bottom of the drive is supported to remove it from the unit.
Figure 70. Unlocking the drive
Attention: Suppor
t the bottom of the tape drive when it is removed to avoid damaging any of the
internal connections.
• Execute Reset the list of known drives and modules. See “Locating Management functions” on page
79.
• Conrm that the driv
e is logically removed by checking the Operator Panel or Management GUI.
• If replacement drive is not available, install the drive bay cover.
• If you are replacing the drive, see “Adding a tape drive” on page 151
.
IBM Condential
Chapter 6. Upgrading and servicing153