112
INSTALLER
USERMAINTENANCE TECHNICIAN
TECHNICAL DATA
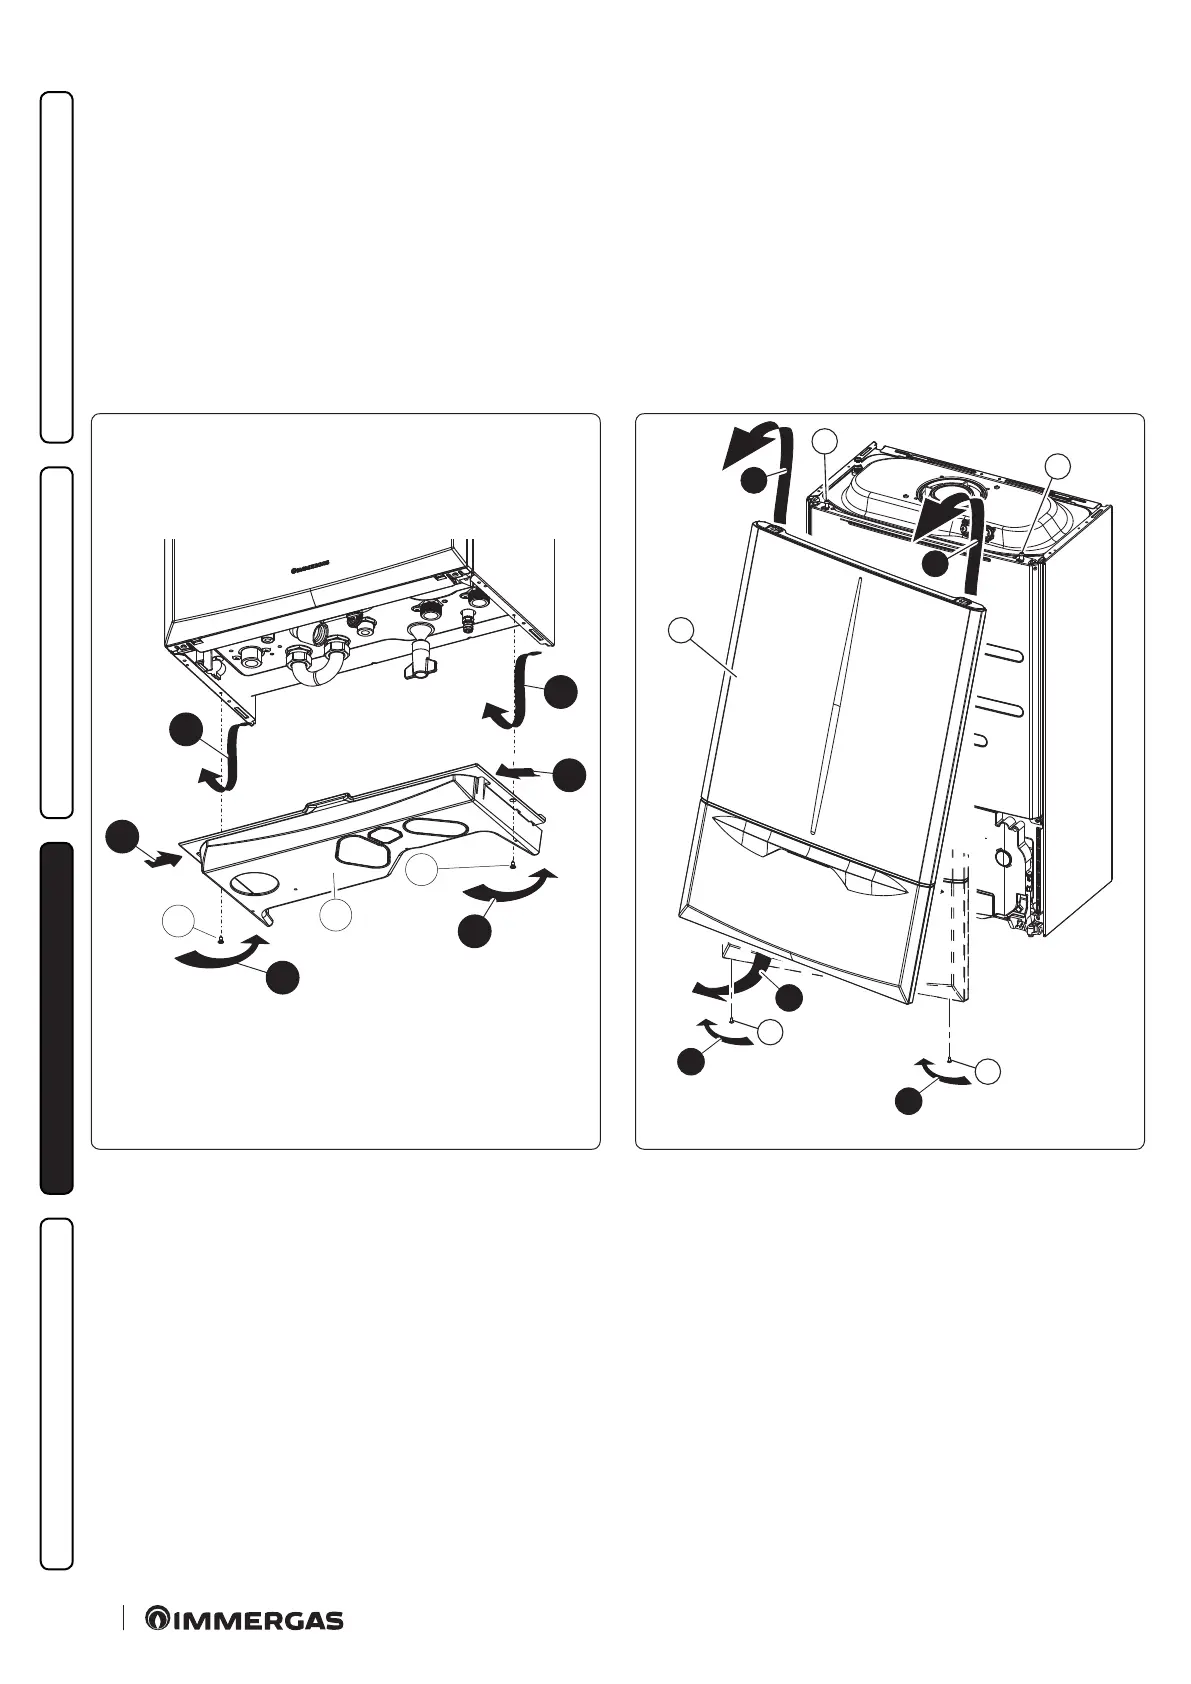
3.23 CASING REMOVAL
To facilitate appliance maintenance the casing can be completely removed as follows:
Lower grid (Fig. 83)
- Loosen the two screws (a);
- Press the hooks locking the lower grid (b) inwards.
- Remove the grid (b).
Front casing (Fig. 84)
- Loosen the screws (c).
- Pull the front casing (c) towards yourself from the bottom edge to release it from the control panel.
- Li the front casing and remove it from the upper pins (e).
1
a
1
a
2
2
3
3
b
83
3
3
c
c
b
2
a
1
a
84
Reassembling the front casing.
Follow the instructions below to reinstall the front casing:
- Insert the front into the upper pins (e).
- Bring it to the end stop against the control panel.
- Open the door and press around the user interface area, ensuring that it engages with the control panel.
- Close the door and tighten the screws (c).