Chapter 5
Setting-up Operation, Daily Operation
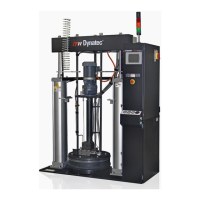
DM55 DynaDrum PP V6, Manual No.21-18, Rev.2.19 Page 41
17. Close clamshell and lock the drum in place using the clamp handles.
A fiber drum requires a full clamshell for operator safety.
Partial clamshells should only be used with steel drums.
Be sure that the drum of adhesive is held securely by the clamshell before
18. Switch the System ON by pressing the Control Switch On at the Touch Panel.
All activated zones start heating.
When temperatures are ready (System Ready), the platen can be lowered into the
drum.
• Before starting the production, keep the required heat-up phase of the adhesive
respectively of the Bulk Melter/platen, so that sufficient adhesive can be molten
and supplied to the Applicator.
• The unit is ready for operation, when all temperatures are within the tolerances.
19. Wh
en System is Ready, Switch the Up/Down-Switch (3) to Down.
20. Sw
itch the Auto/man-switch (2) to Man.
21. Remove the drip tray (optional).
22. To
move the platen down press both Left & Right-Confirm-Buttons (4) and the Purge
button (1) alternately and several times.
Repeat this procedure until no air and just adhesive comes out of the purge valve.
DO NOT leave the valve open during operation or material will flood the top of the
23. Press the Pumps button on the Main screen and go to the Pump Overview screen to
set
the pump mode to Auto (Manual, Stop or Automatic).
24. Adjust the air pressure for the Bulk Melter’s piston pump to obtain desired flow.
25. Switch the Auto/man-switch (2) to Auto.
26. Press both Left & Right-Confirm-Buttons (4) simultaneously.
The system is now ready for Auto Mode operation.
Monitor the controller to determine when to replace an empty drum.
After the first ten hours of operation, check all set screws, socket head and cap
screws for tightness.
See Chapter 7.7 Special Maintenance for PUR Applications.
 Loading...