Chapter 6
Controller V6 Touch
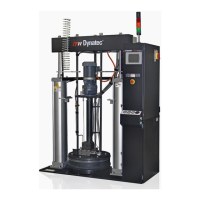
Page 52 DM55 DynaDrum PP V6, Manual No.21-18, Rev.2.19
Item Description
3
• The actual values of the temperature zones are displayed in columns under the icons. Zone
status is indicated by color: the zone field is colored green when the zone reaches set point,
yellow while the zone is heating up, grey it it has been temporarily switched off and red if in
alarm.
• When all zones have reached their set point values, READY will be displayed in the status
line. If zones are still heating up and have not yet reached their set point values, NOT
READY will be displayed in the status line.
• Under the Platen icon two temperature zones are displayed, one for platen
surface (1) and one for platen core (2); a cascaded PID-control controls the set point of the
core temperature; both zones have only one set point temperature.
4
The appropriate actual values (pump rpm, pressures) are displayed under the icons.
M1 will be displayed if Bulk Melter is operated with piston pump (option). In this case
the piston pump is controlled by pressure regulator.
Primary pressure: If the system is equipped with a (primary) pressure sensor, the
appropriate primary pressure transducer input will be displayed with number 1.
The primary pressure input can be controlled via the Pressure Set Point in Pump Control/
Pressure Control Screen.
Secondary pressure: If a second pressure sensor is equipped (usually in
combination with dual pump outlets), the appropriate pressure transducer input will be
displayed with number 2.
The secondary pressure input is just a readout function.
Pressure Discrepancy Alarm: If the display fields are highlighted red, it indicates
that the (optional) pressure discrepancy has detected an excessive difference between the
primary and secondary pressure. See point “Extended Pump Mode Settings Screen, Linear
Line Speed, Pressure Control” for further information.
5
• The purge valve is automatically activated 5 seconds later after the Air Inject is activated.
• By manually pressing purge valve button on the panel box the purge valve will be opened
and allow air/ adhesive to come out of the valve.
• If activated it is highlighted green.
6
• The Air Inject is automatically activated after pressing both Two-Hand-Control-Buttons (Left
& Right-Confirm-Buttons) for lifting the platen (in Auto mode and in manual mode) and it is
automatically deactivated when platen has reached top position. After starting air inject the
purge valve will be activated 5 seconds later.
• By manually pressing the air inject button, air will be injected into the drum.
• If activated it is highlighted green.
7
Fill Level Value Display
The fill level value of adhesive in the drum is displayed (estimated value).
8
This arrow flashes and indicates the platen is lifting.
This arrow flashes and indicates the platen is lowering.
9
By pressing Set, values may be displayed and edited. The display will automatically return to
actual values after about 15 seconds, if there is no display activity.
 Loading...