To install the device on a wall:
1. Place the device on a flat, level surface with the Juniper Networks logo, which is
embossed on the top cover, facing up. Ensure that the rubber feet are attached to the
bottom of the chassis.
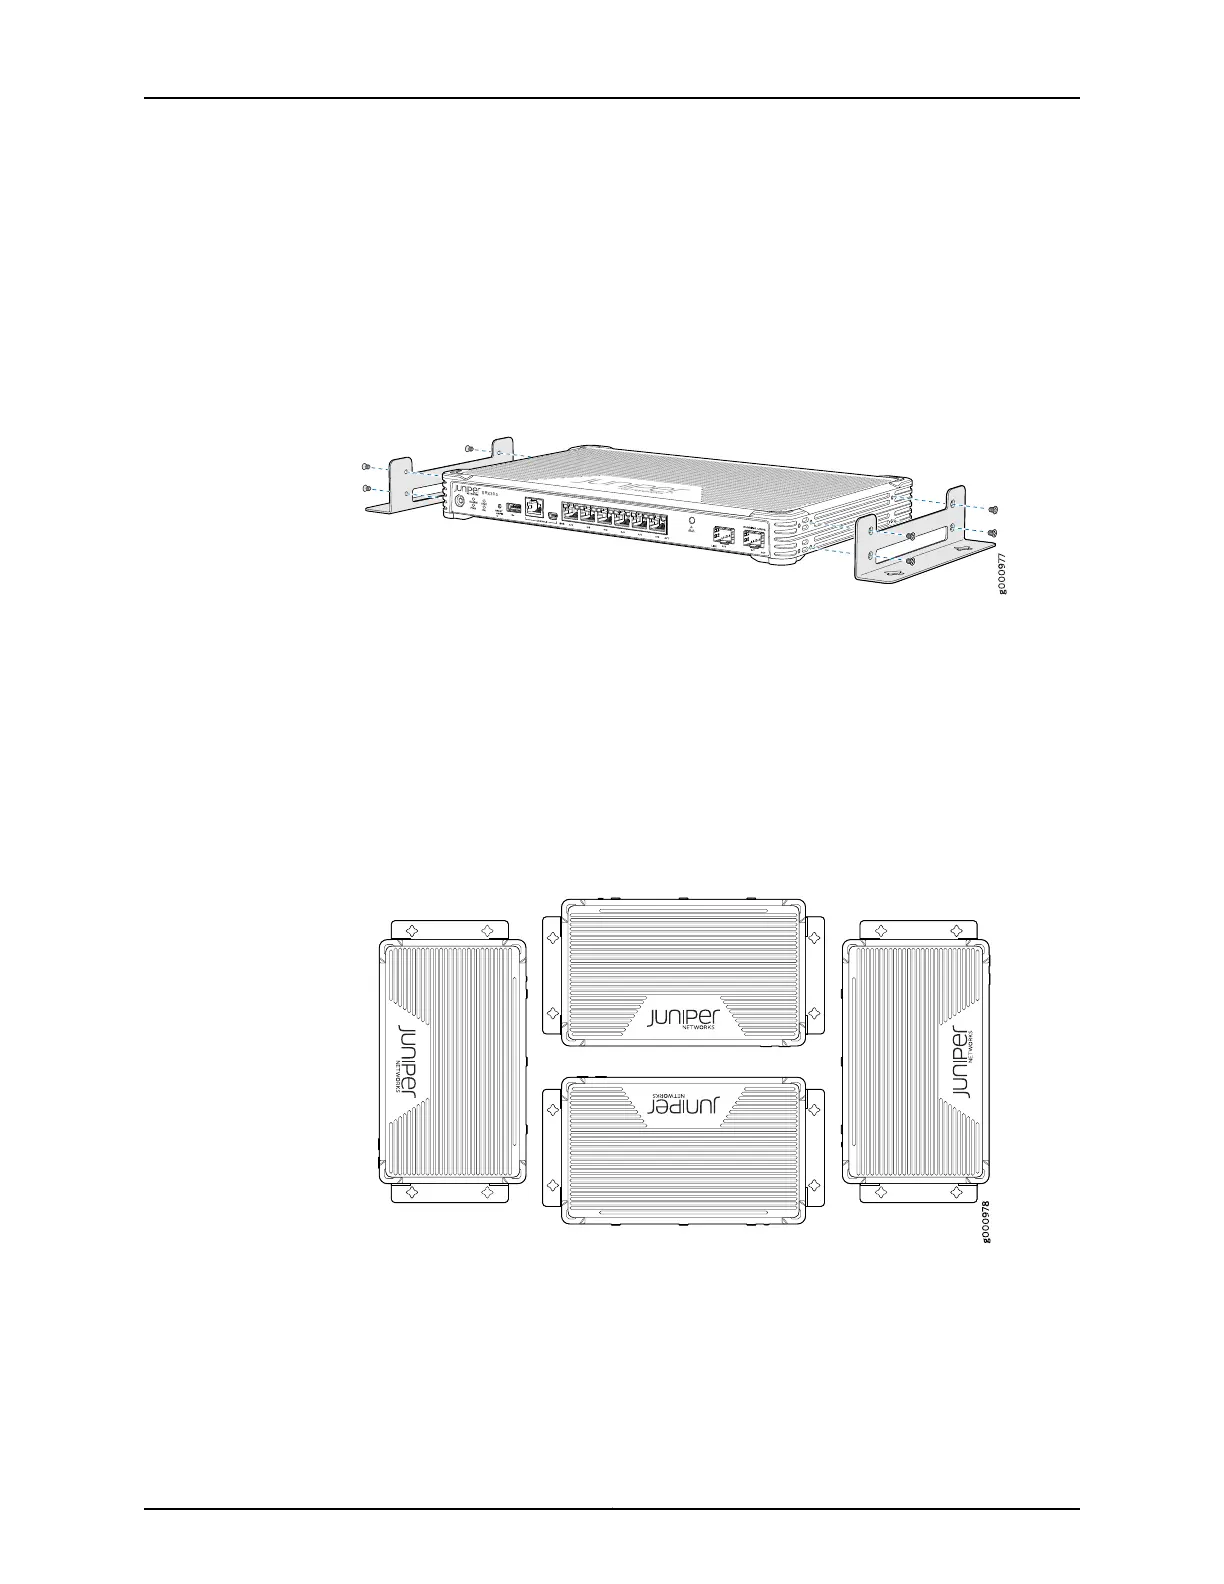
2. Position a mounting bracket on each side of the chassis as shown in
Figure 8 on page 46.
Figure 8: Attaching Wall-Mount Brackets
3. Use a number-1 Phillips screwdriver to install the screws that secure the mounting
brackets to the chassis.
4. If you are using wall anchors to support the chassis, install two pairs of anchors on
the wall with the mounting brackets attached.
5. Have one person grasp the sides of the device, lift it, and position it on the wall.
Figure 9 on page 46 shows the four different orientations in which you can mount the
services gateway on a wall.
Figure 9: Orienting the SRX300 Services Gateway on a Wall
6. Have a second person install two pairs of mounting screws through the bracket holes
on either side of the device to secure it to the wall.
7. Verify that the mounting screws on one side are aligned with the mounting screws on
the opposite side and that the device is level (see Figure 10 on page 47).
Copyright © 2016, Juniper Networks, Inc.46
SRX300 Services Gateway Hardware Guide

 Loading...


