August 2013 3-64 P/N 06-236530-001
3-2.5.2.4.44 How to Change a Networked Control Unit's Node Number
Purpose: To change a control unit's network-node-number
assignment.
CAUTION
Ensure that this procedure does not introduce a duplicate-node address. Also
check the system programming to ensure that all other control units in the
network reference the changed node number correctly. For example, if the node
number was changed from 2 to 3, be sure that all other control units in the
network that react to initiating signals from this control unit have this node
number changed from 2 to 3 in their event-output-control programs. See the
Configuration Program User’s Guide for event-output-control programming.
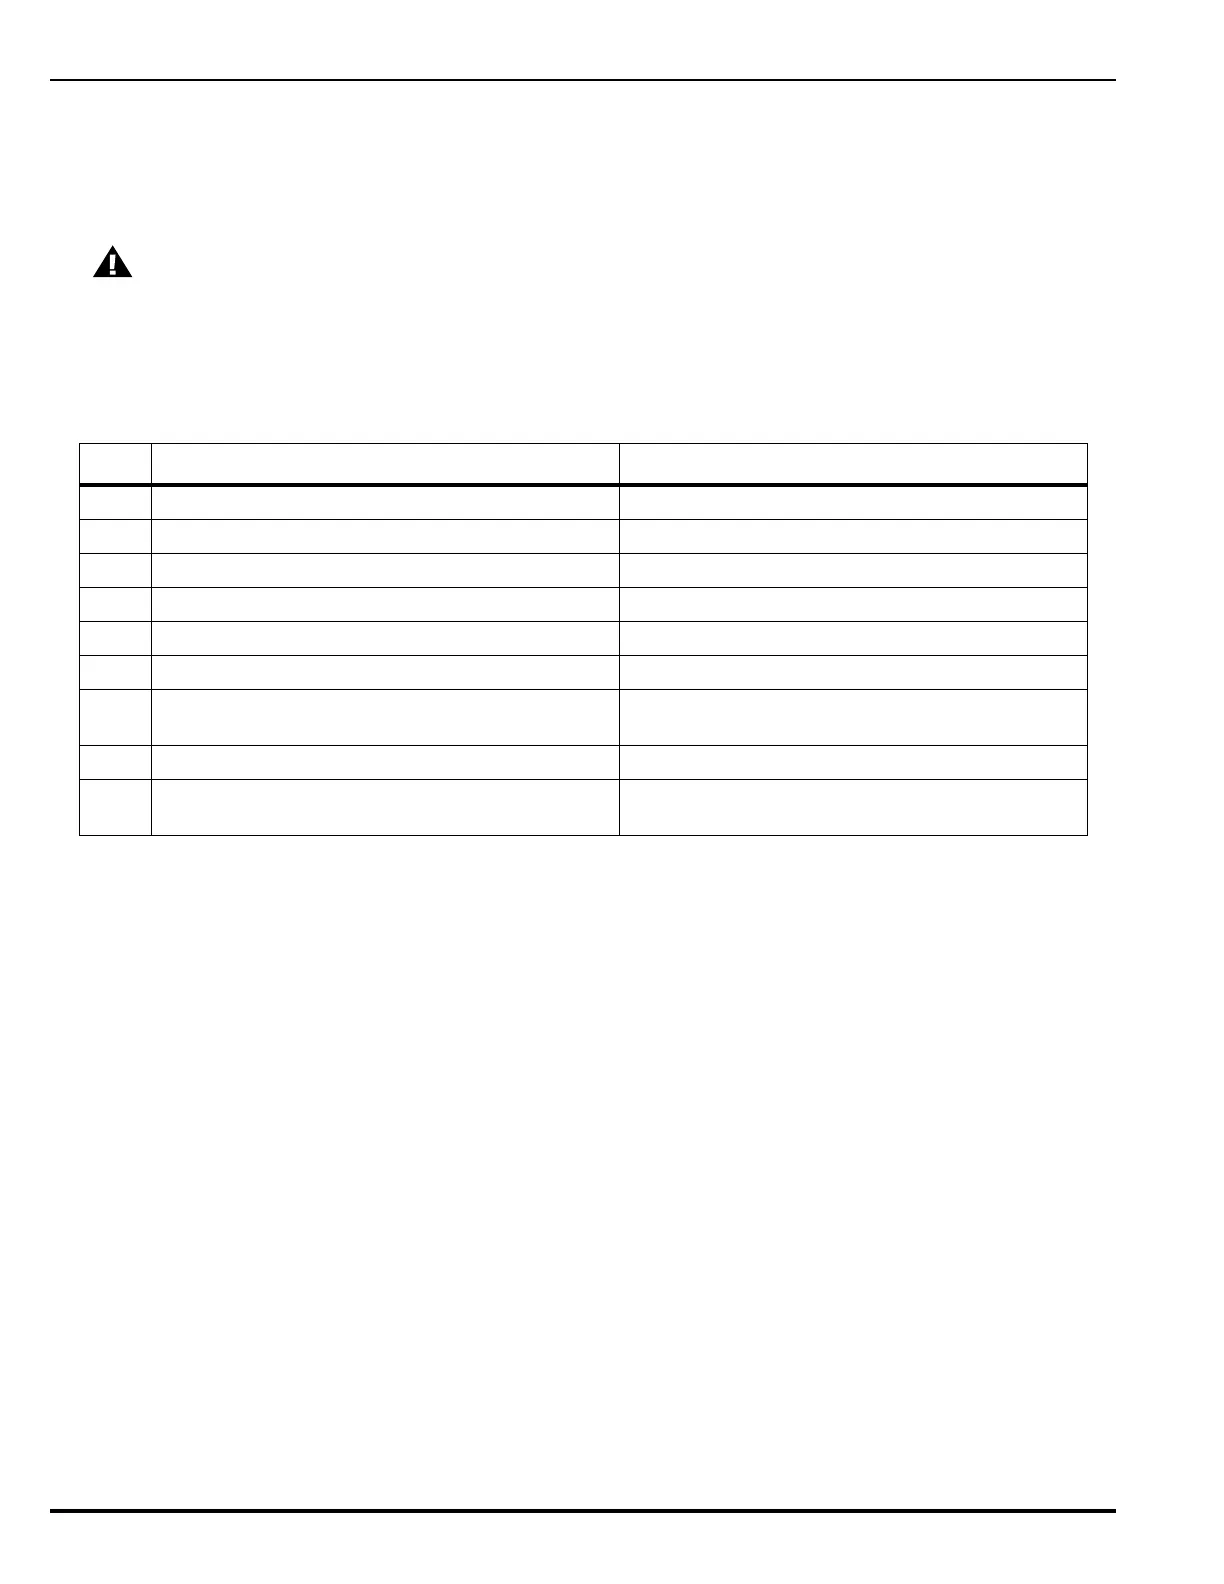
Step Action Result
1 Press 0 Key Initiate menu access
2 Enter Password Gain access to menus
3 Press 3 Key Enter Set-Menu branch
4 Press "Scroll" Key Access additional options
5 Press 6 Key Select "Network" option
6 Press 2 Key Select "Node Number"
7 Use keypad to enter new node number and press
"Enter" Key to confirm selection.
Specify new node number
8 Press "Backspace" Key (as required) Exit Menu System
9 Wait until "Initializing Configuration" message
disappears from the display.
Initialization complete