57
01/13424999386
7 Installation
Note: The compact control panel is only suitable for wall mounting.
The control panel must be located in a dry room in a clearly visible and accessible place can be installed.
No ceiling mounting or 180° rotated mounting.
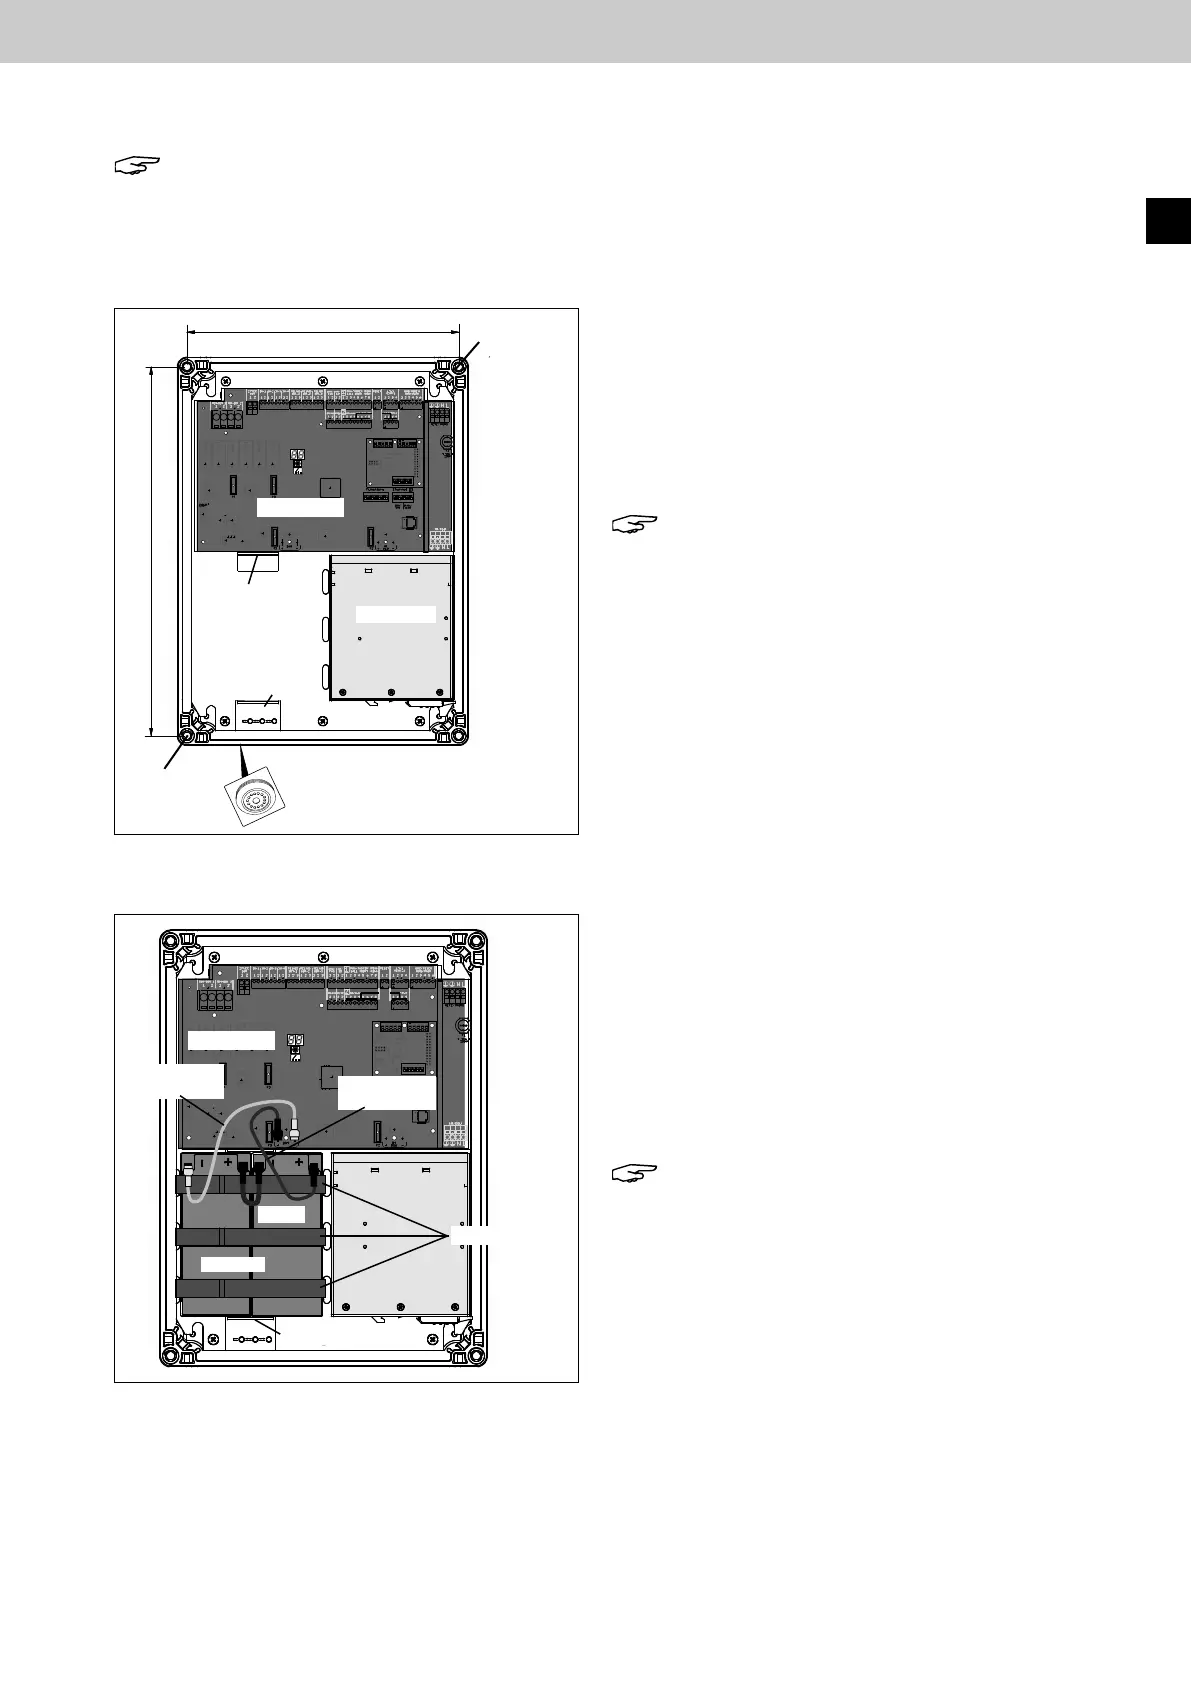
1. Wall mounting
► Break out cable entries at the top of the plastic housing
for cable glands.
Use the attachment points for the screwdriver at the
predetermined breaking points.
► Insert the ventilation plug on the underside of the
housing. Also break out the suitable cable entry here.
Note: The operation of the control panel without
Ventilation plugs can lead to malfunction and are
not permitted!
Always make sure that the ventilation plug is not
covered by the batteries!
► Fix the plastic housing of the compact control panel
with the specified mounting bores to the wall with
suitable dowels and screws.
2.Insertionandconnectionofthebatteries
► Using the 3 Velcro strips, install the batteries upright on
the underside of the compact control panel between the
positioning brackets and secure.
► Bridgeandconnectthebatteriesasshowninthegure.
► Connect the battery connecting lead to the control pcb
using blade connectors, paying attention to the correct
polarity of the batteries.
Note: The battery connecting leads are contained
in the accessories package.
Blue connecting lead (+), white connecting lead (-),
bridge (black).
Fig.: Insertion and connection of the batteries
Fig.: Dimensions of the mounting bores for wall mounting
Mounting
bores
Mounting
bores
Mounting plate
Positioning bracket
Positioning bracket
Ventilation plug
Control pcb
Power pack
3 x Velcro strips
Positioning bracket
Batteries
Control pcb
Connecting
lead white (-)
Connecting
lead blue (+)
Bridge
380
280
EasyConnect+
EN