5.8 Expansion module -2CAN-
Connector X6 of the SERVOSTAR is assigned to the signals for the RS232 interface and the CAN
interface. It is therefore not the standard pin assignment for these interfaces, and a special cable is
required to be able to use both interfaces simultaneously.
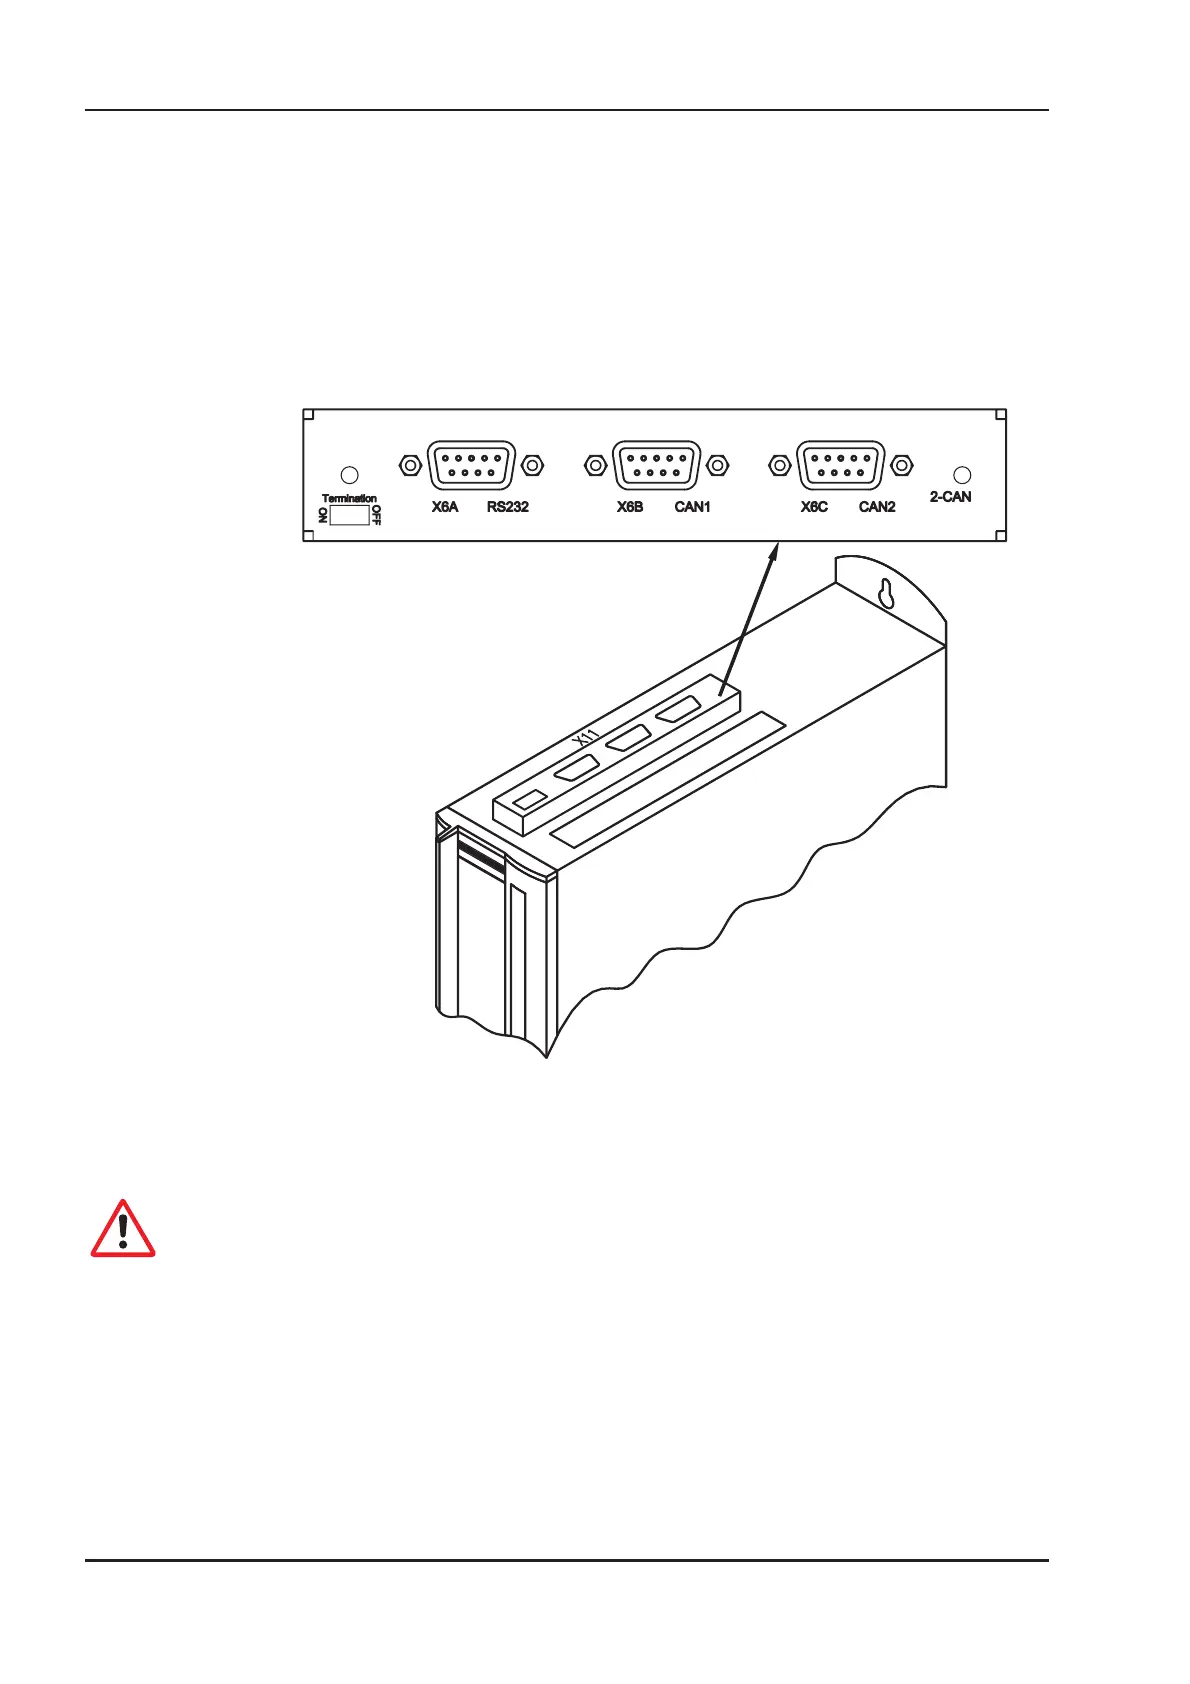
The -2CAN- expansion module provides the interfaces on separate Sub-D connectors. The two
CAN connectors are wired in parallel. A termination resistor (120 W) for the CAN bus can be swit
-
ched into circuit if the SERVOSTAR is at the end of the bus.
5.8.1 Position of the connectors
5.8.2 Fitting the expansion module
If you want to retrofit the -2CAN- expansion module into a SERVOSTAR 600, proceed as follows:
l
Use a suitable screwdriver to lever off the cover of the option slot.
l
Take care that no small items (such as screws) fall into the open option slot.
l
Screw the distance pieces into the fixing lugs of the option slot.
l
Place the expansion module onto the option slot.
l
Screw the screws into the threads of the distance pieces.
l
Plug the Sub-D9 socket into connector X6 on the SERVOSTAR
84 SERVOSTAR
®
601...620 Installation Manual
Extensions / Accessories 03/04 Kollmorgen
 Loading...