Step 1. Do the following according to the actual scenario.
If you are replacing a processor and reusing the heat sink:
1. Remove the processor identification label from the heat sink and replace it with the new label
that comes with the replacement processor.
2. Wipe off old thermal grease on the heat sink with an alcohol cleaning pad.
If you are replacing a heat sink and reusing the processor:
1. Remove the processor identification label from the old heat sink and place it on the new heat
sink in the same location.
Note: If you are unable to remove the label and place it on the new heat sink, or if the label is
damaged during transfer, write the processor serial number from the processor identification
label on the new heat sink in the same location as the label would be placed using a permanent
marker.
2. Wipe off old thermal grease on the processor with an alcohol cleaning pad.
3. Check whether the manufacturing date on the new heat sink exceeds two years.
• If yes, wipe off the thermal grease on the new heat sink with an alcohol cleaning pad, and go
to
Step 2 step 2 on page 114.
• If no, go to
Step 3 step 3 on page 114.
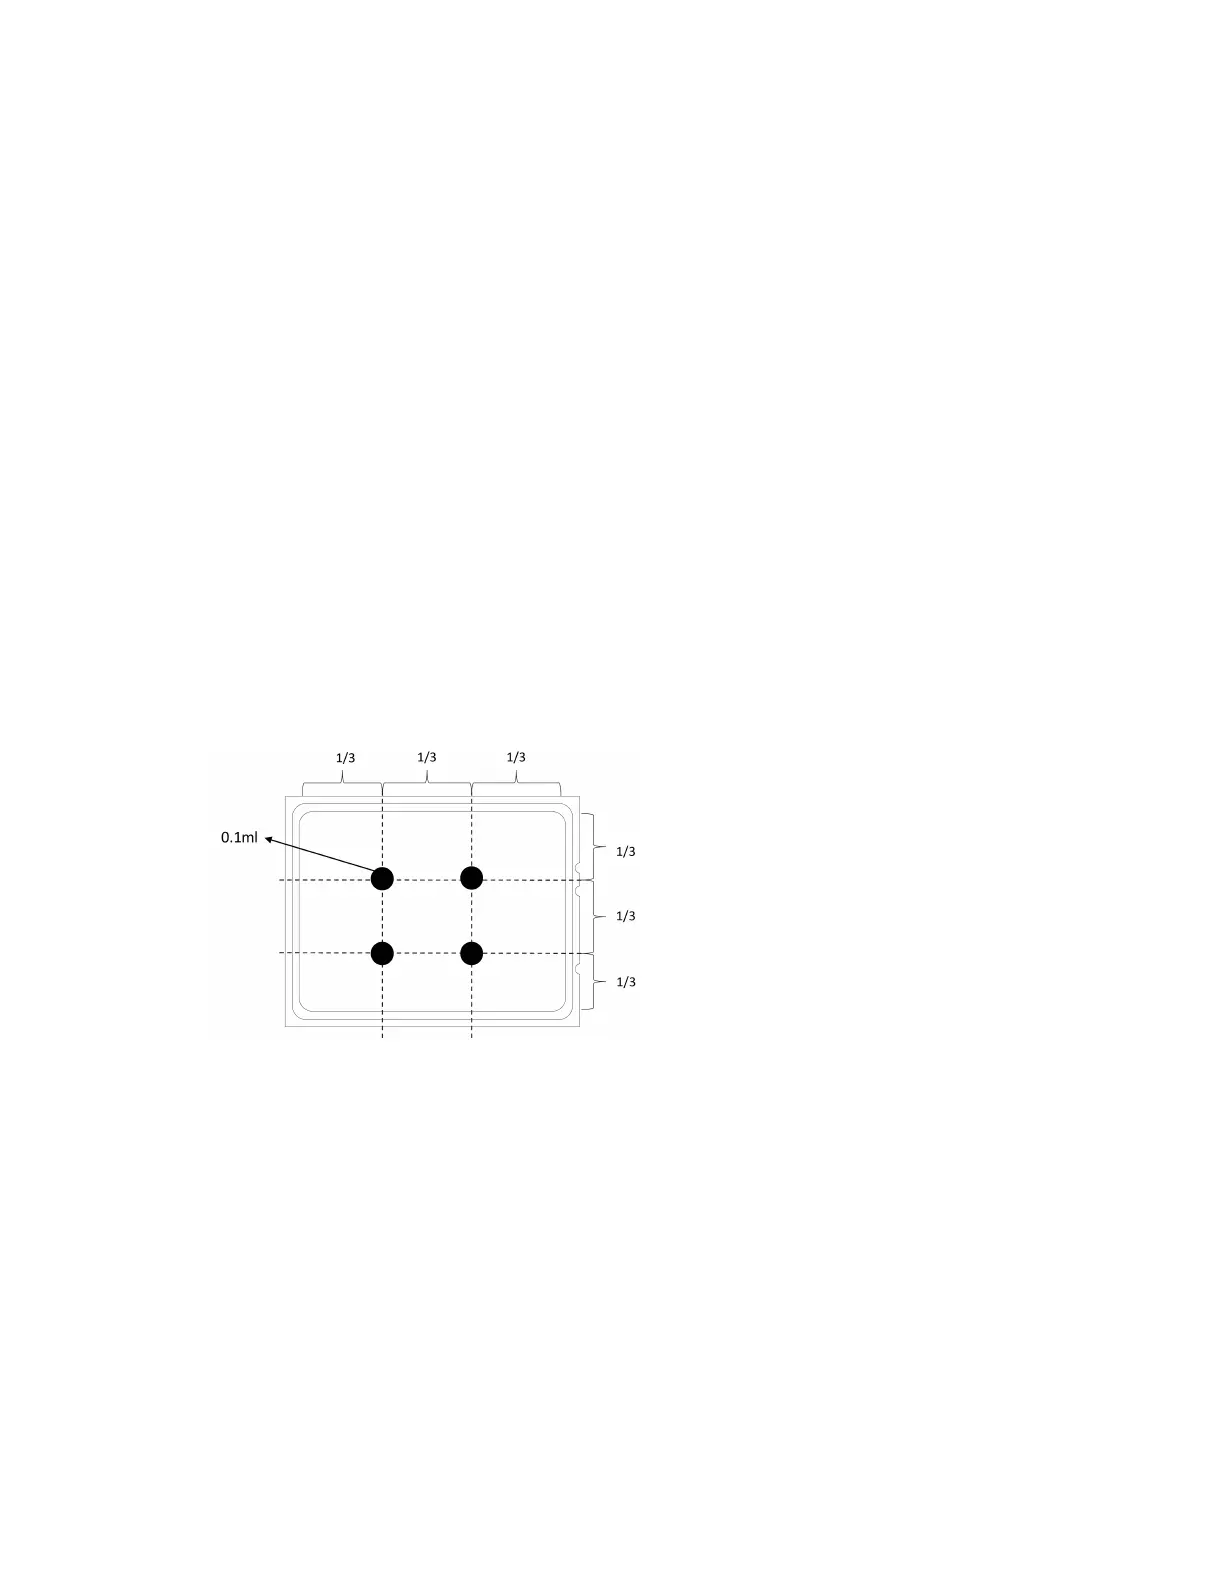
Step 2. Apply new thermal grease on the top of the processor with a syringe by forming four uniformly
spaced dots, while each dot consists of about 0.1 ml of thermal grease.
Figure 75. Applying thermal grease
Step 3. Install the heat sink.
Note: For reference, the torque required for the fasteners to fully tighten is 1.22-1.46 newton-
meters (10.8-13.0 inch-pounds).
114
ThinkSystem SR645 V3 User Guide

 Loading...


