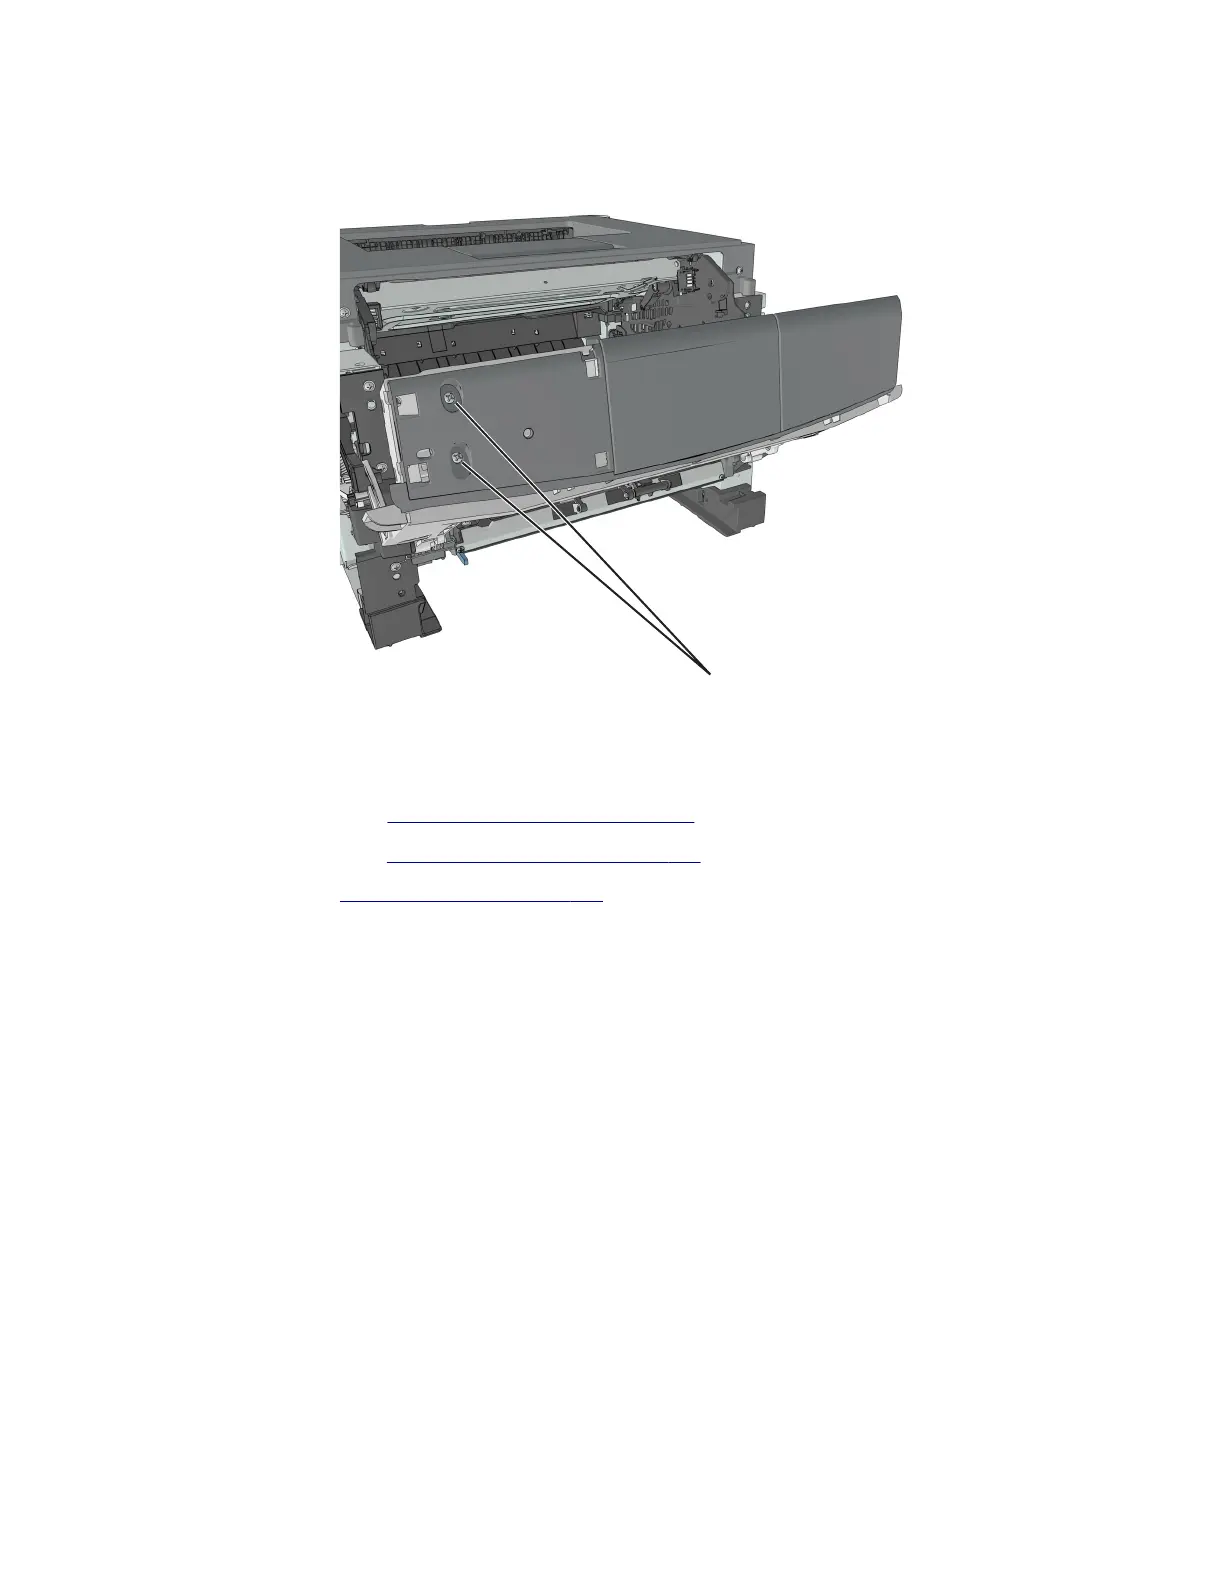
7 Remove the two screws (C) securing the control panel assembly.
C
8 Route all cables off the printer to completely remove the control panel assembly.
Control panel assembly removal (MS610de)
1
Remove the right cover. See “Right cover removal” on page 194.
2 Remove the nameplate. See “Nameplate removals” on page 216.
3 Remove the bezel. See “Bezel removals” on page 214.
4514-6xx
Repair information
220