Page 18 / 89 Section 4. Operation
Creating a connection in AUTOTAKE mode
Step 1. Press and release the selected destination button. The pressed destination button,
and the actually connected source button light up green. If no source is connected
(the output is muted) no source button will light up.
Step 2. Press and release the selected input button. The switch action will be executed
immediately. Switching between sources to the selected destination can be done
directly.
Info: If the pressed destination is locked then sources could not be selected. This is indicated by
a continuously light of the OUTPUT LOCK when a locked destination is pressed.
Deselecting or muting in AUTOTAKE mode
Step 1. Press and release the selected destination button. The pressed destination button,
and the actually connected source button are lighting green. If no source is
connected (the output is muted) no source button will light up.
Step 2. Press and release the active green lighting source button. The output is muted.
Info: Deselected destinations are disconnected from any source, thus output devices will display
black or blue image or "no signal" message and may automatically turn off.
Info: If the pressed destination is locked then sources could not be deselected. This is indicated
by a continuously light of the OUTPUT LOCK when a locked destination is pressed.
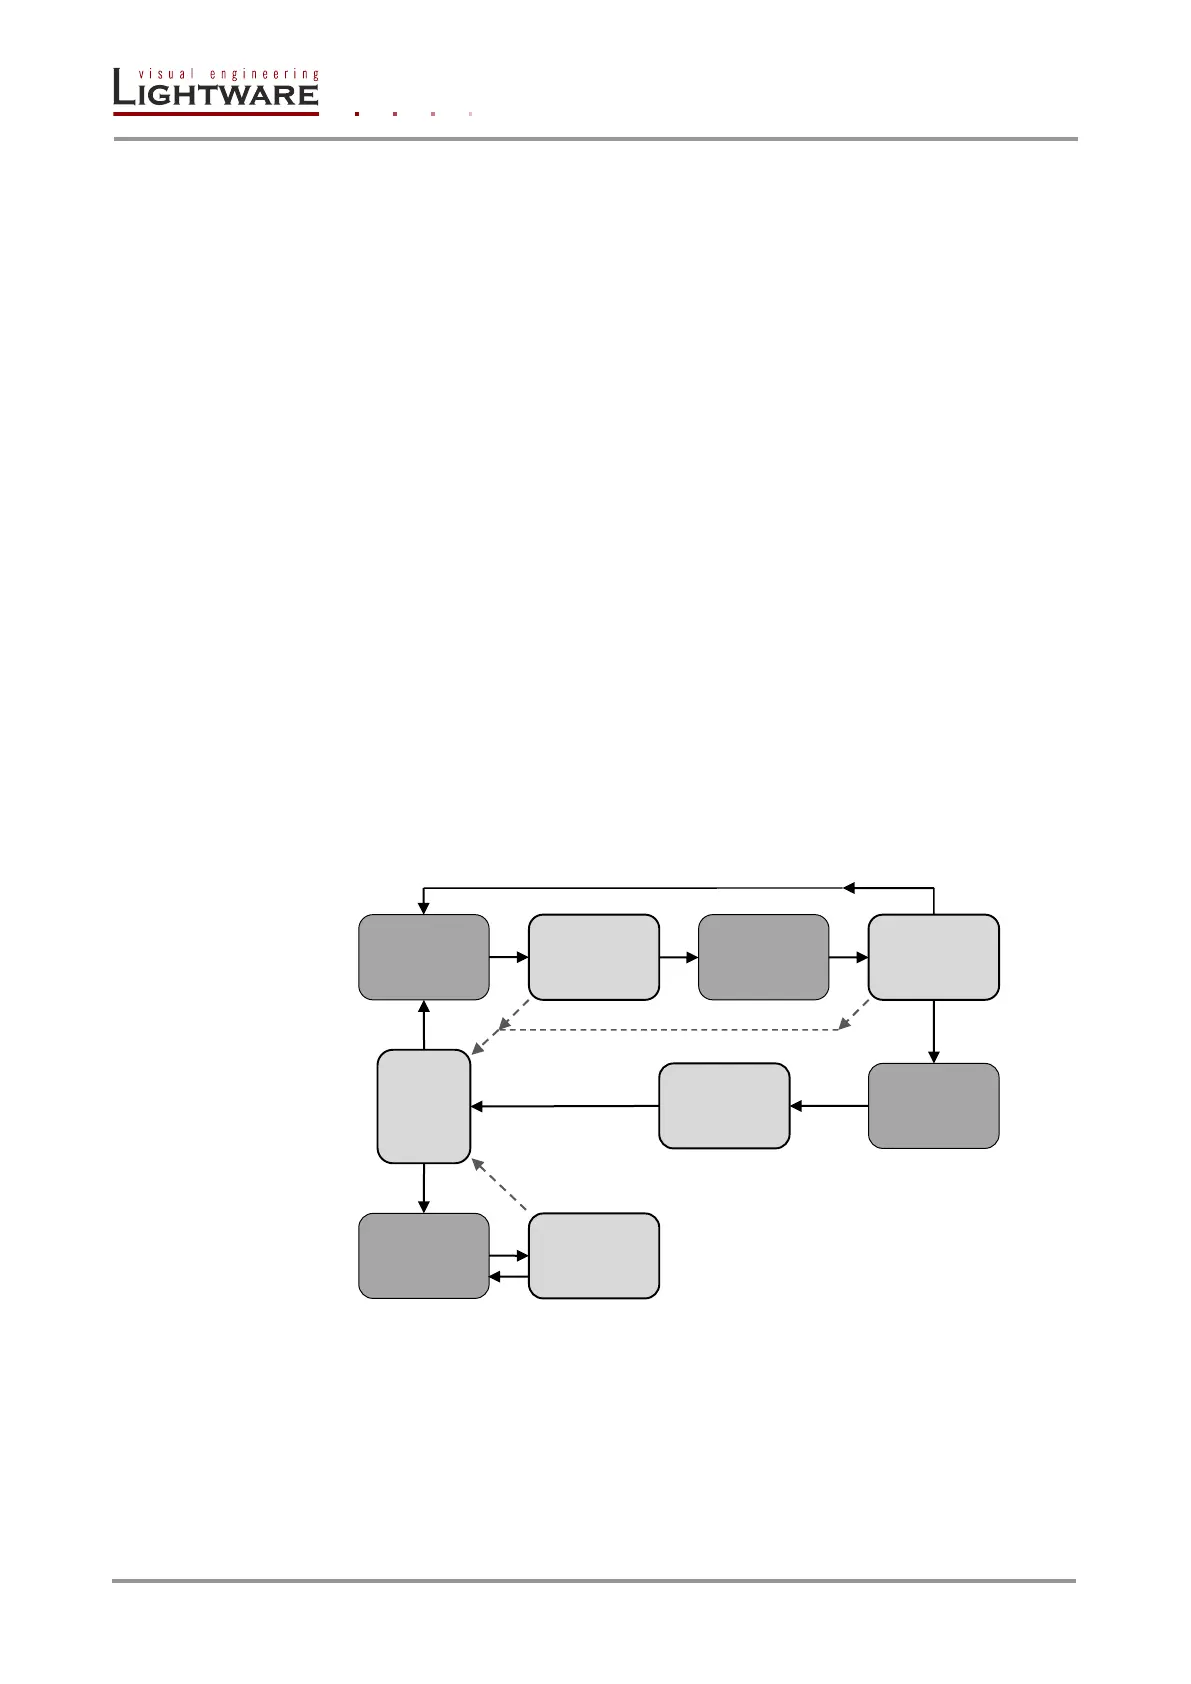
4.2.6. Switching operations flowchart
To better understand the viewing and switching sequence in TAKE and AUTOTAKE
modes, please study the below diagrams.
TAKE mode
Figure 4-1. Switching flowchart in TAKE mode
button
button
source
deselect
nothing pressed for 3 sec
button
viewing
destination
connection
nothing pressed for 3 sec
multiple connections can be made by a single TAKE action