Page 22 / 89 Section 4. Operation
4.3.3. Multiple simultaneous connections
The matrix allows simultaneous remote control over multiple interfaces. Web control,
Lightware Device Controller Software over Ethernet and Lightware Device Controller
Software with serial connections can be used at the same time.
4.3.4. Serial port settings
Standalone DVI-Plus matrices can be ordered with either RS-232 or RS-422
communication port. The port settings are done in the factory. D-SUB connector pin
assignments can be found in chapter 2.3.4 on page 13.
The device uses standard RS-232 or RS-422 interface with the following settings:
9600 Baud,
8 data bit,
1 stop bit,
No parity,
Straight serial cable.
4.3.5. IP settings
The Ethernet port can be configured remotely through Lightware Device Controller
Software or the built-in website.
The factory default IP settings or DHCP mode can be activated quickly through front panel
shortcut buttons. To reset the IP configuration perform the following:
Resetting the IP address
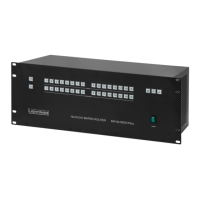
Reset to factory default IP configuration or to DHCP mode with front panel buttons.
Step 1. Switch the router to TAKE mode if used previously in AUTOTAKE mode by pressing
TAKE button for 3 seconds (light will go off).
Step 2. Press and release Control Lock button (it lights in up red continuously).
Step 3. Press and keep pressed the Output Lock button (the current protocol indication will
light up).
Step 4. Press and release the
a) Load Preset button to set the factory default IP settings
IP address: 192.168.254.254
port number: 10001
subnet mask: 255.255.0.0
gateway: 0.0.0.0
b) Save Preset button to set DHCP enabled
IP address: Acquired with DHCP
port number: unchanged
subnet mask: Get from DHCP server
gateway: Get from DHCP server
Step 5. A light sequence will occur to confirm the command. (Take/Auto, Load Preset and
Save Preset buttons will light up one after the other)
Step 6. Reinsert the LAN cable to the Ethernet port if it was unplugged.
Step 7. Wait about 20 seconds before connecting the router via Ethernet.
 Loading...
