- 36 -
Starting up HandyTIG 180 DC BasicPlus
10.15
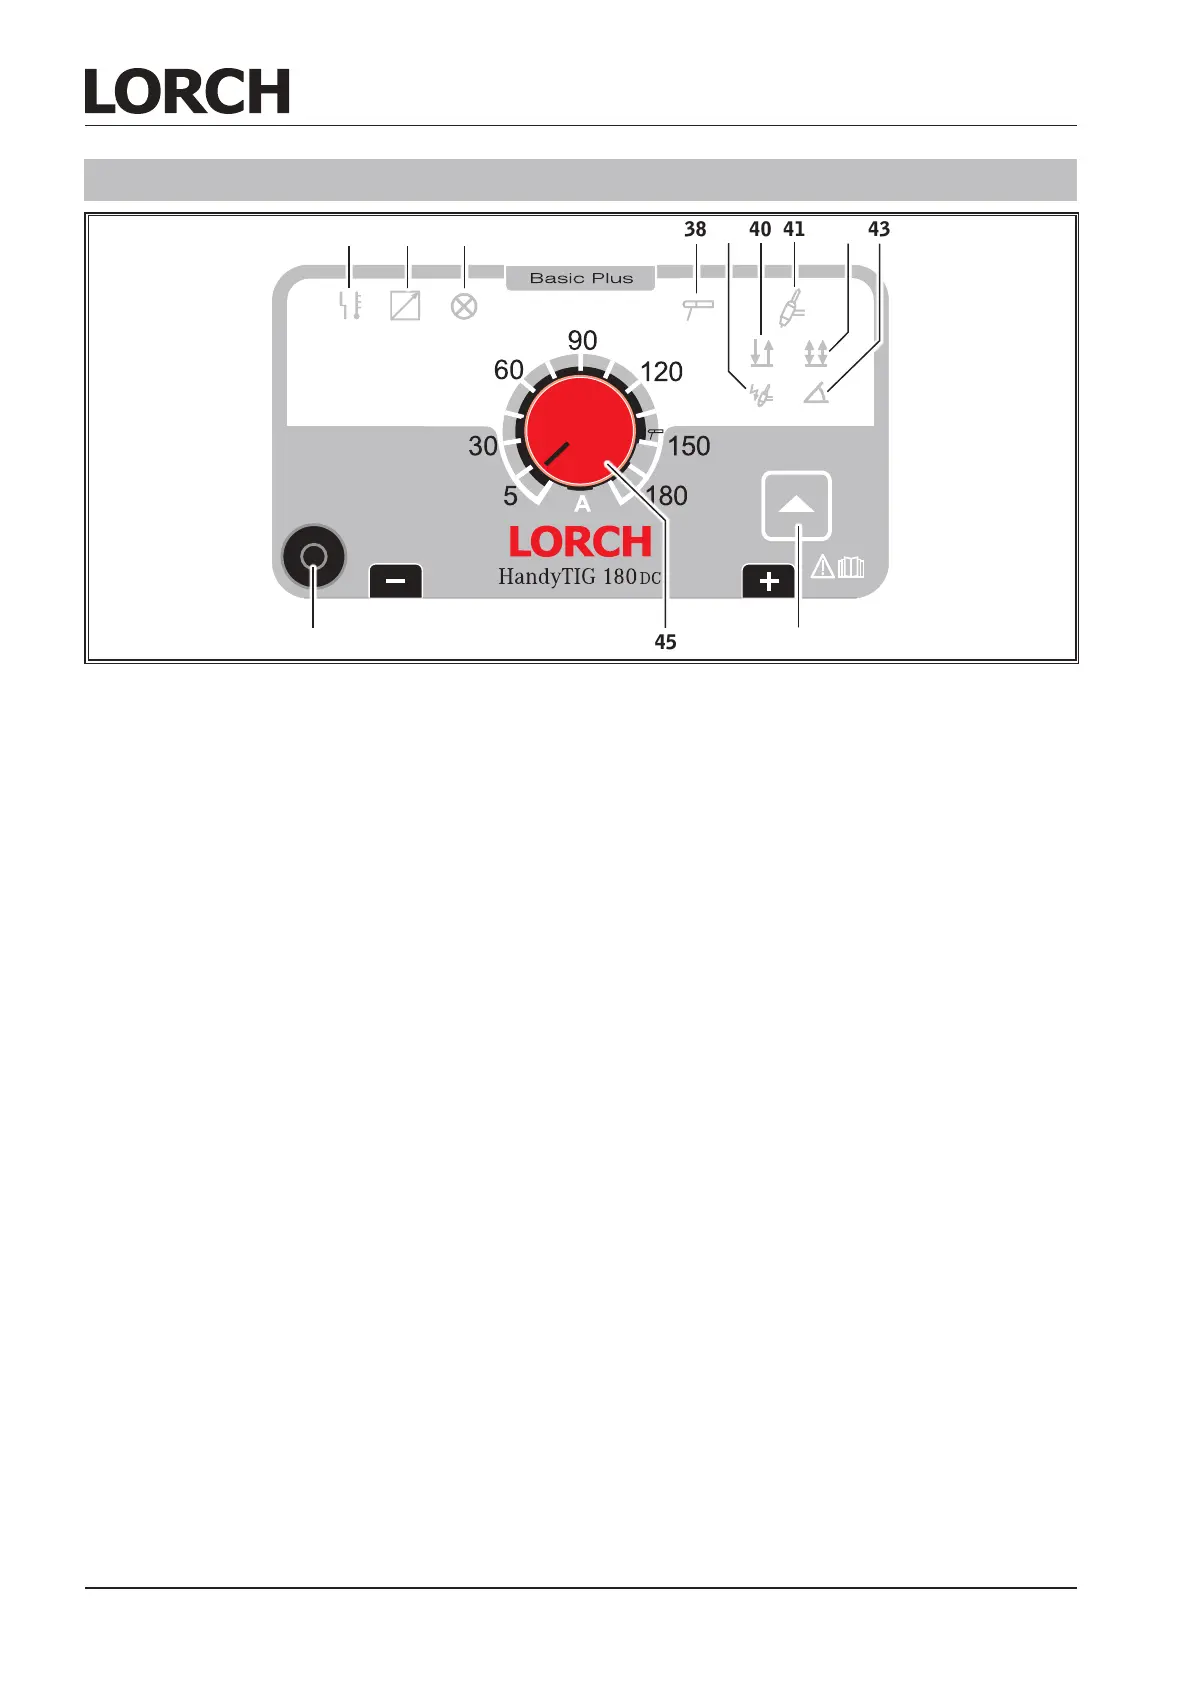
9 Torch control socket
plug the torch control plug into this socket.
35 LED malfunction
is lit constantly when the machine is over-
heated, LED ashes in case of a malfunction.
Ignition of an arc is not possible.
The LED ashes in a self-test mode directly
after switching on the machine.
36 LED Remote
Hand remote connected:
LED lights up permanently, turning knob welding
current 45 without function, adjustment only pos-
sible at hand remote control.
Foot remote connected: LED lights up by activa-
tion of foot remote, turning knob 45 predenes
the maximum value for the adjustment range of
the foot remote. If i.e. 100A are set,
5A – 100A can be recalled with the foot remote.
37 LED mains
is lit when the machine is operational.
38 LED MMA mode
is lit when MMA mode is selected.
39 LED HF
s lit when the HF function is activated, for con-
tactless ignition.
40 LED 2-stroke
is lit when 2-stroke mode is selected (only in
TIG mode)
press torch button = arc is ignitted
release torch button = arc goes out
41 LED TIG
is lit when TIG mode is selected.
42 LED 4-stroke
is lit when 4-stroke mode is selected (only in
TIG mode).
press torch button = ignition current ows
release torch button = welding current ows
press torch button = end current ows
release torch button = arc goes out
43 LED slope
is lit when function slope is activated.
2-stroke - at the start of the weling process the
machine rises the current from ignition current
to the selected welding current (upslope). At
the end of the welding process the machine
decreases the current from welding current to
min. current (downslope).
4-stroke - at the start of the weling process the
machine rises the current from start current to
the selected welding current (upslope). At the
end of the welding process the machine de-
creases the current from welding current to end
current (downslope).
44 Mode key
is used to select the different modes/functions.
45 Knob welding current
is used to set the desired welding current.
15 Starting up HandyTIG 180 DC BasicPlus
4335 36 37 38 40 41 42
9 45 44
39
Abb. 17: Control console 180 DC BasicPlus
 Loading...