In the first 1000 kilometers (5 months) and every
4000 kilometers (20 months) thereafter, inspections
should be carried out.
Clean and lubricate every 1000 kilometers.
Visually inspect the drive chain to see if it has the
following damages.
Check item:
1. Loosened pins
2. Roller damage
3. Chain link corrosion
4. Twisted or seized link
5. Over worn
6. Knotted or bent link
If a defect is found, the drive chain must be
replaced.
Note:
Standard transmission chain is: 428H or 428UO.
Our company recommends using this standard
transmission drive chain as a replacement part.
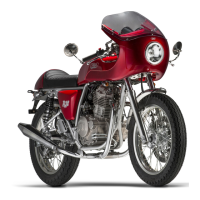
Inspect and adjust
Loosen the nut ④ and the rear axle ①.
Turn the chain adjuster nut ② to fully tension the
drive chain. As shown in Fig. 2.2.23
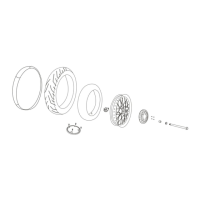
Count the 21 pins (20 links) on the chain and measure the
distance between the two points.If the distance exceeds the
use limit, the chain must be replaced.
Chain 20 links:259mm As in Fig.2.2.24
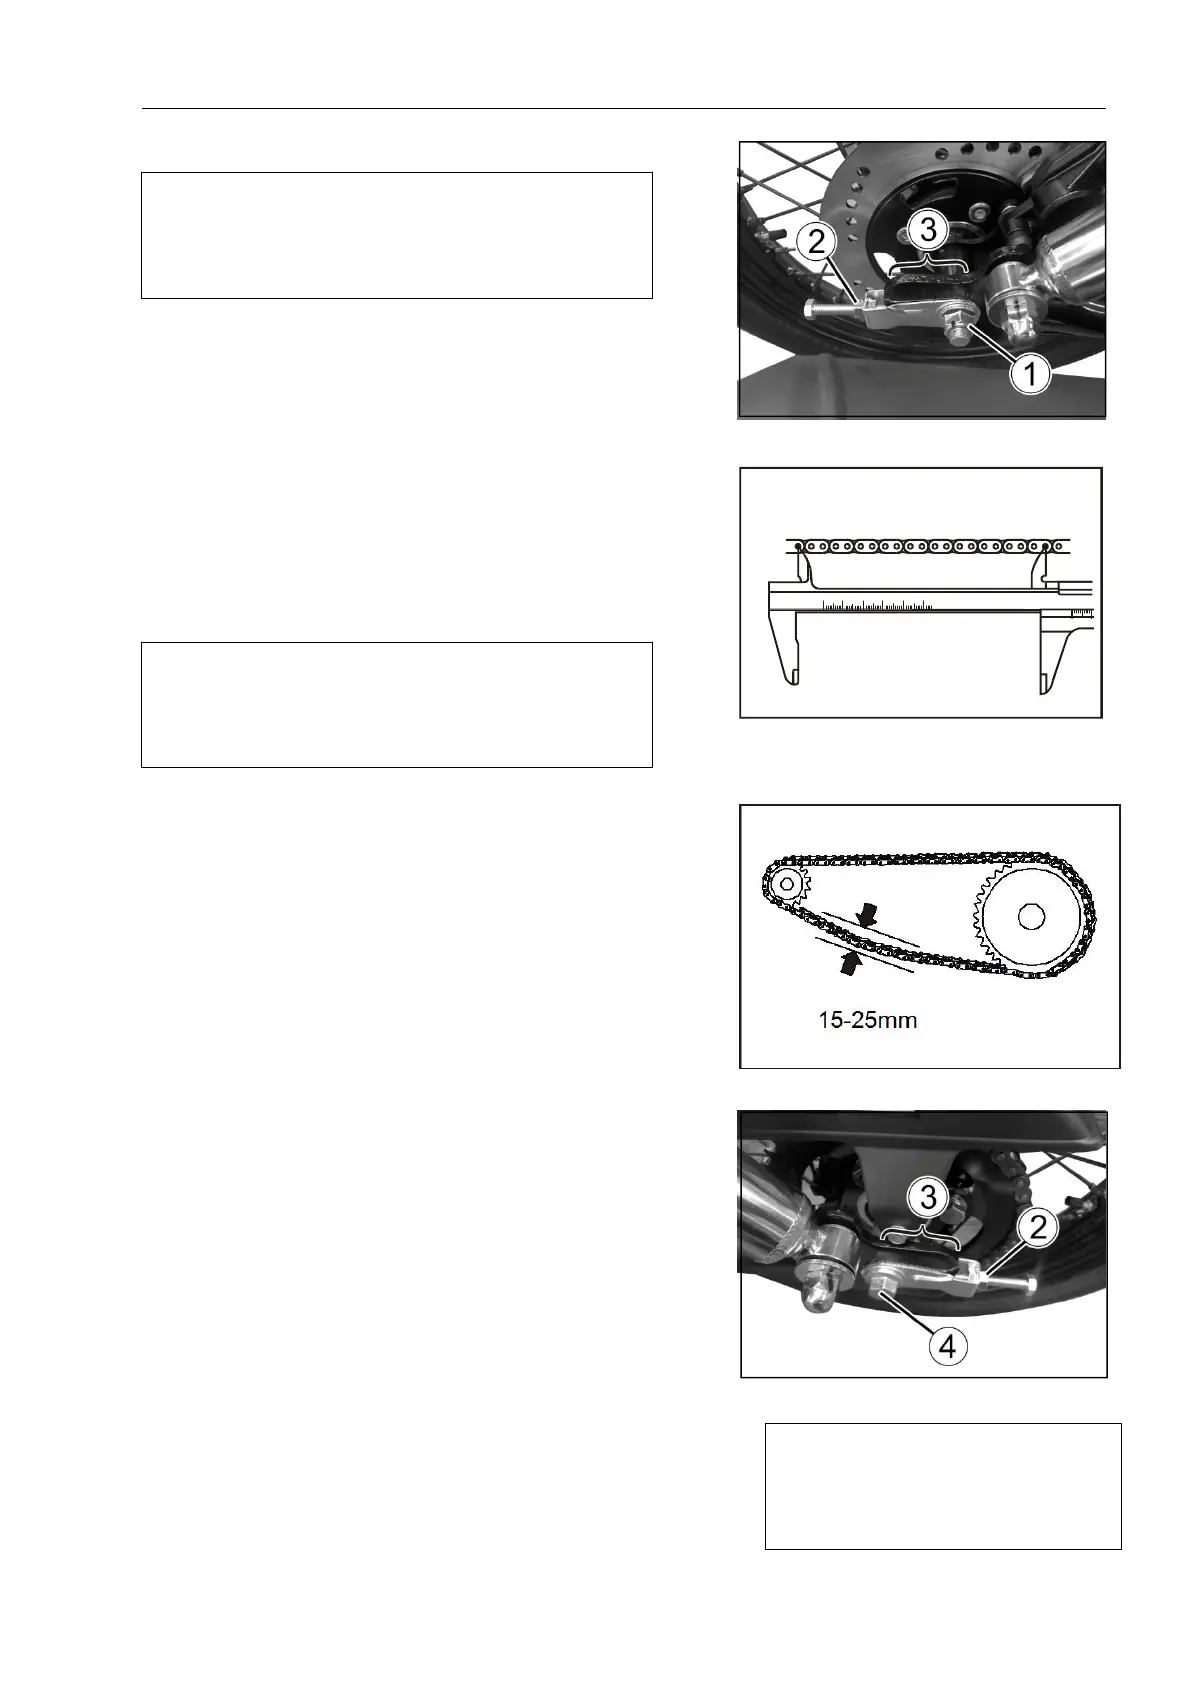
Support the motorcycle well with the side bracket.
Loosen the two chain adjuster nuts ② until the chain
slack in the center of the chain between the engine and the
rear sprocket is 15-25 mm, as shown in the figure.
The reference mark ③ must be at the same position on
the scale and the left and right scales must be at the same
scale position to ensure that the front and rear wheels can
be aligned correctly
Chain tightness:15-25mm As in Fig.2.2.25.
After adjusting the chain, tighten the rear axle nut
④.Fig.2.2.26
Rear axle nut: 78N.m(7.8kg.m)
After tightening the rear axle nut ④, recheck the
tightness of the chain, and readjust if necessary.
Tighten the two-chain adjuster nut firmly ②.