132
Controls in detail
Seats
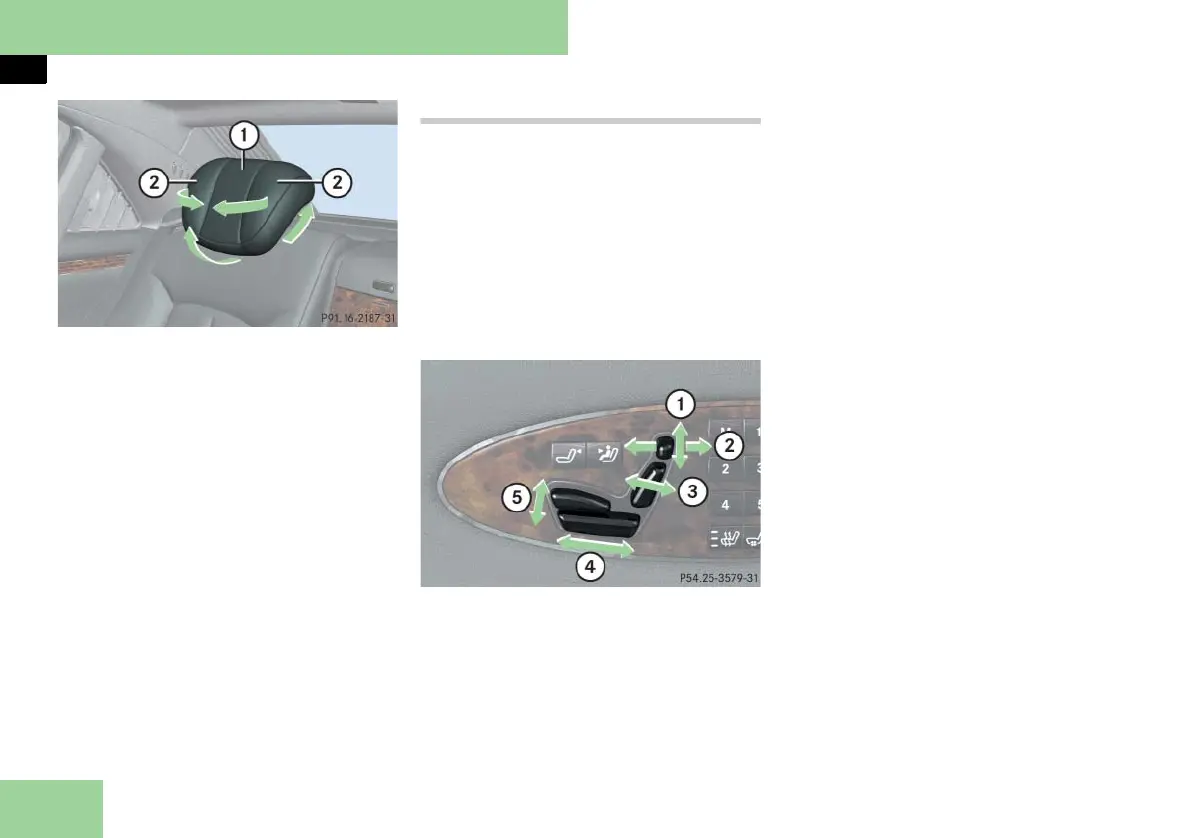
Maybach 62
1 Head restraints
2 Head restraint side cushions
왘 Adjust the side cushions of the head
restraints by hand.
왘 In addition to adjusting the head re-
straint tilt using the corresponding
power control on the rear door con-
trol panel, the angle of the head re-
straint can also be adjusted manually.
Push or pull on the lower edge of the
head restraint cushion.
i Adjust the head restraint in such a way
that it is as close to the head as possible.
Rear seat adjustment (Maybach 57)
i To adjust settings for the right rear pas-
senger seat, make sure the right rear passen-
ger seat adjustment button is selected
(컄 page 135).
i The memory function (컄 page 140) lets
you store settings for the seat positions.
i The rear center seat* cannot be adjusted.
! When moving the seat, make sure there
are no items in the footwell or behind the
seats. Otherwise you could damage the seats.
1 Head restraint height
2 Head restraint tilt
3 Seat backrest tilt
4 Seat fore and aft adjustment
5 Seat cushion tilt
왘 Switch on the ignition (컄 page 60).
or
왘 Open the respective door.
Head restraint height
왘 Press switch up or down in direction
of arrow 1.
Head restraint tilt
왘 Press switch forward or backward in
direction of arrow 2.
Seat backrest tilt
왘 Press switch forward or backward in
direction of arrow 3 until your arms
are slightly angled when holding the
steering wheel.
i Tilt the seat backrest to the rear for easier
removal and installation of the head re-
straints.
i The functions for adjusting backrest tilt
and seat fore and aft are linked functions.
When the seat is adjusted fore and aft, the
backrest tilt is adjusted simultaneously, and
vice versa.
Seat fore and aft adjustment
왘 Press switch forward or backward in
direction of arrow 4.
Seat cushion tilt
왘 Press switch up or down in direction
of arrow 5 until your upper legs are
lightly supported.