409
Practical hints
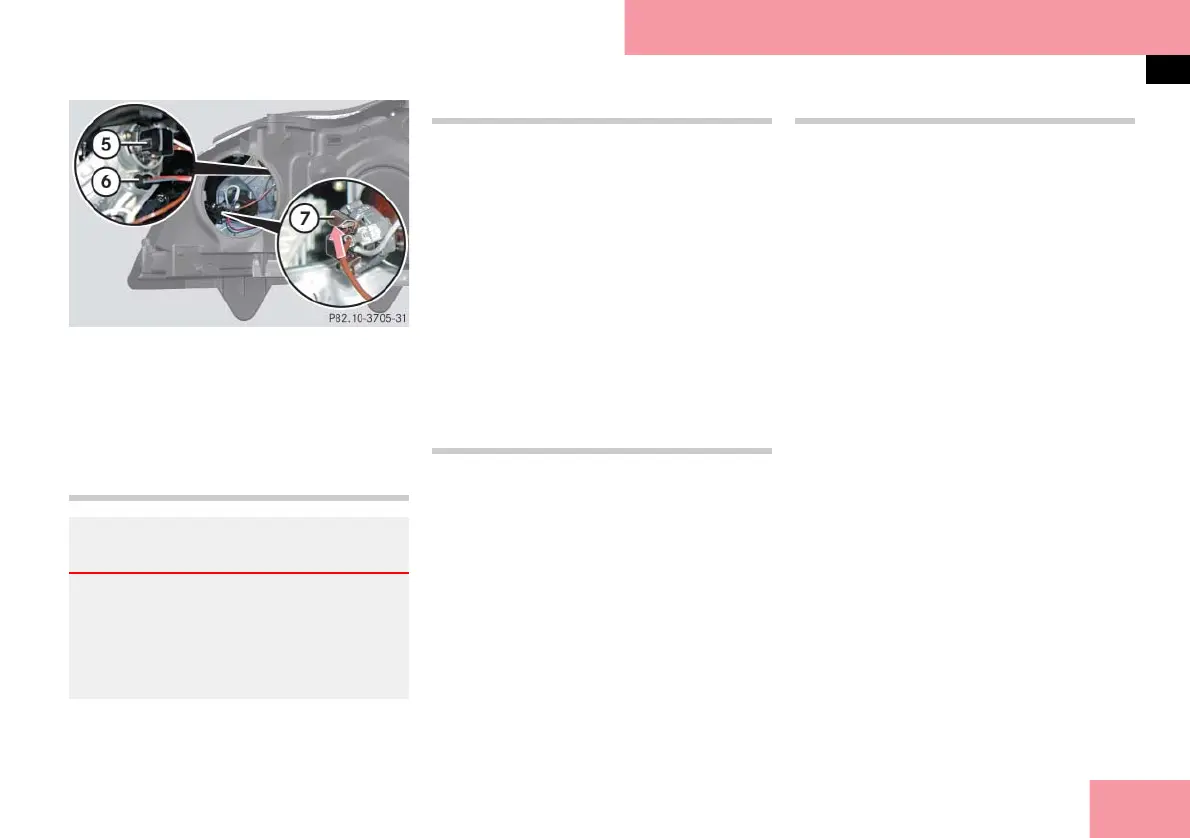
Replacing bulbs
5 Bulb socket for high beam flasher
bulb
6 Bulb socket for parking and standing
lamp
7 Bulb socket for corner-illuminating
lamp
Low beam and high beam bulbs
High beam flasher bulbs
왘 Twist housing cover 1 (컄 page 408)
counterclockwise and pull out.
왘 Twist bulb socket 5 counterclock-
wise and pull out.
왘 Push bulb into socket, turn counter-
clockwise and remove.
왘 Insert new bulb in socket, push in and
twist clockwise.
왘 Reinsert bulb socket 5 in lamp and
twist clockwise.
왘 Align housing cover 1 and twist
clockwise.
Parking and standing lamp bulb
왘 Twist housing cover 1 (컄 page 408)
counterclockwise and pull out.
왘 Pull out bulb socket 6 with the bulb.
왘 Pull the bulb out of the bulb
socket 6.
왘 Insert a new bulb in the socket.
왘 Reinstall bulb socket 6.
왘 Align housing cover 1 and twist
clockwise.
Corner-illuminating lamps
왘 Twist housing cover 1 (컄 page 408)
counterclockwise and pull out.
왘 Press bulb holder for corner-illumi-
nating lamp 7 (
컄 page 409) upward
and to the left in direction of arrow.
왘 The bulb holder disengages.
왘 Remove bulb from lamp and pull
white cable out of black cable con-
nector.
왘 Insert cable of new bulb into black ca-
ble connector.
왘 Insert new bulb into lamp and en-
gage bulb holder for corner-illumi-
nating lamp 7 into position.
왘 Align housing cover 1 and twist
clockwise.
Warning! G
Do not remove the cover for the Bi-Xenon
headlamp. Because of high voltage in Xe-
non lamps, it is dangerous to replace the
bulb or repair the lamp and its compo-
nents. We recommend that you have such
work done by a qualified technician.