Version 1.10 Page 111 of 203
4.4.3 OPTOJUMP HW TEST
In this section the connected hardware (OptoJump Next bars and/or webcam) can be checked.
Opening the function, if the webcam(s) is (are) connected, the live image should be displayed. If one
or both images do not appear, check that they have been selected in the Basic Configurations |
Video or the drivers have been installed correctly.
To check the connection with OptoJump bars, press <Execute> to start the test. The test continues
until <STOP> is pressed.
If there are no interrupted LEDs, the test ends with a positive result.
The test can now be repeated by pressing <Execute> and interrupting the LEDs manually, (e.g., by
placing your foot between the bars). Please note that some LEDs turn red indicating interruption of
the signal caused by entry of the foot. If <End> is pressed, the software will show the interrupted
LEDs in the table below, indicating that the test has not had a positive result because of this
intentional interruption.
This test is also very useful to check (mainly in case of outdoor installations of long bar combinations)
if there are obstacles, like leaves, stones, hills, etc. between the transmitting and the receiving bar.
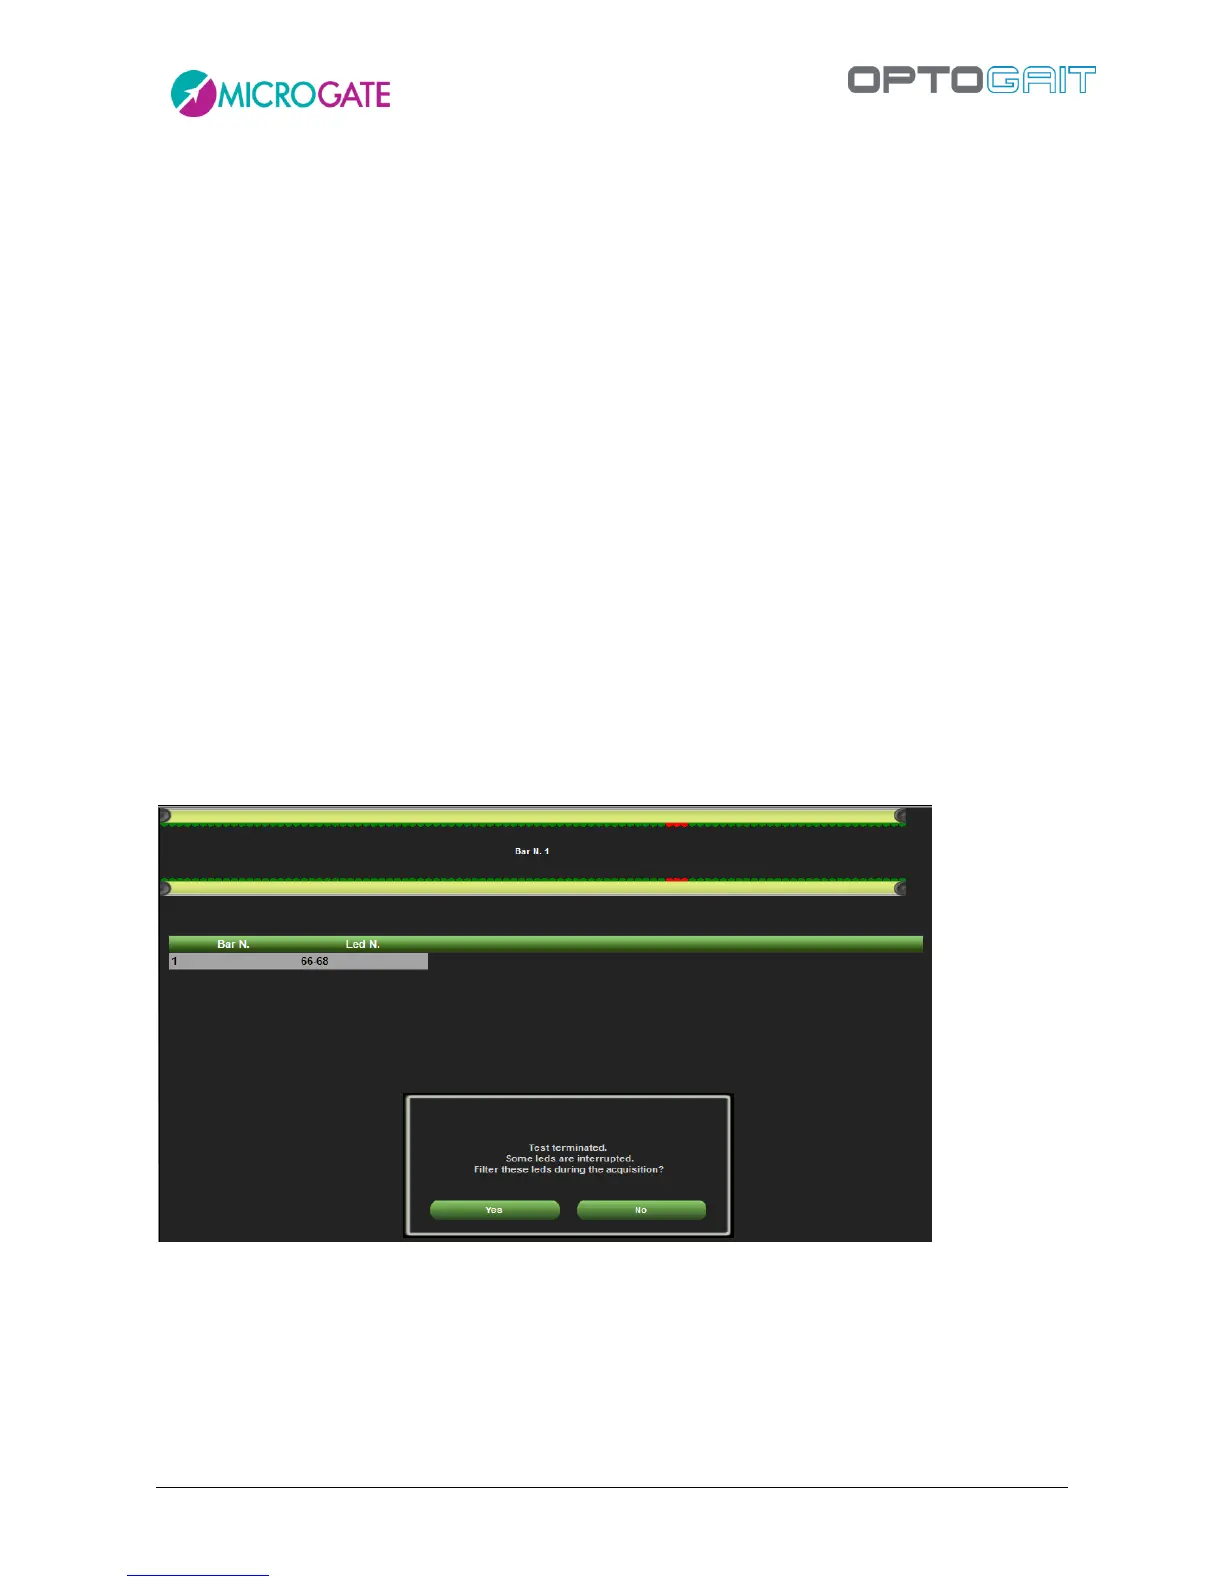
If the obstacles cannot be removed, it is possible to exclude them via the software: all interruptions
of those LEDs will not be taken into consideration for the test. The picture below shows, for example,
LED no. 66-68 of bar #1, which has been interrupted with the request to exclude it from acquisition.
Figure 96 - Excluding an interrupted LED
If you reply YES, next time when using this function , the excluded LED will be BLUE and the button
in the lower right corner, <Active LED filter>, will indicate that one or more LEDs have been excluded
from the acquisition (the same button appears every time a new test is performed). Pressing the
button, the filter can be removed and all LEDs of this bar can be taken into consideration again.