76 Chapter 8: Patching
PRO6 Live Audio System
Owner’s Manual
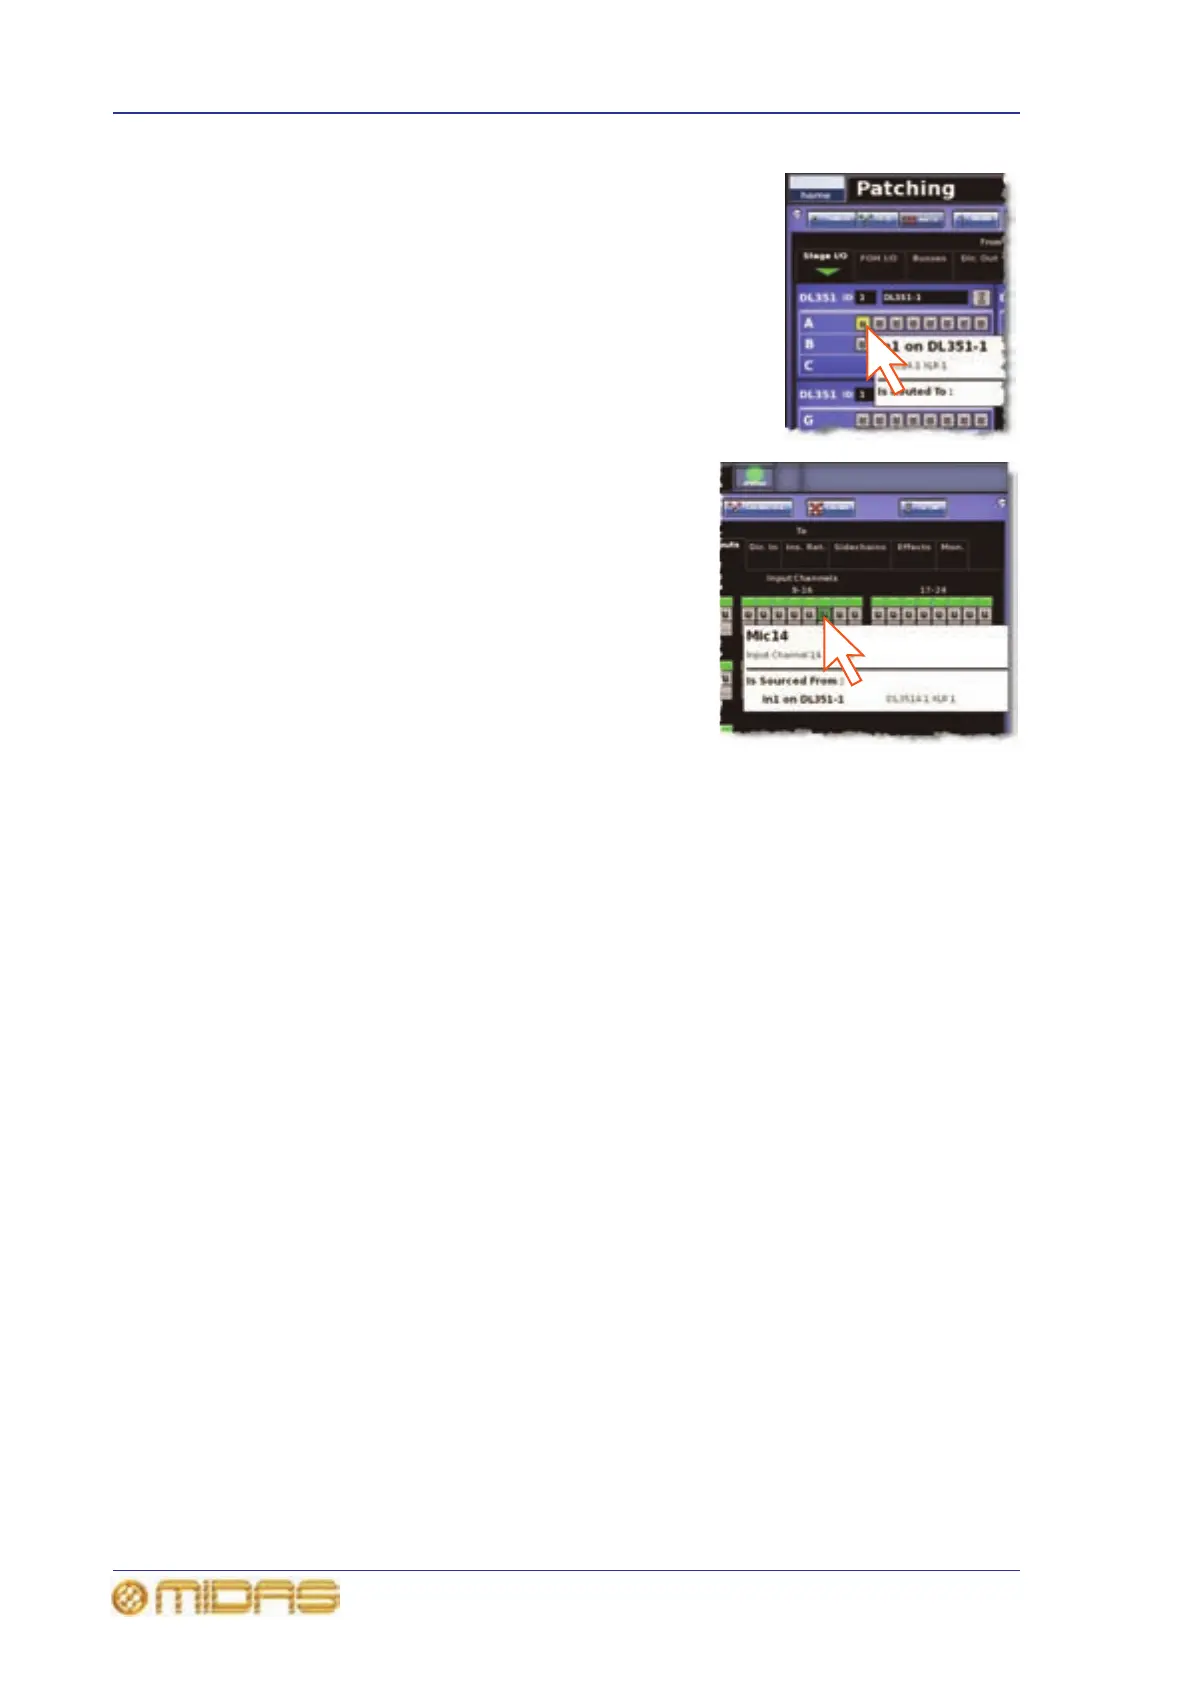
2 Select the source patch connector. For example, in
the Stage I/O tab of the From section, click the first
patch connector (XLR1) of card A of the DL351
Modular I/O. Its background will change to yellow
and a green triangle will appear under the tab title
(as shown right).
3 Select the destination patch connector. For
example, in the Inputs tab of the To section,
click the patch connector for input channel 14
(Mic14). It will now be patched to the source.
If the new patch is carrying a signal, this
audio may be heard, depending on the
settings of the PRO6 Control Centre.
Note: You can also carry out single patching
operations using the CLEAR SEL. and AUTO
functions.
>> To patch a single source to multiple destinations
1 Patch the source patch connector to one of its destinations, as detailed in “To
patch a single source to a single destination” on page 75.
2 In the To section, select the other destinations.
Sequence patching (SEQ.)
If you need to do a number of patches, and each has only a single destination, you can
use the sequence function. All of the source patch connectors are selected in the From
section before being patched, one by one, in the To section. This saves you having to
go back to the From section for the start of each patch.
To assist you in sequence patching, you can change the tooltip to the list type (see “List
tooltip” on page 67).