Methods of creating stitching data
[9]-5
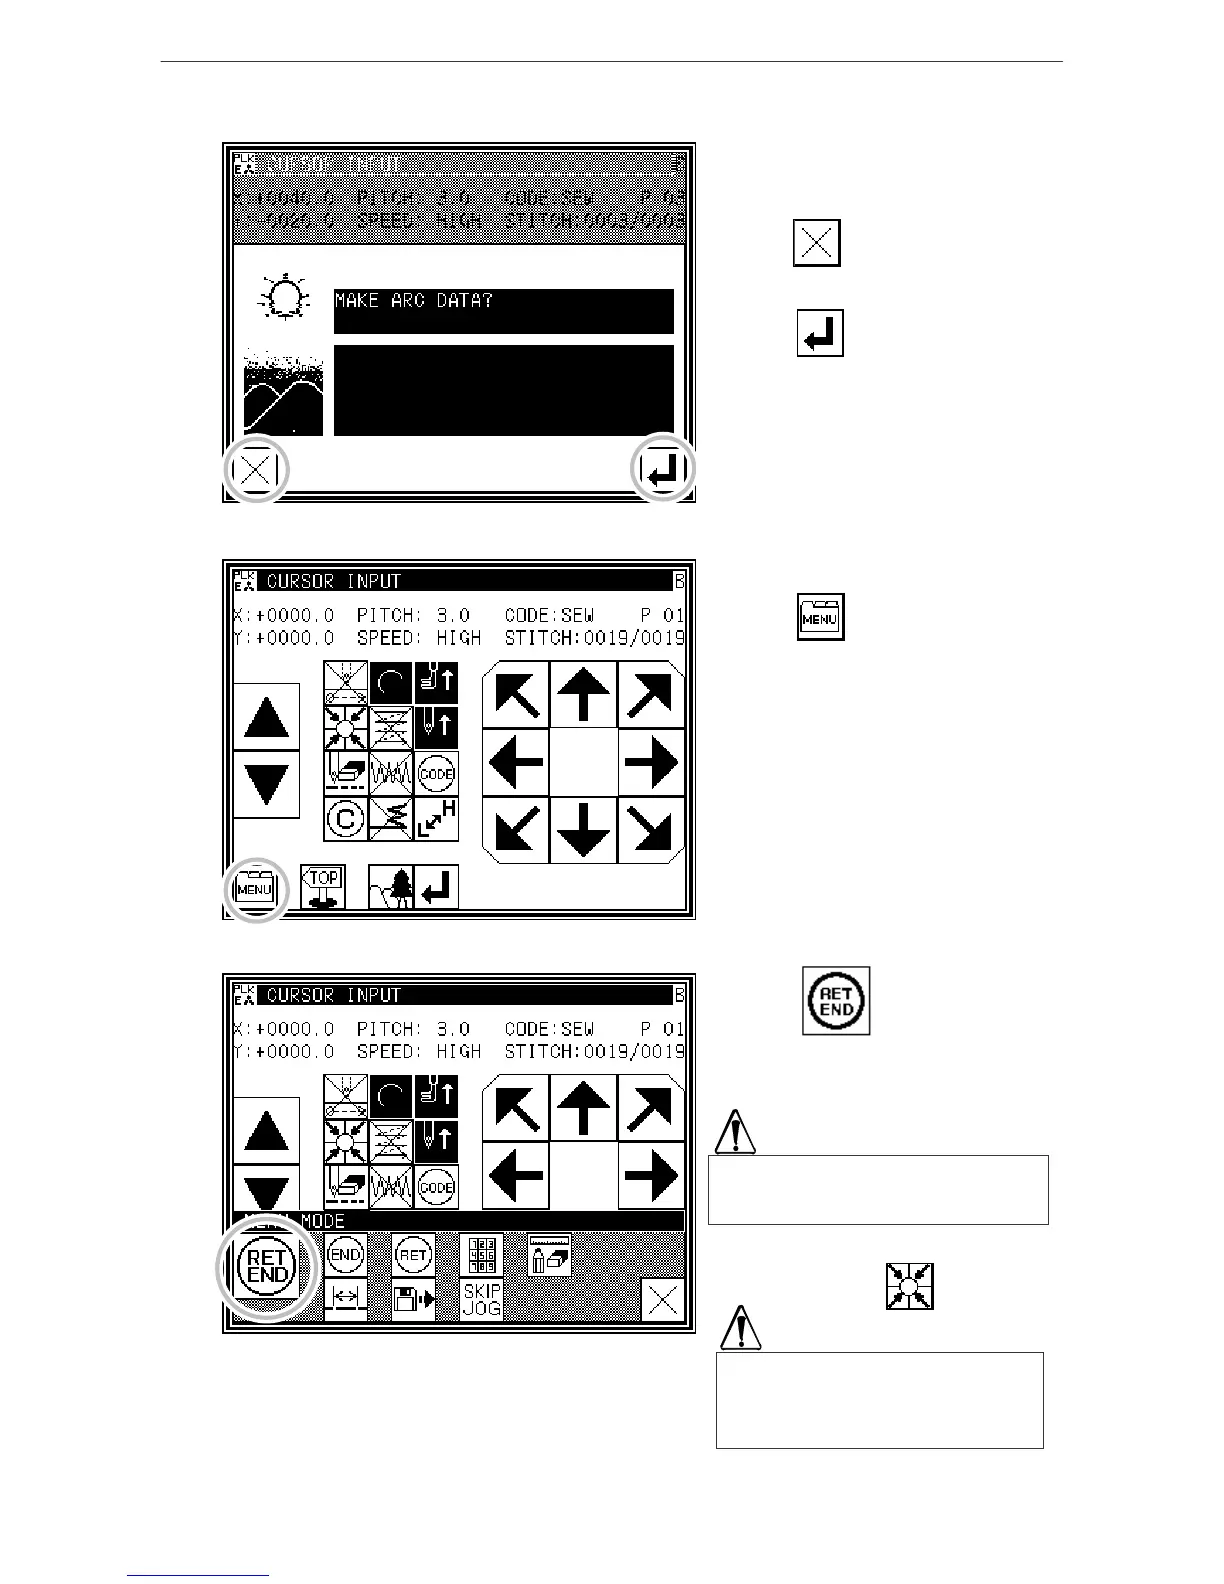
6. Creating the arc input data
* The confirmation message "Create
arc" will appear.
* Press to return to the point C
data entry screen.
* Press and start creation of
the arc input data.
(The arc will be created.)
* A message indicating that the data is
being created will appear.
7. Completing creation of the arc input data
* Press .
8. Inputting the return/end code
* Press .
(Data on feed data to the home position
and the end code will be created.)
* A prompt for home position return will
appear.
Press .
The work holder will automatically return
to the home position. Take care when
the needle is lowered, etc.
The needle will rise to the UP
position.
If the needle is not at the UP position,
it may lower once and then return to
* A message indicating that the data is
being created will appear, and then
the Standard screen will reappear.

 Loading...