125
Finishing the Installation
Checking the Wiring
Activating The Protection
Test the the protection module by pressing and holding down the
two buttons on the MX-DoorMaster until the blue LED ashes. This
deactivates the the protection in the frame for 90 seconds (see
Section 2.4.7).
Use the special key to release the module above the mechanical
the protection lock and turn the red button to the ‘closed lock’
symbol (see Section 2.3.7). Insert all the modules securely back into
the frame. The modules can only be removed now aer deactivating
the the protection.
Before operating the door station, the batteries in the MX-DoorMaster must be fully charged
(maximum charging time: 12 hours). Finish the installation with Section 2.8.2, «Conguring
the MX-DoorMaster».
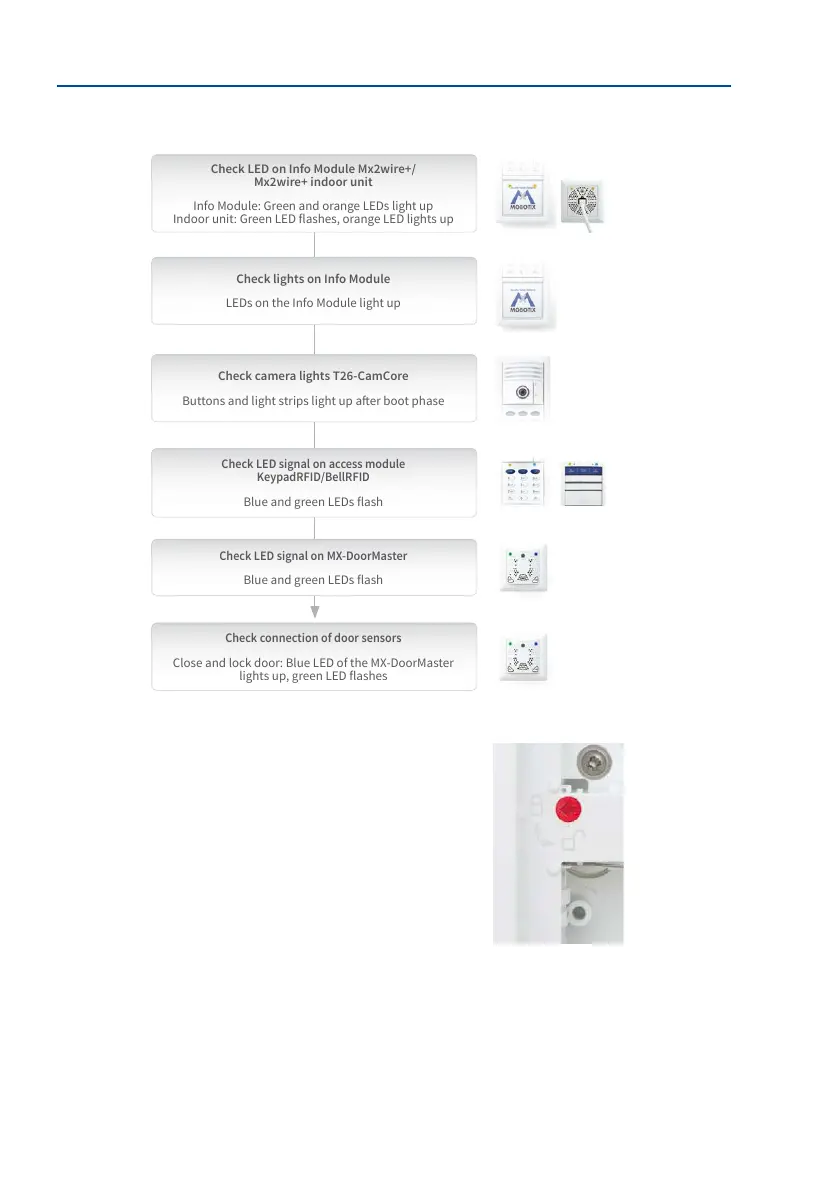
Test sequence from top
to bottom; unavailable
modules are skipped
When a battery is almost
completely discharged,
the red LED on the
MX-DoorMaster lights up rst
(for approximately 15 min.)
Check LED on Info Module Mx2wire+/
Mx2wire+ indoor unit
Info Module: Green and orange LEDs light up
Indoor unit: Green LED ashes, orange LED lights up
Check camera lights T26-CamCore
Buttons and light strips light up aer boot phase
Check LED signal on MX-DoorMaster
Blue and green LEDs ash
Check connection of door sensors
Close and lock door: Blue LED of the MX-DoorMaster
lights up, green LED ashes
Check LED signal on access module
KeypadRFID/BellRFID
Blue and green LEDs ash
Check lights on Info Module
LEDs on the Info Module light up
Cindy Jones
Thomas Jones
Dr. Jones, MD