107
Installing the MX-DoorMaster
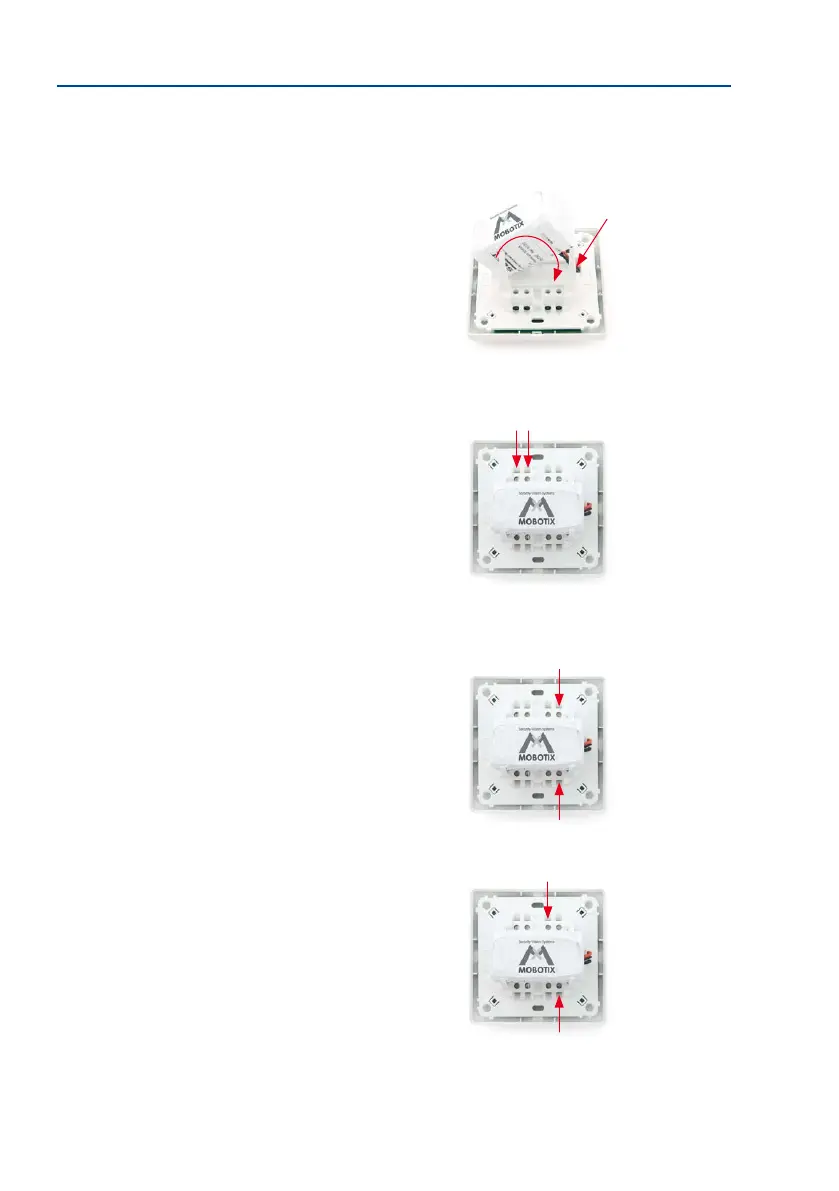
2.5.4 Installation Using Cavity or In-Wall Socket
1.
Prepare all the required cabling and the cavity or in-wall socket: See previous sections.
2. Remove the battery pack, connect the connector (A),
guide the cable under the battery pack and replace the
battery pack (B). The red LED indicates that the battery
is low.
3. Screw on the MxBus cable (coming from the T26 door
station):
– Red wire to MX + terminal
– Blue wire to MX – terminal
When extending the MxBus cable, make sure the polarity
is correct (+/-).
4. Screw on the the protection (coming from the T26
door station):
– First wire to OUT1 + terminal
– Second wire to OUT – terminal
The device still functions properly if the wires are
swapped.
5. Screw on the electric door opener (coming from the
door):
– First wire to OUT2 + terminal
– Second wire also to OUT – terminal
The device still functions properly if the wires are
swapped.
A
B
Remove approximately
5 mm of insulation from
all the cables used
Important: See the connec-
tion options in Section 2.4.2