93
Installing the T26 Modules
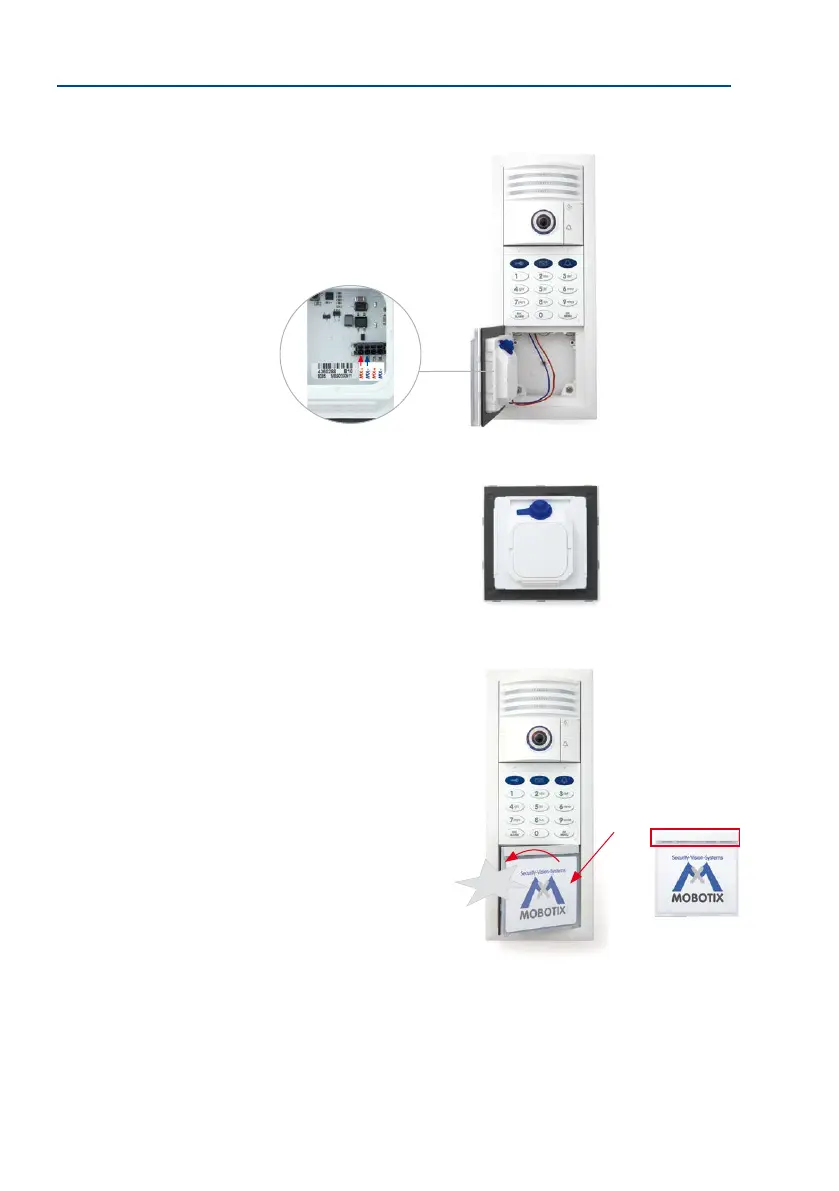
2.4.4 Installing the Info Module
The info eld in the info module of the T26 door station without Mx2wire+ technology is
equipped with permanent LED backlighting supplied via MxBus.
1. Ensure that the gasket is tted to the info module.
2. Loosen the rear cover plate (using a small screwdriver
or similar tool) and remove it. You now have a clear
view of the connectors located directly on the info
module board.
3.
Remove approximately 5 mm of insulation from each of
the cables to be connected and feed each cable through
one of the wire apertures in the housing (piercing the
rubber membrane with the cable).
T26 with KeypadRFID
Cindy Jones
Thomas Jones
The Jones Family
Dr. Jones, MD
T26 with BellRFID
4. Connect the two MxBus cables that come from the access module to the info mod-
ule board.
– Red wire to MX + terminal
– Blue wire to MX – terminal
5. Put the cover plate back on.
6. First of all, insert the right side of the module into the
frame. Then press rmly on the le side, until the mod-
ule audibly clicks into place.
Control click: If you do not hear a click sound, this means
that the module is not properly locked into place. In this case,
repeat the last steps, making sure that no cable or foreign
object in the housing is preventing the module from properly
clicking into place.
As an alternative to the
terminals on the access or
info module, you can use the
two free MxBus terminals
of the camera module to
connect the MX-DoorMaster
(see Section 2.5)
Click
Always mount the
module so that the bar
with the MOBOTIX let-
tering is at the top