97
Installing the T26 Modules
2.4.6 Labeling the Info Module
The info module allows you to place a paper label or printer label behind the transparent
cover. You can use the enclosed permanent marker to personalize the paper insert by adding
your name, contact number, house number and so on.
You will nd a PDF template on the MOBOTIX website to help you create your own label.
Simply add your personal data to the template and print it onto a sheet of A4 paper. Then
simply cut out your ‘doorbell label’ and insert it into the info module. Before you do this,
you will need to remove the info module from the door station frame (see Section 2.4.7,
«Removing, Exchanging and Modifying Modules»).
Note
To create a doorbell label that goes with a KeypadRFID module, please make sure to
familiarize yourself beforehand with how to congure and operate the door station
(see T26-Systemhandbuch Teil 2).
Proceed as follows:
1. Make your personalized doorbell label. To do this, cus-
tomize the PDF template (Info_Panel.pdf) provided on the
MOBOTIX website (www.mobotix.com).
2. Loosen the transparent protective cover on the info
module by hand or using a screwdriver, which you posi-
tion on the side (as shown in red) and use as a lever.
3. Tilt the protective cover downwards and remove the
silicone mat and paper insert.
4.
Place your completed doorbell label (B) behind the transparent protective cover (A).
Insert the silicone mat (C) so that its smooth side is behind the label.
5.
Position the protective cover at the bottom of the info
module (D) and press the top of the cover until it clicks
in place. Now, you can click the info module back into
the door station frame.
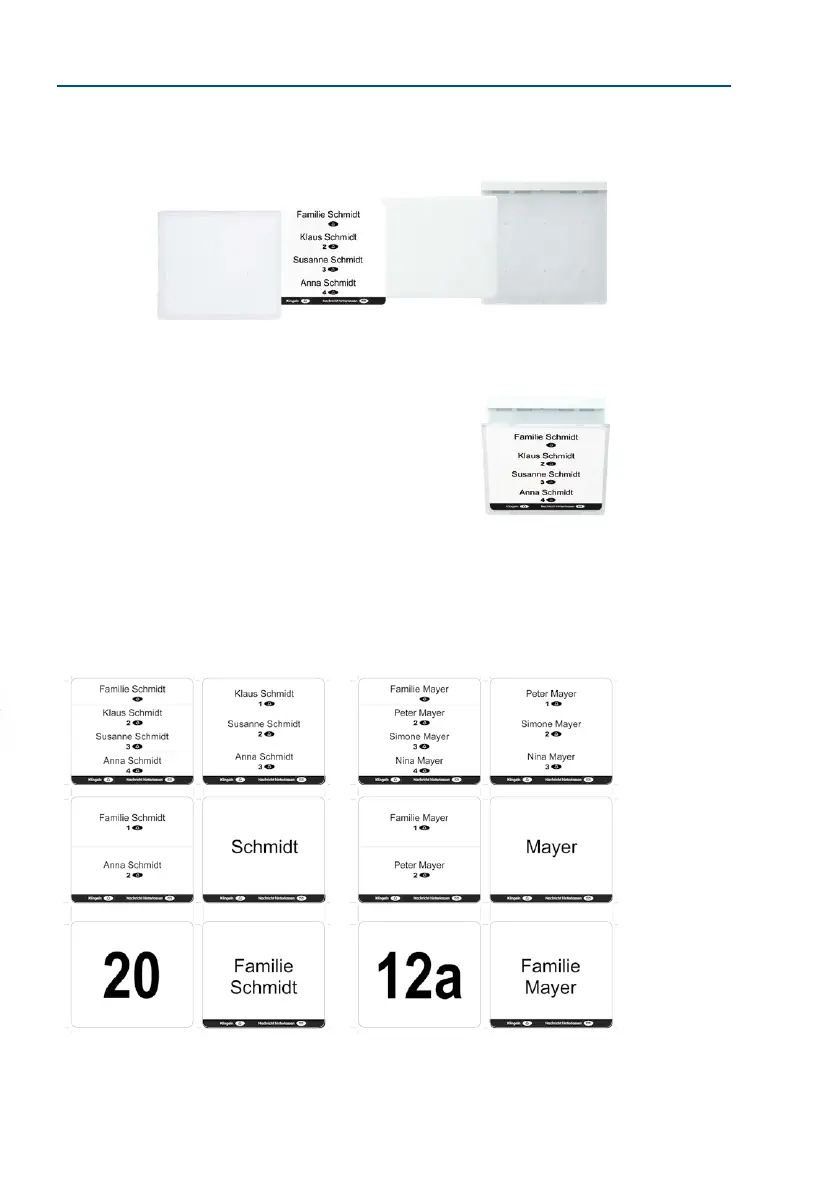
Info_Panel.pdf (available at www.mobotix.com)
Here are a few examples of doorbell labels that were created using the PDF le template.
To open the le requires Adobe Acrobat Reader (free).
Protective cover (A) Doorbell label (B) Silicon matt (C)
Info Module Mx2wire+
(D)
Follow the correct order
(from le to right)
Adobe Acrobat Reader:
download from www.
adobe.com