SHOP MANUAL MT26/31 - 12.2004SHOP MANUAL MT26/31 - 12.2004
SHOP MANUAL MT26/31 - 12.2004SHOP MANUAL MT26/31 - 12.2004
CH 3 PAGE 3
DRIVE LINE
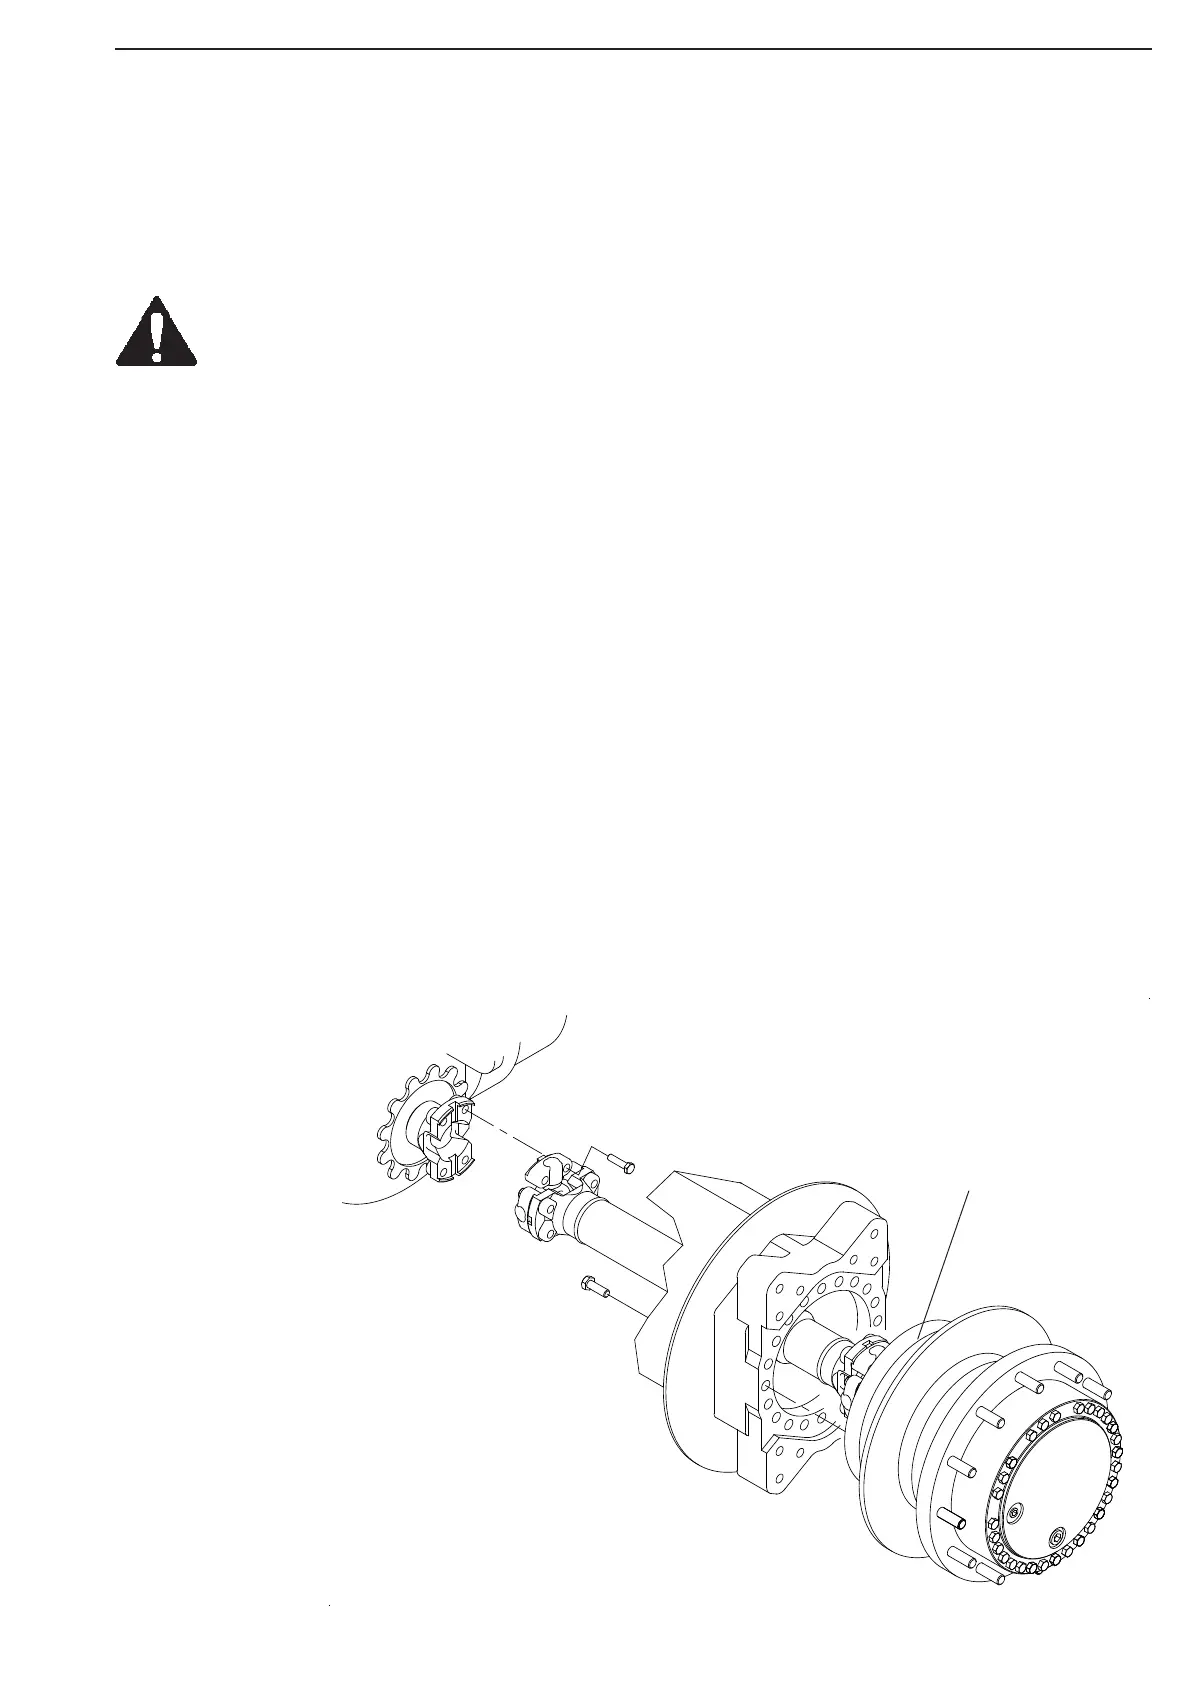
The Front Axle Drive Unit transfers the power from the transmission to each front wheel.
Removal
Rise both front wheels off the ground using a floor jack or a crane.
Place dumper on safety stands.
Thoroughly clean the front axle and the area around for any accumulated dirt.
Release the four bolts securing the actual drive shaft to the transmission output flange.
Turn the wheel to ease access to each bolt.
Remove actual wheel (
Ref. 3.4.1)
Remove the brake calipers. (Ref. 3.6.1.3)
Loosen the 20 bolts securing the reduction drive assembly to the suspension arm, keep one of the upper bolts
in place.
Fasten a lifting sling to the drive unit, and lift to release the weight. Remove the remaining bolt and lift/withdraw
the unit from of the suspension arm, guiding the drive shaft through the opening.
Installation
Replace the drive assembly as removed.
Mount the 20 fastening bolts.
Replace the calipers. (Ref.3.6.1.3)
Replace wheel. (Ref. 3.4.1)
Connect the drive shaft to the transmission output flange, and tighten the four bolts.
Control
Check oil level in reduction drive. (Ref. Operation and Maintenance Manual)
Check that all connections are located as before removal, and rotate wheel to make sure there is no binding
parts.
Lift dumper, remove stands, and lower to ground.
Check wheel nut torque. (Ref. 3.4.1)
Perform a test drive to see that maintained equipment is functioning as required.
Front Axle Drive
Assembly
Fig 3.2 Front Axle Drive Unit
3.2 Front Axle Drive Assembly
3.2.1 Front Axle Drive Unit
WARNING!__________________________________________
Be aware of the risk of injury to people and equipment when
handling heavy objects!