c. Click Collect.
The file is saved in the Downloads folder for your browser with the name support-data.7z.
2. From SANtricity System Manager, determine which power supply has failed. You can find this
information in the Details area of the Recovery Guru, or you can review the information
displayed for the shelf.
a. Select Hardware.
b. Look at the power and fan icons to the right of the Shelf drop-down lists to
determine which shelf has the failed power supply.
If a component has failed, either or both icons are red.
c. When you find the shelf with a red icon, select Show back of shelf.
d. Select either power supply.
e. On the Power Supplies and Fans tabs, look at the statuses of the power-fan canisters, the
power supplies, and the fans to determine which power supply must be replaced.
A component with a Failed status must be replaced.
Attention: If the second power supply canister in the shelf does not have Optimal status,
do not attempt to hot-swap the failed power supply. Instead, contact technical support for
assistance.
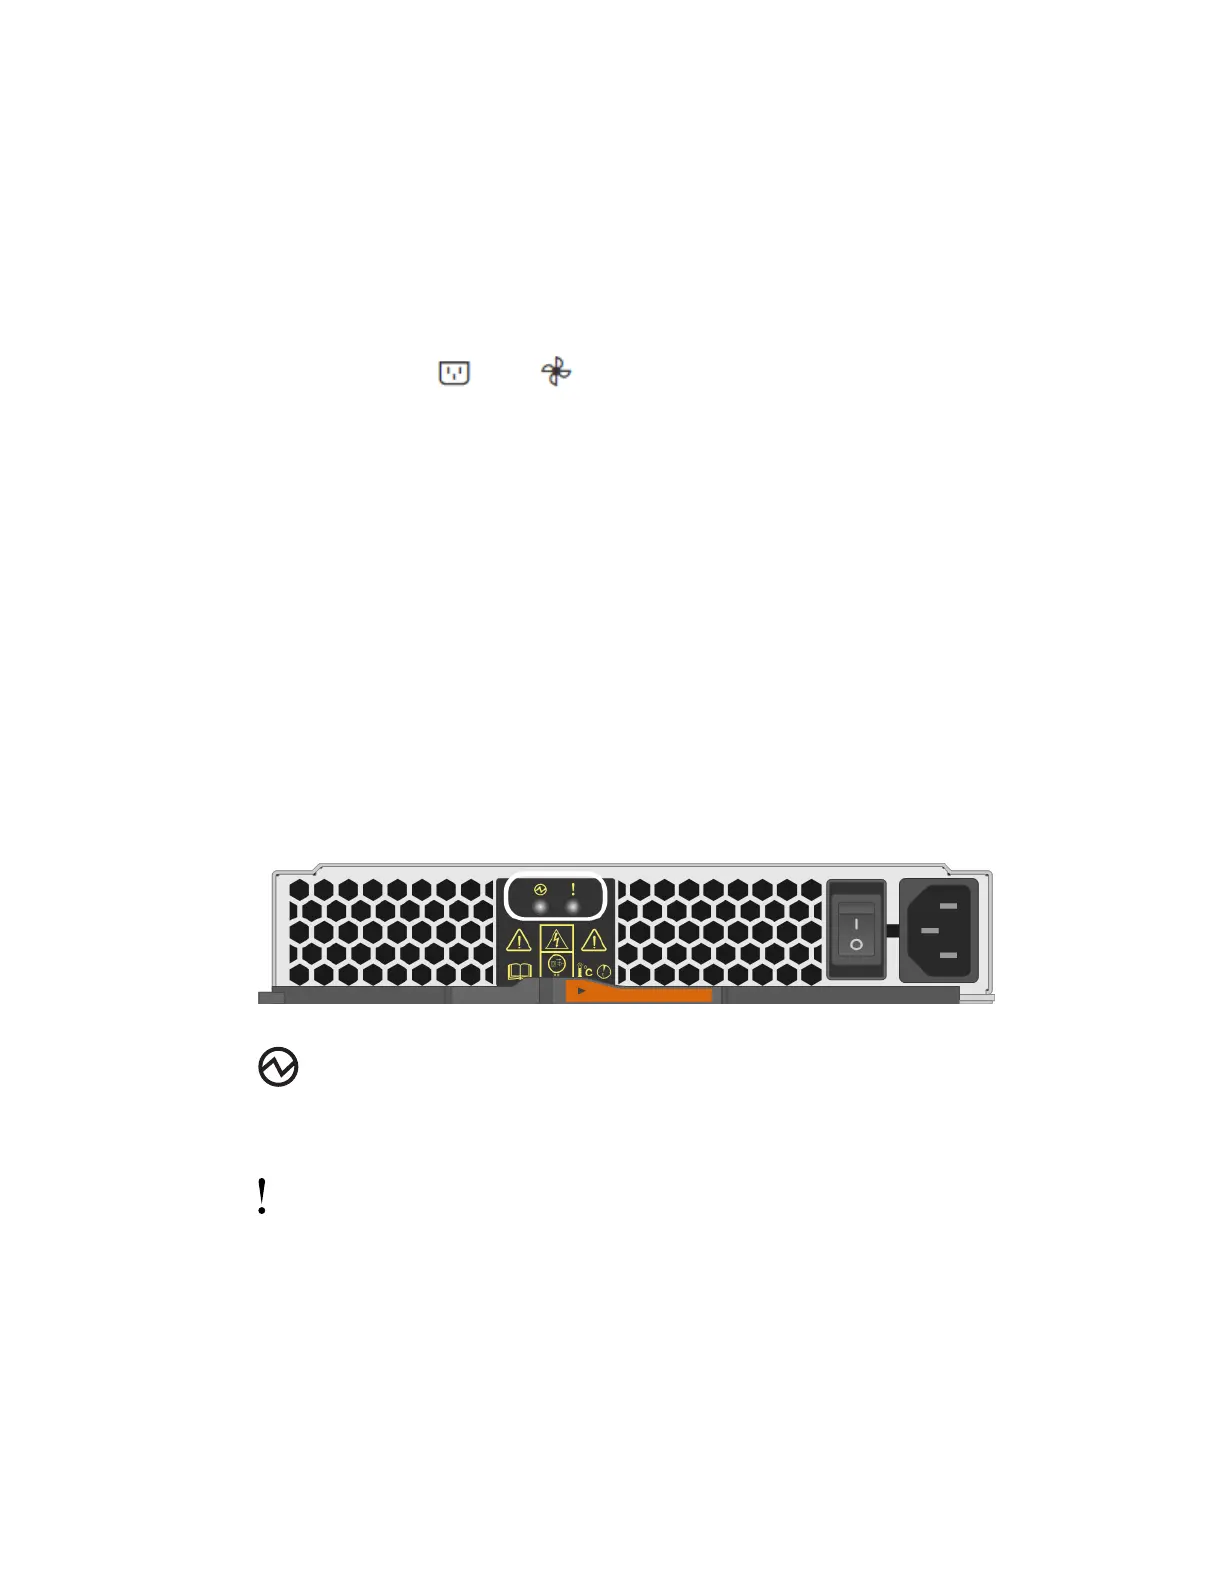
3. From the back of the storage array, look at the Attention LEDs to locate the power supply you
need to remove.
You must replace the power supply that has its Attention LED on.
Power LED: If it is solid green, the power supply is functioning correctly. If it is Off, the
power supply failed, the AC switch is turned off, the AC power cord is not properly installed, or
the AC power cord input voltage is not within margin (there is a problem at the source end of the
AC power cord).
Attention LED: If it is solid amber, the power supply or its integrated fan has a fault.
After you finish
Go to
Remove failed power supply
on page 40.
Canisters |
39