• Attention LED is on: Indicates that the new drive might be defective. Replace it with another
new drive.
2. If the Recovery Guru in SANtricity System Manager still shows an issue, select Recheck to
ensure the problem has been resolved.
3. If the Recovery Guru indicates that drive reconstruction did not start automatically, start
reconstruction manually, as follows:
Note: Perform this operation only when instructed to do so by technical support or the
Recovery Guru.
a. Select Hardware.
b. Click the drive that you replaced.
c. From the drive's context menu, select Reconstruct.
d. Confirm that you want to perform this operation.
When the drive reconstruction completes, the volume group is in an Optimal state.
4.
As required, reinstall the bezel.
5. Return the failed part to NetApp, as described in the RMA instructions shipped with the kit.
Result
Your drive replacement is complete. You can resume normal operations.
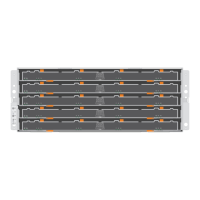
Replace drive drawer (60-drive)
The steps to replace a failed drive drawer in an E5760 controller shelf or a DE460C drive shelf
depend on whether the volumes in the drawer are protected by Drawer Loss Protection. If all volumes
in the drive drawer are in disk pools or volume groups that have Drawer Loss Protection, you can
perform this procedure online. Otherwise, you must stop all host I/O activity and power off the shelf
before replacing the drive drawer.
Steps
1. Prepare to replace drive drawer (60-drive) on page 64
You prepare to replace a drive drawer by determining if you can perform the replacement
procedure while the drive shelf is online or if you need to stop host I/O activity and power off any
of the shelves that are powered on. If you are replacing a drawer in a shelf with Drawer Loss
Protection, there is no need to stop host I/O activity and power off any of the shelves.
2. Remove cable chains on page 66
You remove both cable chains so you can remove and replace a failed drive drawer. The left and
right cable chains allow the drawers to slide in and out.
3. Remove failed drive drawer (60-drive) on page 71
You remove a failed drive drawer to replace it with a new one. Removing a drive drawer entails
sliding the drawer partially out, recording the locations of the drives, removing the drives, and
removing the drive drawer.
4. Install new drive drawer (60-drive) on page 73
You install a new drive drawer to replace the failed one. Installing a drive drawer into a drive tray
entails sliding the drawer into the empty slot, installing the drives, and replacing the front bezel.
5. Attach cable chains on page 74
You must attach the cable chains so you can safely re-install the drives in the drive drawer.
Drives |
63