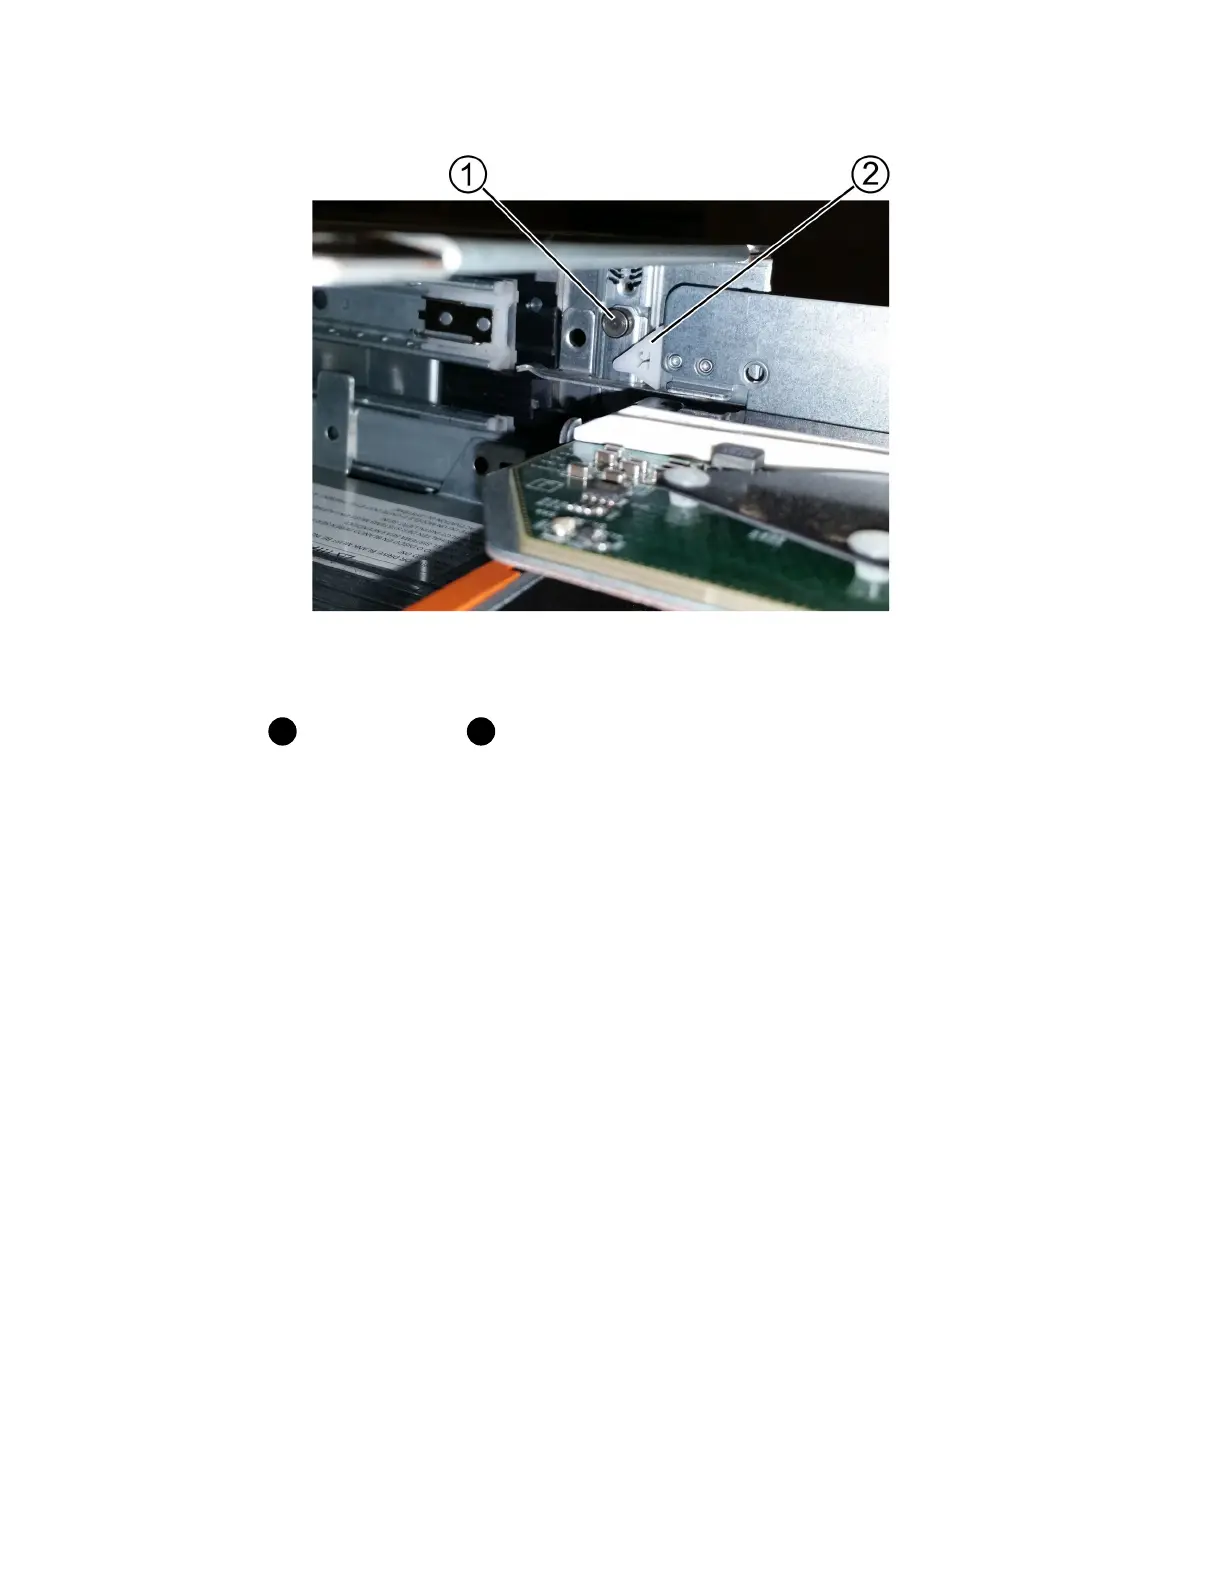
Lock-out tumbler
Drawer guide
2. Position the replacement drive drawer in front of the empty slot and slightly to the right of center.
Positioning the drawer slightly to the right of center helps to ensure that the lock-out tumbler and
the drawer guide are correctly engaged.
3. Slide the drive drawer into the slot, and ensure that the drawer guide slides under the lock-out
tumbler.
Attention: Risk of equipment damage – Damage occurs if the drawer guide does not slide
under the lock-out tumbler.
4. Carefully push the drive drawer all the way in until the latch fully engages.
Experiencing a higher level of resistance is normal when pushing the drawer closed for the first
time.
Attention: Risk of equipment damage — Stop pushing the drive drawer if you feel binding.
Use the release levers at the front of the drawer to slide the drawer back out. Then, reinsert the
drawer into the slot, ensure the tumbler is above the rail, and the rails are aligned correctly.
After you finish
Go to
Attach cable chains
on page 74.
Attach cable chains
You must attach the cable chains so you can safely re-install the drives in the drive drawer.
Before you begin
• You have installed the new drive drawer.
• You have two replacement cable chains, marked as LEFT and RIGHT (on the horizontal
connector next to the drive drawer).
74
| Maintaining E5700 Hardware