If you want to provide customers WiFi access by letting them check in to a Facebook business page, first
register the access point with Facebook Wi-Fi (see Register the Access Point With Facebook Wi-Fi on page
42).
To set up a captive portal for a WiFi network:
1. Open a web browser from a computer that is connected to the same network as the access point or to
the access point directly through an Ethernet cable or WiFi connection.
2. Enter the IP address that is assigned to the access point.
A login window opens.
3. Enter the access point user name and password.
The default user name is admin. The password is the one that you specified the first time that you
logged in.The user name and password are case-sensitive.
The Dashboard page displays.
4. Select Management > Configuration > Wireless > Basic.
The page that lets you select an SSID displays.
5. Select the SSID.
The WLAN settings for the SSID display.
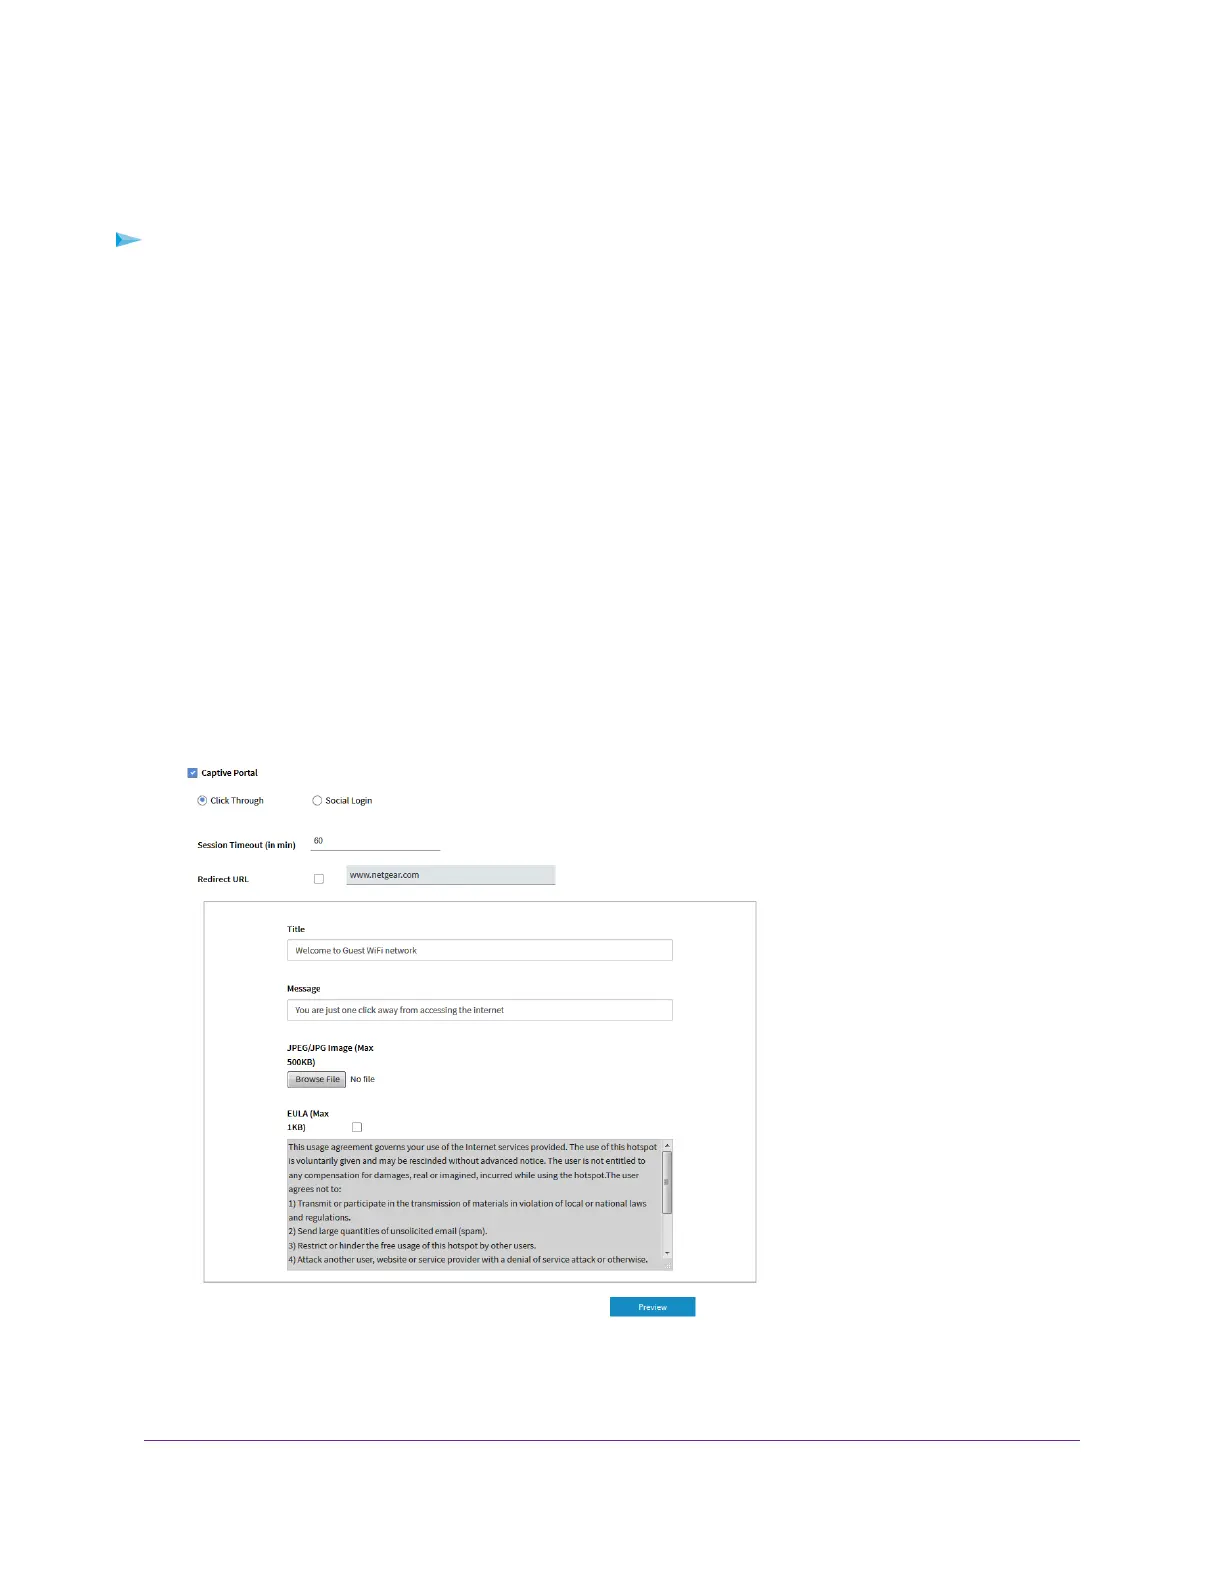
6. Select the Captive Portal check box.
7. Specify the type of captive portal by selecting one of the following radio buttons:
Manage the Basic WiFi and Radio Features
44
Insight Managed Smart Cloud Wireless Access Point WAC505 User Manual
 Loading...