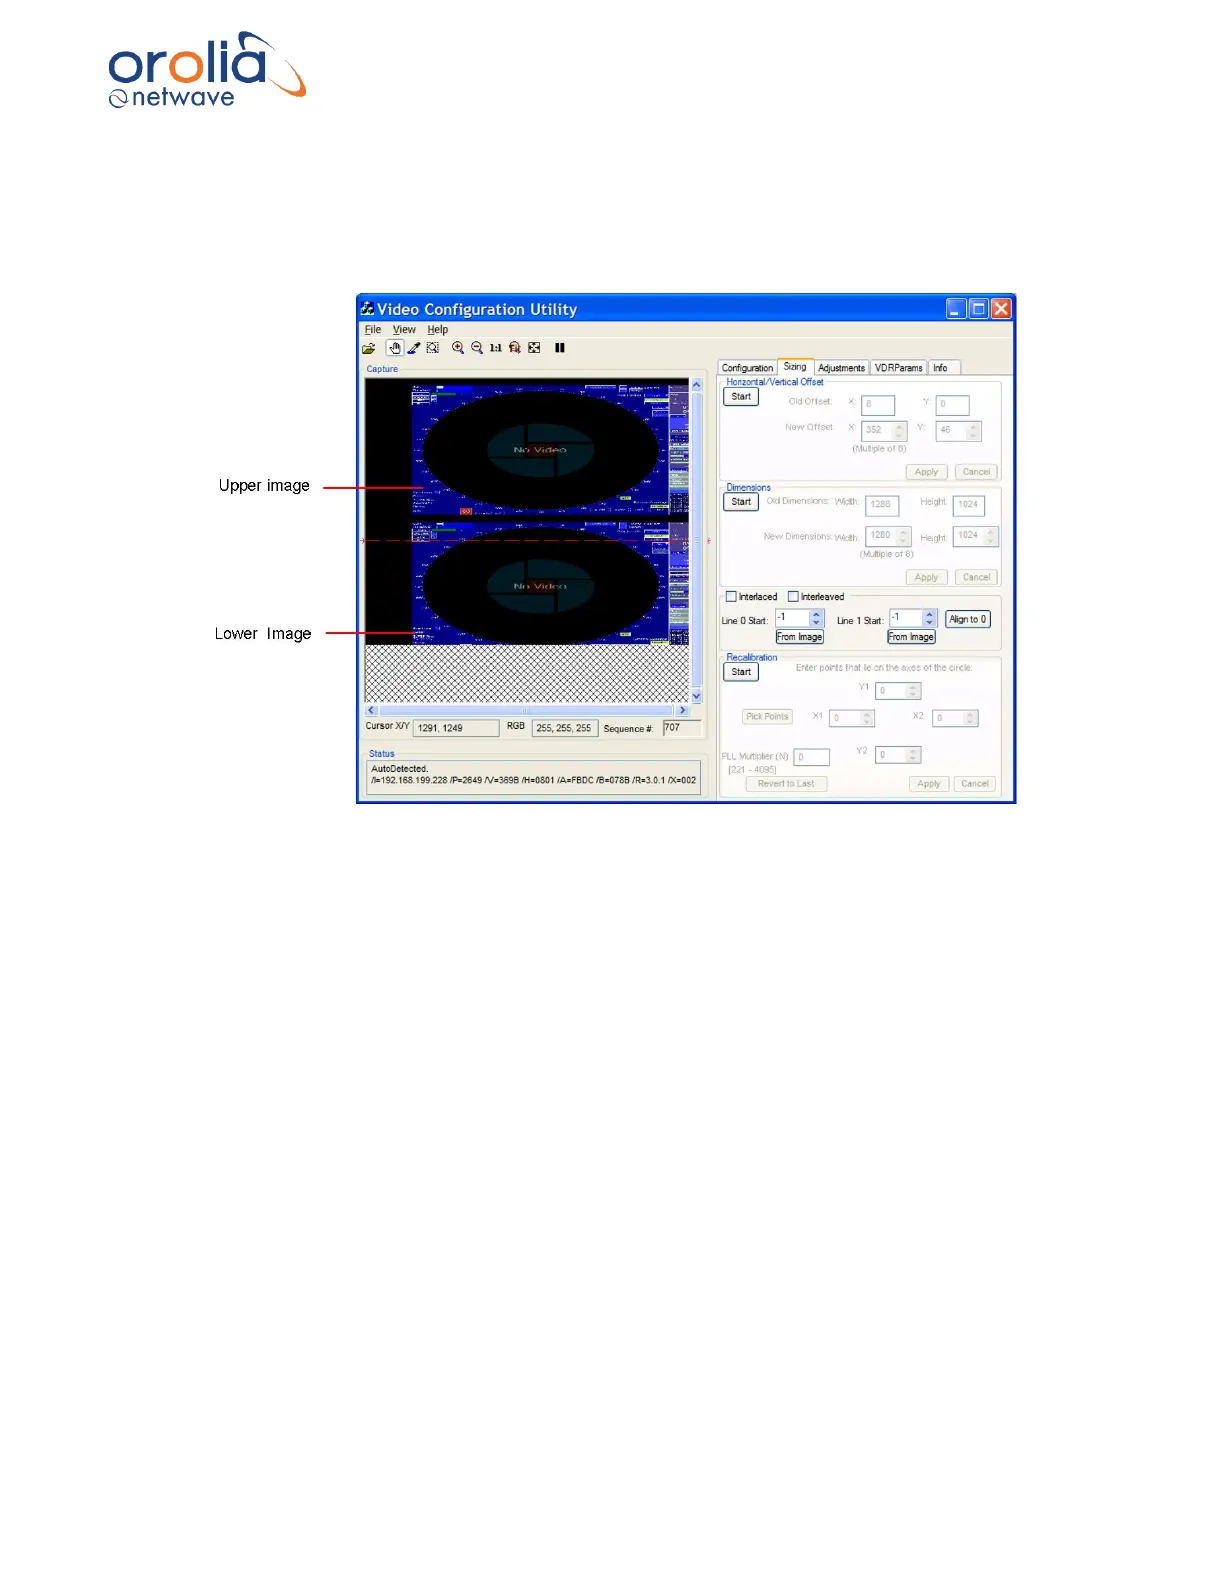
10.18 Interlaced Image
A video source may provide a captured interlaced image like the one below. The captured image
appears vertically 2 or 3 times within the Capture window. To adjust a captured interlaced image,
complete the following steps:
Figure 10.18.1 - Interlaced image
1. On the Configuration Page, set the Vertical Polarity to the same setting (negative
or positive) as indicated in the Auto-Detection Information Box.
2. Repeat for the Horizontal Polarity setting.
3. If either Polarity is different, change them to the setting indicated in the Auto-
Detection Information Box (for example, if the Auto-Detection indicated the Vertical
Polarity is negative ensure it is set to negative once the image has been captured).