NewSonic SonoDur2 Issue 04 09/2016 Page 8
structural steel, HV10 measurements will become mandatory as of July 2012 in accordance with EN
ISO 1090.
Further applications are described in the following:
SONO-10H, 10N Test Load (HV1):
In principle, all measurement tasks described under the SONO-8M motorized measuring probe can
be accomplished. The smaller design enables improved accessibility, i.e. it is easier to measure
components with more complex geometry from all directions - toothed wheels with a smaller
number of modules, forming tools, thin-walled parts.
SONO-50H, 50N Test Load (HV5):
This probe is used most frequently in day-to-day operations, since it can be used not only on thinly
coated components, but also on all components of the above described probes.
There are lower requirements on the surface characteristics than with all probes mentioned above,
which allows to test more coarse grained materials as well.
In relation between surface condition and manual test force or manual control needed, the
application is very well balanced.
SONO-100H, 98N Test Load (HV10):
Conversions in tensile strength of steel are possible here, for instance on hardened and tempered
steels after flame or induction hardening - according to this standard, it does not apply below HV10 –
in addition, conversions in the range of Rockwell and Brinell testing is more likely, since the surface
portion decreases relative to the volume fraction of the measurement.
Rougher surfaces, such as cold work tool steel for stamping tools, embossing dies and stamps,
forging jaws, sintered metals and high-strength vehicle components, are well suited for HV10
measurements.
Weld seam testing, in accordance with HV10 regulation, safety containers, etc.
Information on the test loads:
In publications and in our documents, the conversion from HV1, HV5, HV10, etc., is sometimes
indicated in rounding numbers due to the conversion factor 1 kp (kgf) = 9.81 N in Newton, N is
sometimes indicated as rounding number (HV 5 = 49N is frequently indicated with 50N and HV10 =
98 N with 100 N). But, the force is precisely adjusted in Newton, thus, for instance: 49N, 98N!
The test conditions in terms of surface characteristics (surface roughness) or layer thicknesses
comply with the requirements of the traditional Vickers hardness measurement. At a HV1
measurement, the UCI standard DIN 50159-1/2 specifies a maximum roughness Ra of <0.5 µm, which
corresponds to in relation to the penetration depth. Accordingly, with HV5 it
comes to 0.8 µm and with HV 10 up to 1.0 µm.
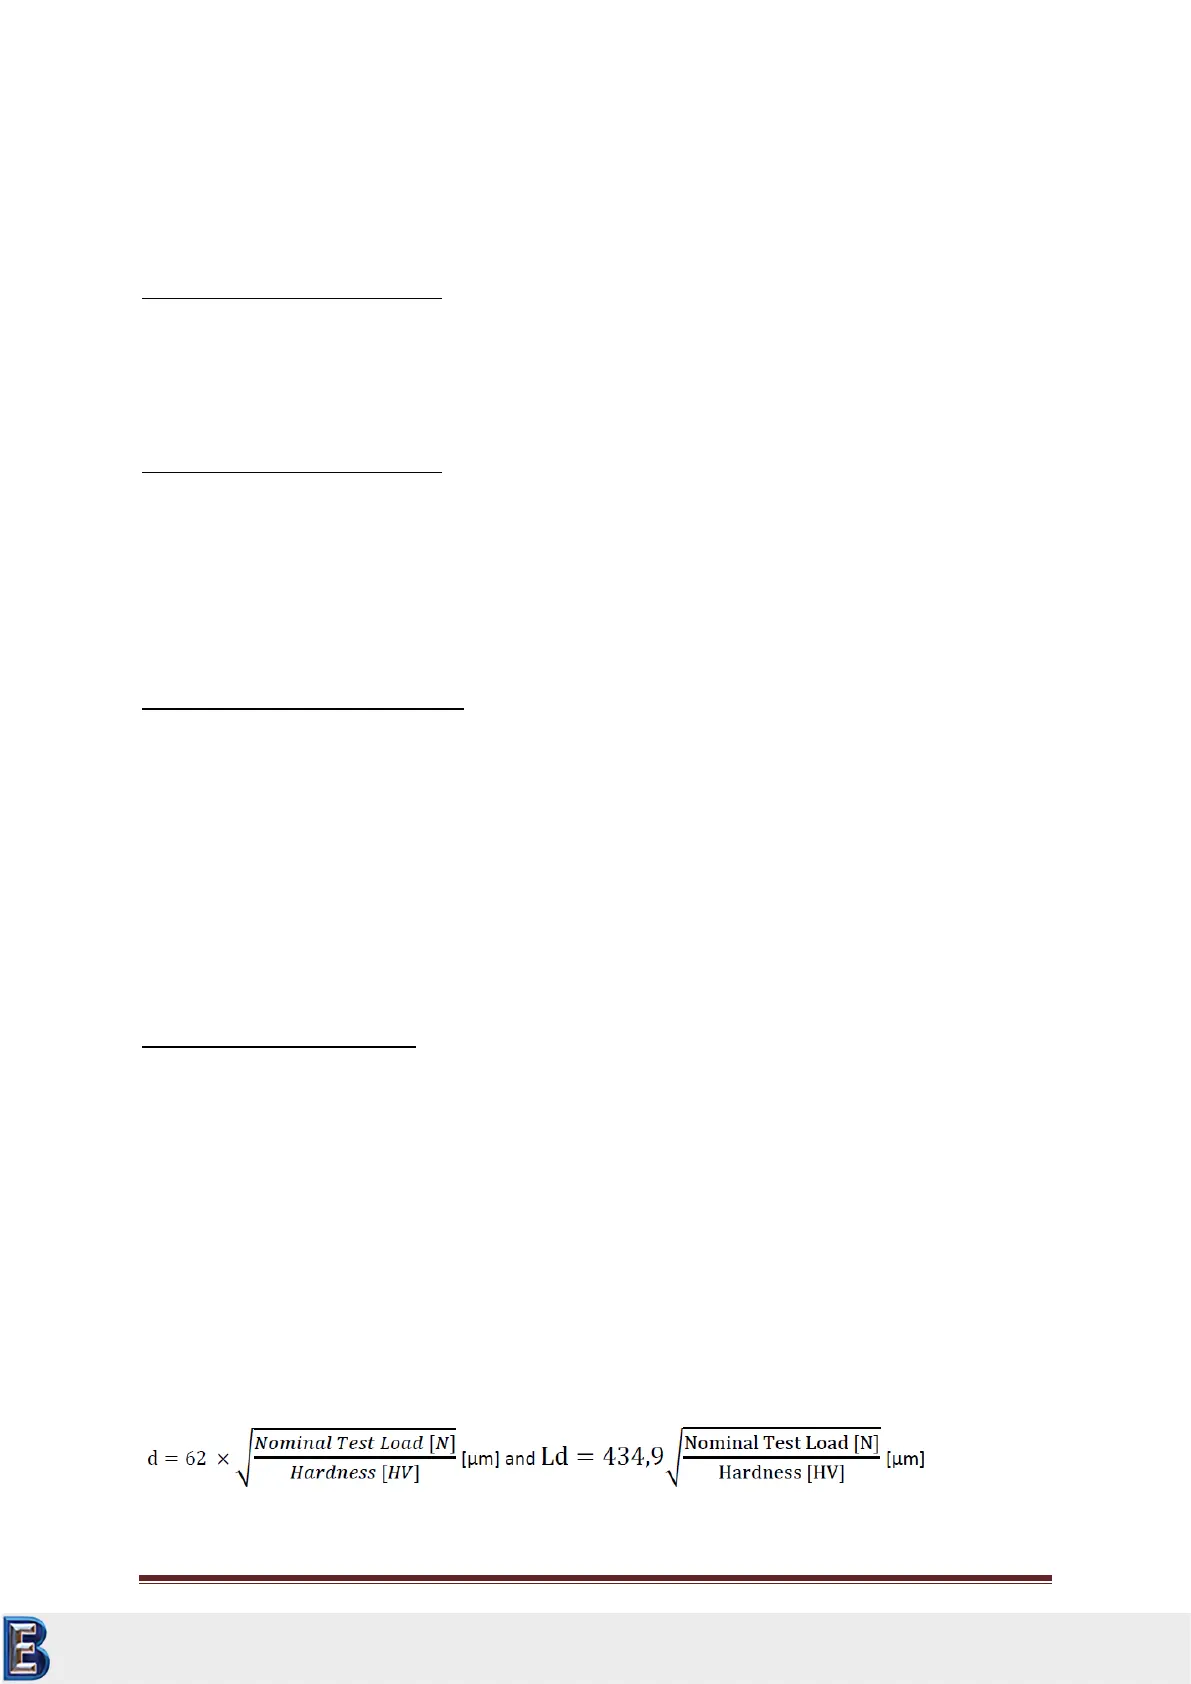
In this context, penetration depth (d) and average diagonal length (Ld) can be determined by
Equation 2-1
Your Complete Source for
Testing Equipment. Since 1969!
www.BergEng.com
Berg Engineering & Sales Company, Inc.
Tel 847-577-3980
info@bergeng.com
 Loading...