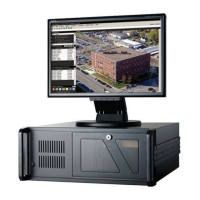
Software Installation
NCS Manual PN 51095:B1 3/08/02 17
4. An InstallShield Self-Extracting.exe dialog box will appear, select YES to continue installing
the NCS. InstallShield will start extracting the necessary files for installing the NCS.
5. A Welcome dialog box will appear. Select NEXT to continue installing or CANCEL to return
to the desktop.
6. A User Information dialog box will appear next. Type your name and company at the
designated prompts. Select NEXT to continue or CANCEL to return to the desktop. The
location of the installation directory will be displayed if it exists, and the user will be asked if
he/she would like to make a backup.
7. Next a Select Program Folder dialog box appears. The NCS must be installed in the
directory provided.
8. A Setup Type dialog box will now appear. Choose Typical, Compact or Custom setup by
clicking in the appropriate circle. Select NEXT to continue installing, BACK to view the
previous screen or CANCEL to return to the desktop.
• Typical Install - Installs the most common options, recommended for most users.
• Compact Install - Not available at this time.
• Custom Install - The user chooses the installed options, recommended for advanced users. The
Select Program Folder dialog box displays for this purpose.
9. Next a Start Copying Files dialog box appears showing the type of setup, target folder and
user information that was provided. Select NEXT to begin copying files, BACK to change any
settings or CANCEL to return to the desktop.
10. The NCS will now install the NCS. When setup is complete, a Setup Complete dialog box
appears informing you that the computer will be rebooted. Press OK to perform the reboot.
Caution: The NCS Communications Driver may have to be changed. If the NCS is installed on a
PC that did not contain the NRT (Network Reporting Terminal), it will use IRQ5 or IRQ7.
The NCS Installation Program sets the IRQ to IRQ5. On Onyx computers, or computers that already
use IRQ5, this must be changed to IRQ7. Please be sure the jumper selection on the NRT-NETPCB
card is set to IRQ7. In addition, please complete the following steps to configure the software:
1. Open a text editor, such as Notepad.
2. Open file ptp20020.ini. This file is located in the \notifier\ncs directory.
3. Look for IRQLevel = REG_DWORD 0x05. Change the 0x05 to 0x07.
4. Save the file, close Notepad.
5. Open the DOS command prompt, and change to the \notifier\ncs directory.
6. Type "regini ptp20020.ini"
7. This completes the software configuration. Reboot the computer for the change to take
effect.
To verify that the NCS Communications Driver is configured correctly, follow these steps in
Windows 2000.
1. From the Start Menu, open Control Panel, then double click on Administrative Tools.
2. Double click on Computer Management.
3. Navigate to System Information, then select Hardware Resources, followed by IRQs.
4. Verify that IRQ7 is displayed, and the Device indicates ptp20020.
1.4.2 Installed Printers
Two printers may be installed to the NCS: an NCS Graphics Printer (optional, any Microsoft Win-
dows compatible printer that is UL ITE listed and installed in the same room as the NCS) which is
used to print out graphics, reports, etc. and an NCS Line Printer (the PRN) which is used only to
print out text.
Note: The NCS Graphic Printer must be a laser printer.
Installing The Graphics Printer
1. Exit the NCS application.
!
www.PDF-Zoo.com