Graphic Floor Plans The Graphic Setup Program
NCS Manual PN 51095:B1 3/08/02 63
If a template group is defined, then pressing the short cut button will display a dialog box from
which a template can be chosen. If a template is not defined, then the first 40 items in the directory
will be displayed in a picture box. For example, if the Create Zones Button is pressed, and no
templates are defined, the first 40 icons found in the device directory will be displayed in a picture
box. However, if templates are defined, a selection of all zone templates will be shown. After a
template is chosen, only the icons associated with that template will be displayed. Select a toolbar
icon and a library of icons associated with that button will appear. Choose an icon by clicking on it
and dragging it to a location on the floor plan screen.
5.2 Graphic Floor Plans
Floor plans are bitmaps that are displayed on the main screen of the NCS. The bitmaps measure
780 x 538 pixels and are customized through Paint Shop Pro, a third party program that is packaged
with the NCS. All floor plan bitmaps must be stored in the directory \{install}\Floors. All images
saved with Paint Shop Pro must be saved in bitmap formats, not as the default .psp extension.
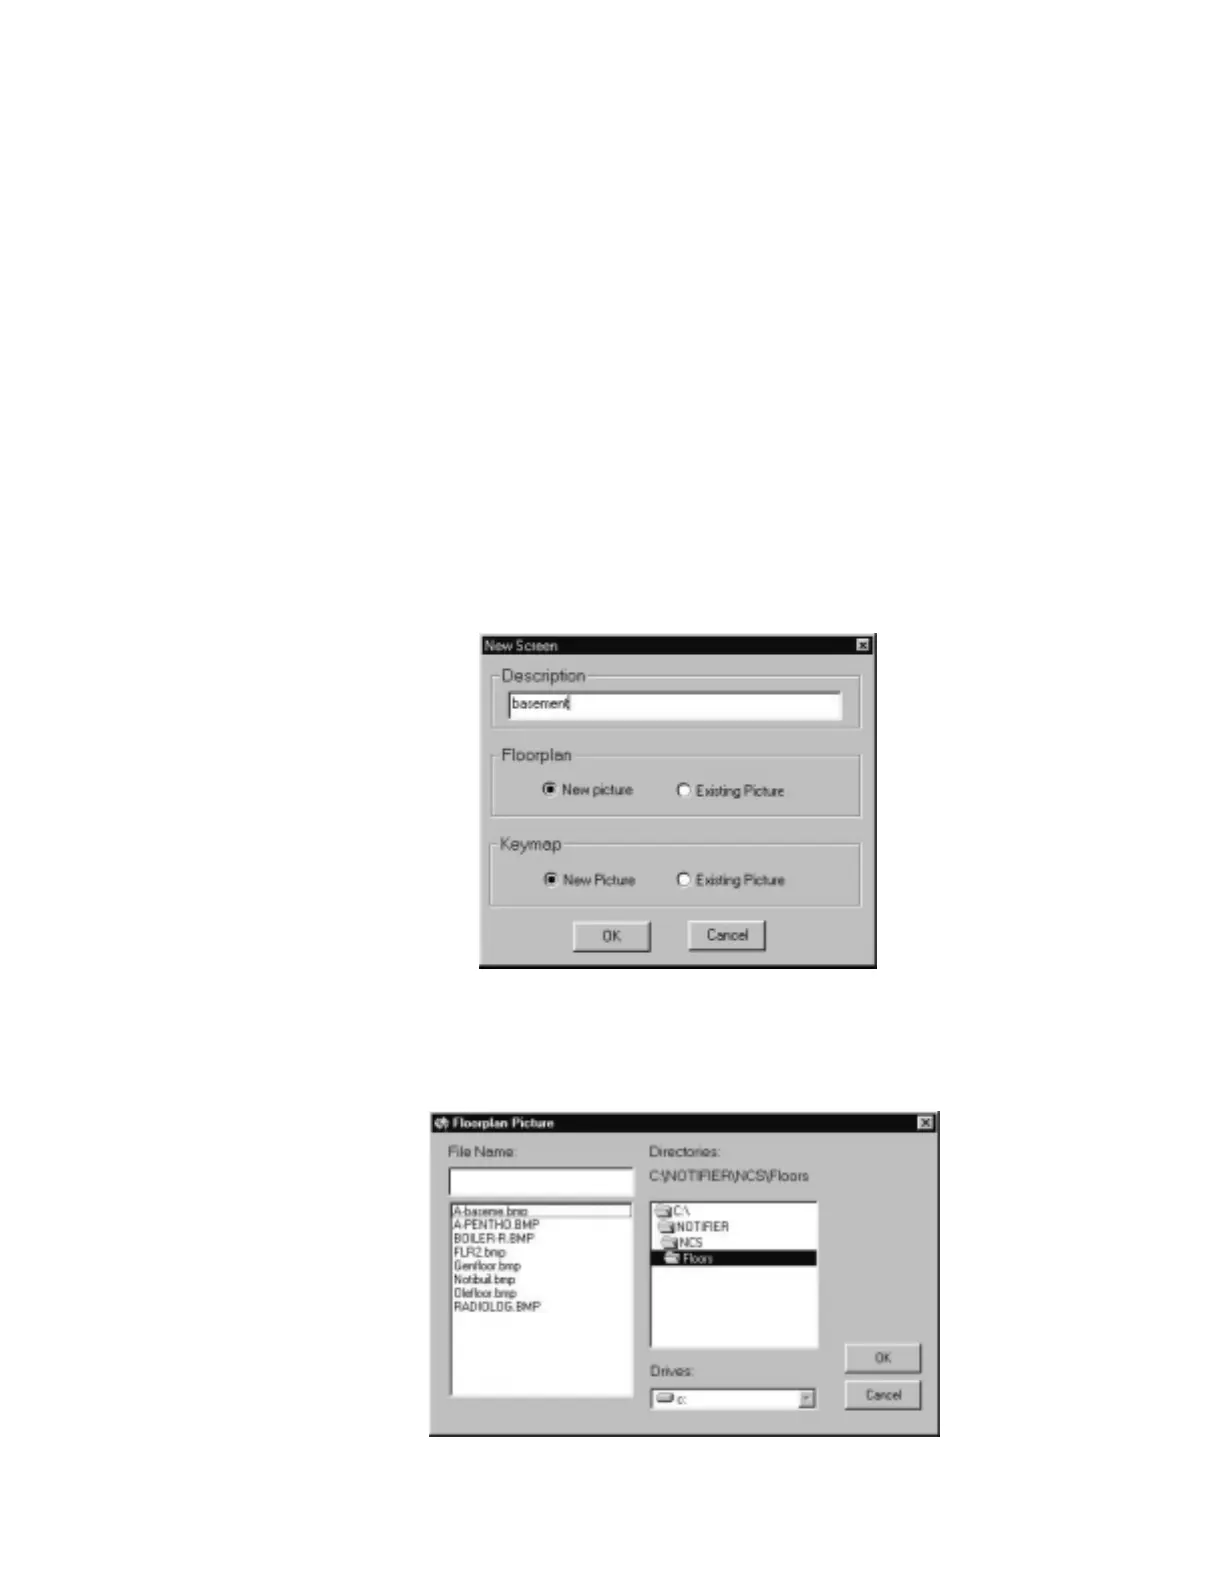
5.2.1 Adding Floor Plans to the NCS
A floor plan can be added to the NCS by selecting the Screens menu option, New Screens
command from the menu bar. A confirmation dialog box is then displayed. This dialog box allows
the user to select an existing floor plan and keymap, or create a new floor plan and key-map. In
both cases, a floor plan title must be selected. Refer to Figure 5.9.
Figure 5.9 “New Screen” Dialog Box
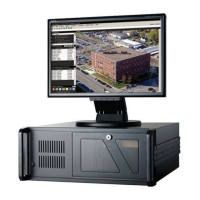
If an existing floor plan or keymap is to be added, a dialog box appears allowing the user to select a
floor plan, refer to Figure 5.10 for an example. Once the floor plan and keymap are selected, they
will be displayed in the Graphic Setup Program.
Figure 5.10 Existing Floor Plan Dialog Box (Example)
floorpl.jpg
floorpic.jpg
www.PDF-Zoo.com