Extended print jobs 119
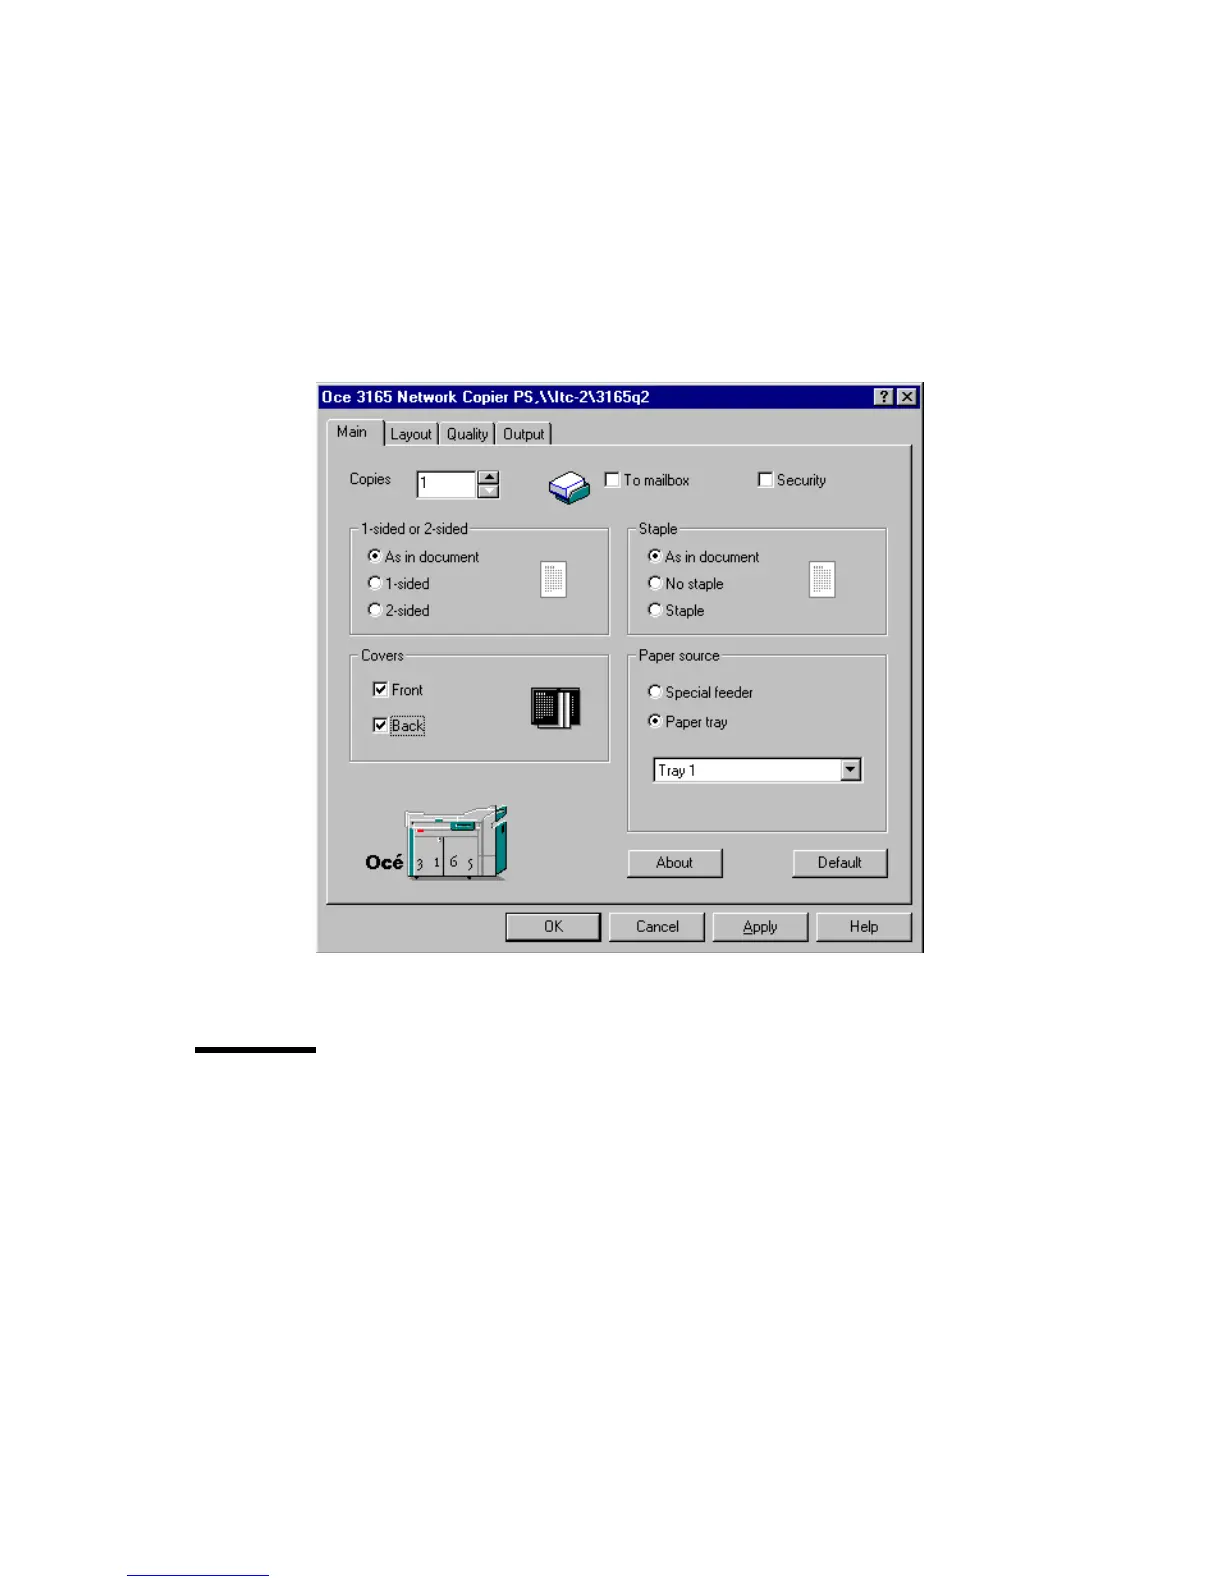
4 Select the paper tray from which the body of the print document is to be
printed.
Note: Do not select ‘Automatic’ as this setting does not allow you to select
covers.
5 Check ‘Front’ and/or ‘Back’ in the Covers box to define covers.
Note: You do not need to select a paper tray for covers.
6 Define other settings as required.
7 Click ‘OK’.
The document is now transferred to the Océ 3165 Network Copier.
[60] Printing a document with a front and a back cover
Defining the location and size of the binding edge
Reports are often bound or perforated. In some cases, the margin is not wide
enough so text gets lost when binding or perforating. You can prevent this by
widening the margin using the ‘Margin shift’ function.
Note: The margin can also be narrowed by entering a negative value. This can
be practical when space is limited at the right or at the bottom of the original.
Also, it can be defined whether the reader will leaf through the report by
turning the pages horizontally or vertically. In the latter case, pages are rotated