60
Chapter 3 • Operating the OS1p
Introduction
The OS1p is shipped with the battery connected. It is a good idea to give the battery a full
overnight charge before the first use.
Connect the three fiber optic light guide BNC ends to any of the BNC ports on the right
side panel of OS1p. Make sure that all three of the BNC connectors are locked in place.
The remote trigger switch (the 1/16" red wire on the fiber) connects to the jack labeled
“remote” on the right side panel. (see figure 2-3 Right Panel).
Introduction to running tests
As with any electronic measuring tool, it is important to turn on the tool before use and
let the electronic temperatures reach operating range. This takes about 15 to 20 minutes
for best results.
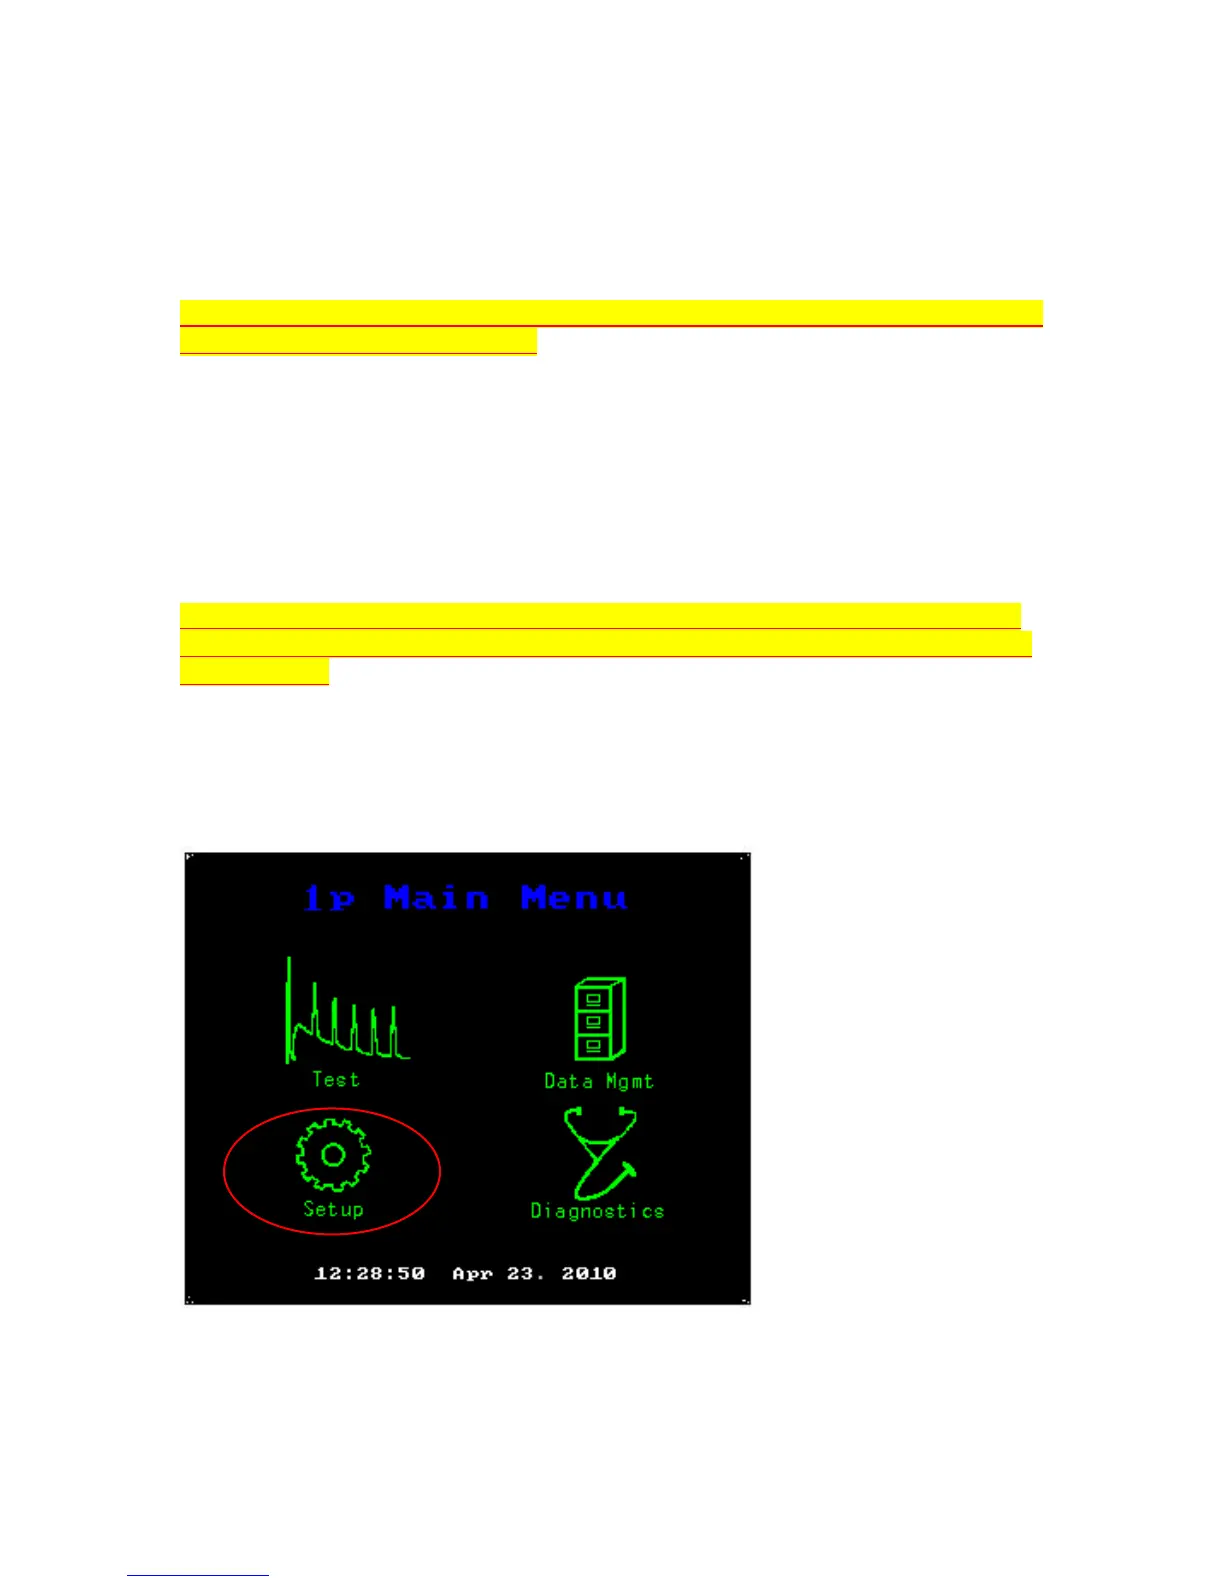
Press the red main power button on the front panel. At first a screen appears that shows a
graph and the OS1p name. Then the main menu screen shown below appears.
Main Menu
Press the touch screen over the “Setup” Menu button and a second screen seen below will
appear.