74
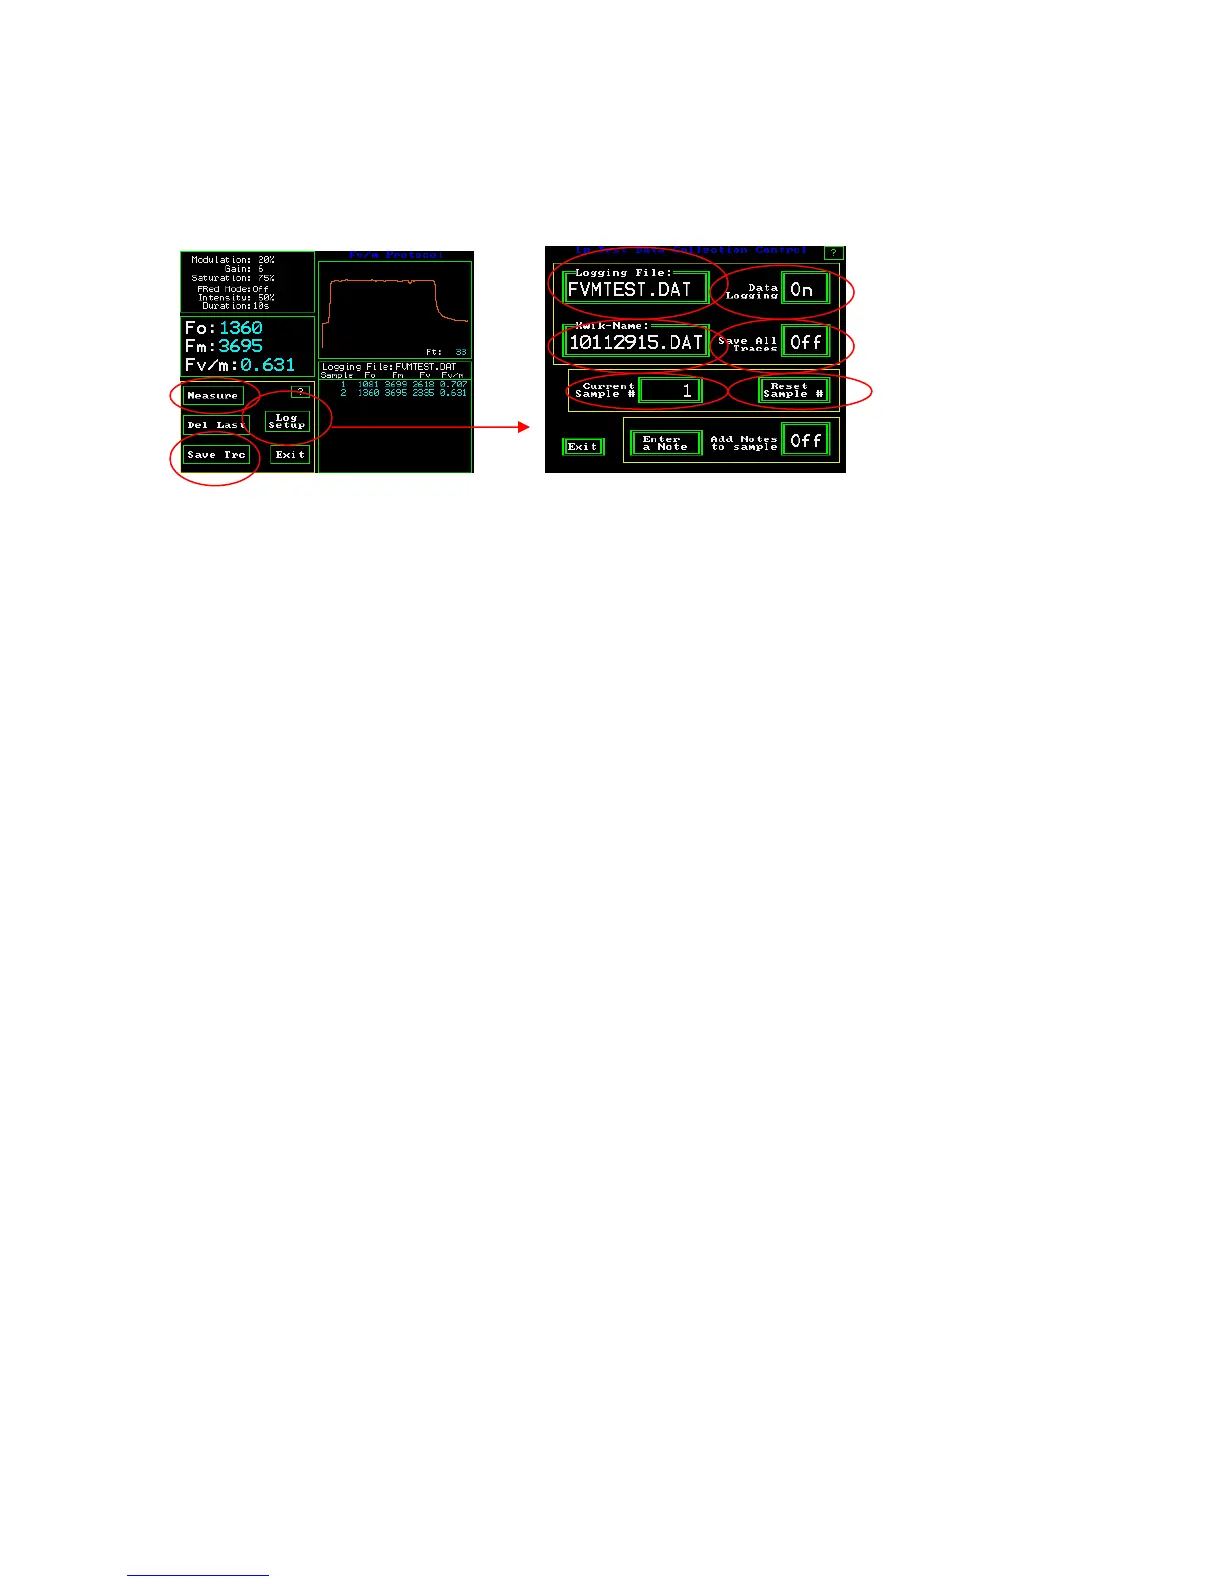
Other Fv/Fm function buttons
Fv/Fm Test Setup Screen 1p Test Data Selection Control Screen
Data logging retains all measured values when turned on.
Save All Traces for all up coming measurements. Turn “On” the “Save All Traces”
button and all future traces will be saved to the measuring file. Turn “Off” the “Save All
Traces” button and a single trace is only saved by pressing the “Save Trc” button from
the test screen after the measurement is made.
Kwik-Name – The “logging file name” is the file name. Kwik-Name allows one to
quickly create a new file name without typing in the characters. The Code represents the
year -10, the month -11, the date 29, and the hour – 15 (24 hour clock). This is especially
valuable for people making measurements in high volume that want to change the file
name for a second field or a sub set. The measuring parameters stay the same as the
existing file and the code allows easy and fast differentiation of different measured values
where appropriate. Press the “Kwik-Name” button and the Kwik name becomes the
“logging file name” moving forward.
Current Sample # – Press the “Current Sample #” button to change the measurement
number before you measure. The number that you enter will appear on the next
measurement. A key pad will appear. Enter the new number, and press “Ent”.
Reset Sample # - resets the sample number to 1 for the next measurement.
Save Trc – Saves the trace displayed on the measurement screen, or the last trace.
Del Last – Deletes the last measurement.
Measure – measurements can be made by pressing the measuring button on the Fv/Fm
measuring screen, the red button at the tip of the fiber optic cable, or the black button on
the bottom of the PAR Clip.