MECH-55
<A/C Head Adjustment>
1. After changing the A/C Head, please perform the
following steps.
NOTE:
PG Shifter and CUE AUDIO adjustment procedures
are mentioned on Electrical Adjustment
Procedures on Service Manual.
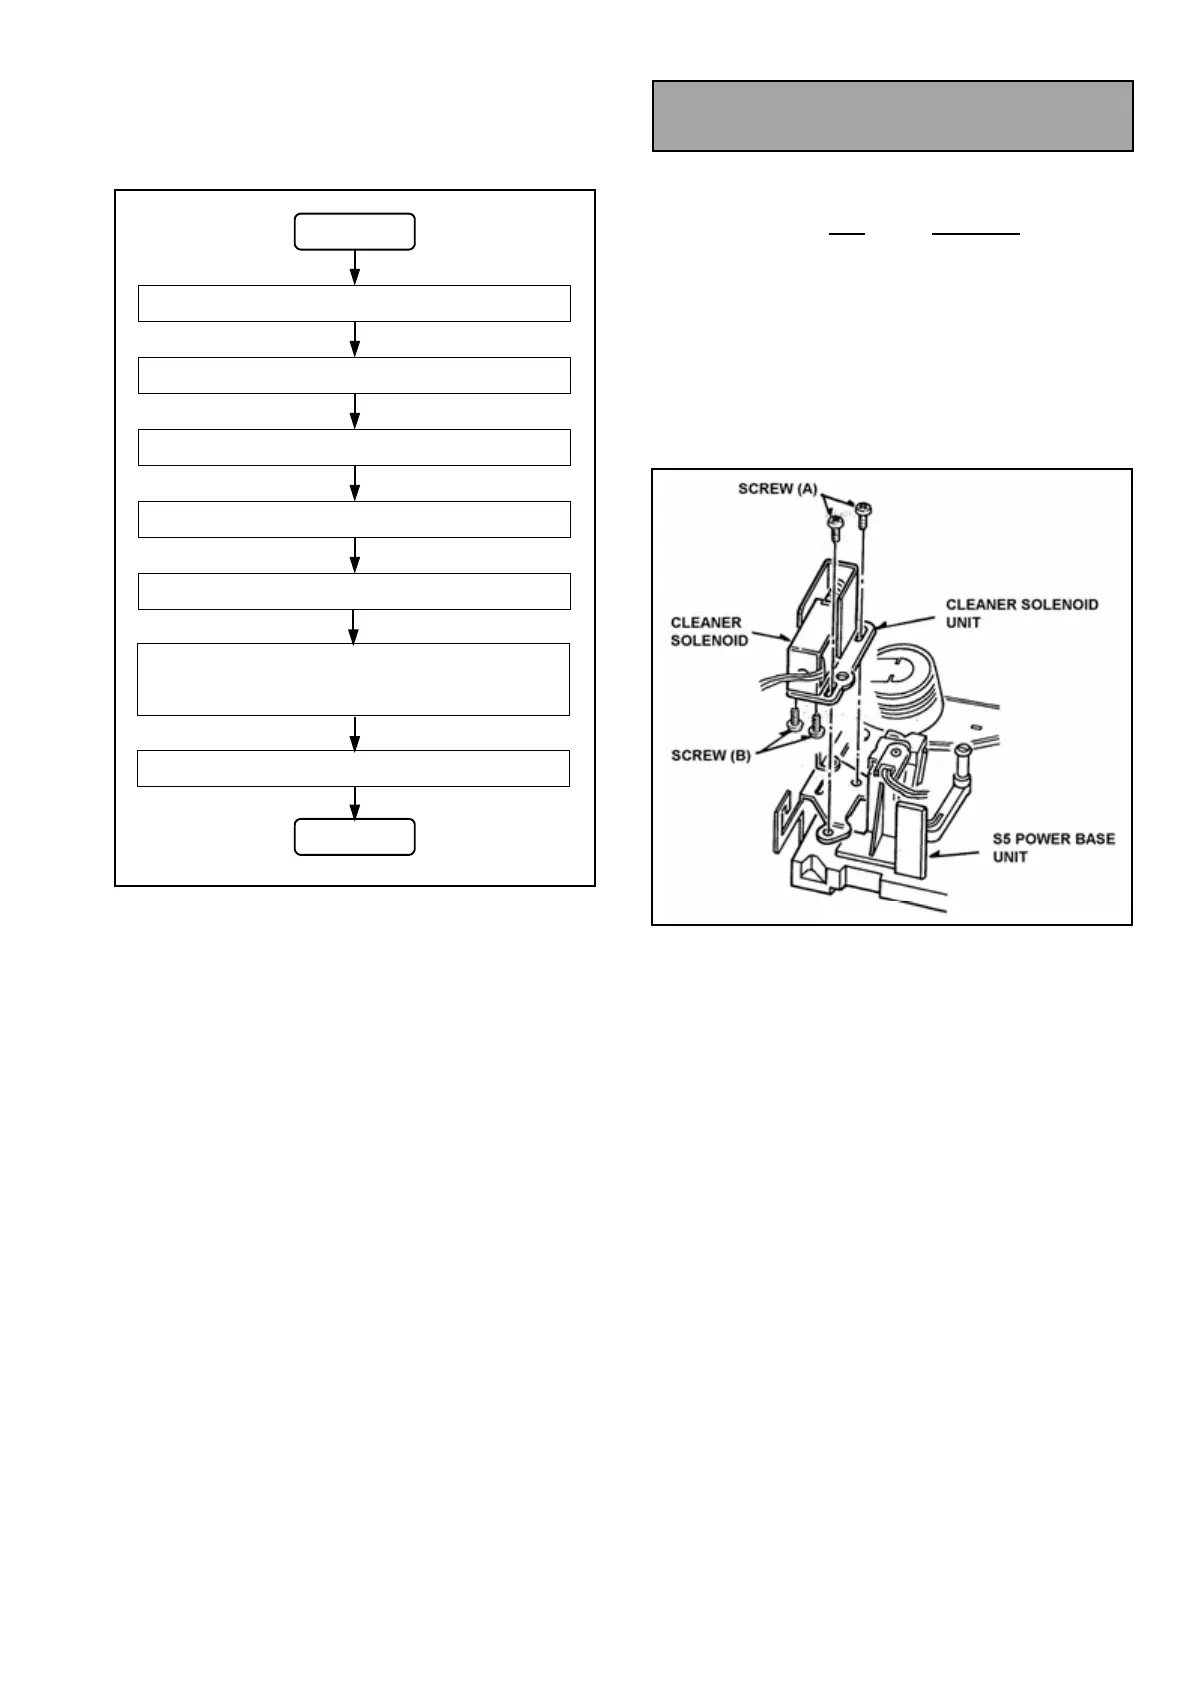
5-22. Cleaner Solenoid
Replacement & Adjustment
(Removal)
1. Disconnect the P48
on the MECH I/F.
2. Unscrew the 2 screws (A) and remove the
Cleaner Solenoid Unit as shown in Figure 5-22-1.
3. Unscrew the 2 screws (B) and remove the
Cleaner Solenoid as shown in Figure 5-22-1.
(Installation)
1. Install the new Cleaner Solenoid following the
removal steps in reverse order.
2. After installation, perform the Cleaner Solenoid
Position adjustment.
Figure 5-22-1
START
3-14. A/C Head Tilt Adjustment
NOTE: PG Shifter Adjustment
3-18. A/C Head Azimuth & X-value Adjustment
3-15. A/C Head Height Adjustment
END
3-29. to 3-38. LISTA Adjustment
NOTE: CUE AUDIO Adjustment
3-39. Self Rec/Play Envelope
Waveform Confirmation