MECH-14
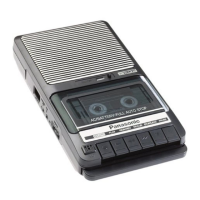
3-16. A/C Head Tilt Confirmation
SPEC
A/Amax ≥ 0.8
TEST
POINT
CUE AUDIO : TP4102 (RF/CUE)
ADJ.
SCREW A, G (A/C Head)
MODE
PLAY
TAPE
NTSC : VFM3580KM or VFM3580KL
(14 to 22min)
PAL : VFM3680KM or VFM3680KL
(14 to 22min)
TOOL
VFK1178A, VFK1148A (Hex Driver)
1. Playback the Alignment tape.
2. Confirm that the screw (G) and (H) are not loose.
3. Push the tension post to the arrow (B) direction as
shown in following figure without moving T2 post.
And confirm that the CUE output level is within the
specification.
4. If it is out of specification, loosen the screw (G)
and adjust the screw (A) (refer to item “3-14 A/C
Head tilt Adjustment”.)
5. If the adjustment is performed, confirm the tape
path condition according to Post Limit
Confirmation procedure (item 3-12).
Figure 3-16-1
Figure 3-16-2
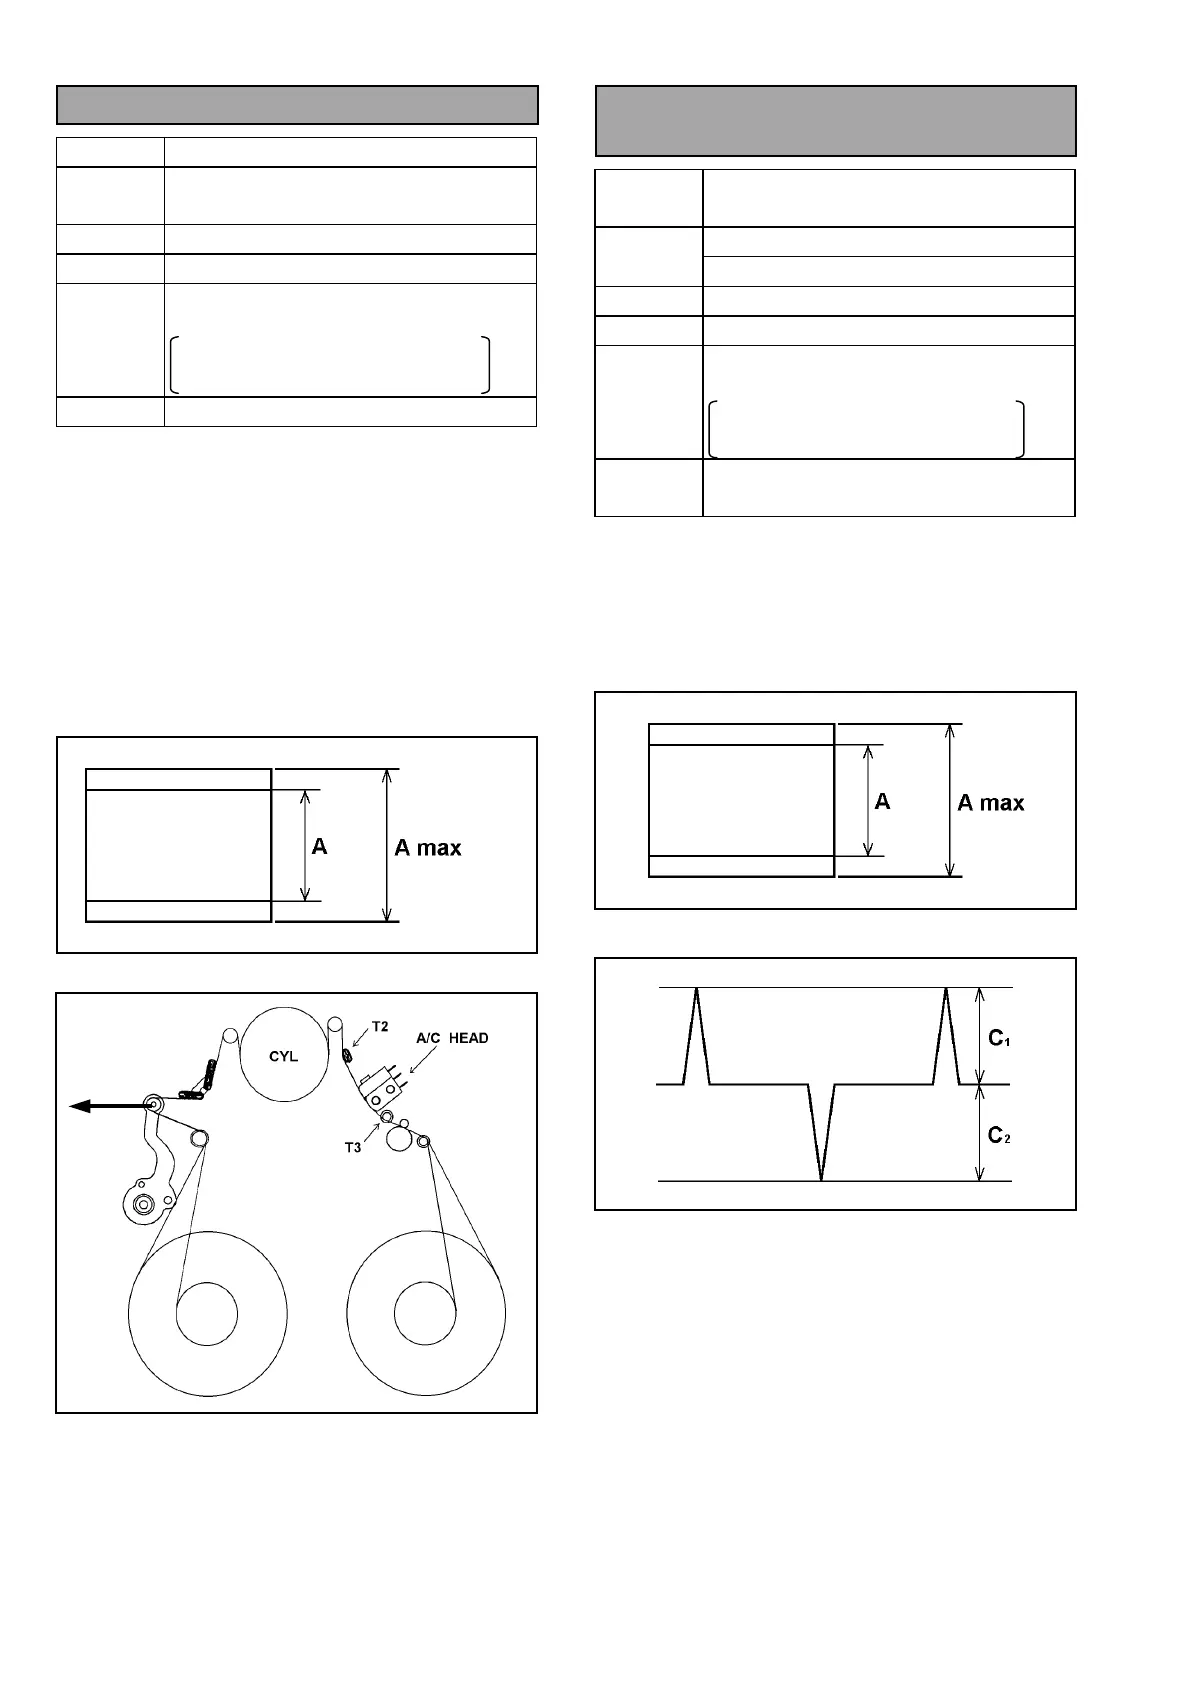
3-17. A/C Head Height
Confirmation
SPEC
CUE : A=A max
CTL : C1, C2 ≥ 1.8V
CUE AUDIO : TP4102 (RF/CUE)
TEST
POINT
CTL : TP30 (SERVO)
ADJ.
SCREW B, H (A/C Head)
MODE
25M mode PLAY
TAPE
NTSC : VFM3580KM or VFM3580KL
(14 to 22min)
PAL : VFM3680KM or VFM3680KL
(14 to 22min)
TOOL
VFK1150A (Nut Driver)
VFK1190 (Hex Wrench)
1. Press and Lift up A/C Head lightly (refer to figure
3-13-4) then confirm that the CTL and CUE output
level is within the specification.
2. If it is out of spec., loosen the screw (H) and adjust
the screw (B) until Cue output is maximized. (refer
to item “3-15 A/C Head Height Adjustment”.)
Figure 3-17-1
Figure 3-17-2
(Increase
tension)
B